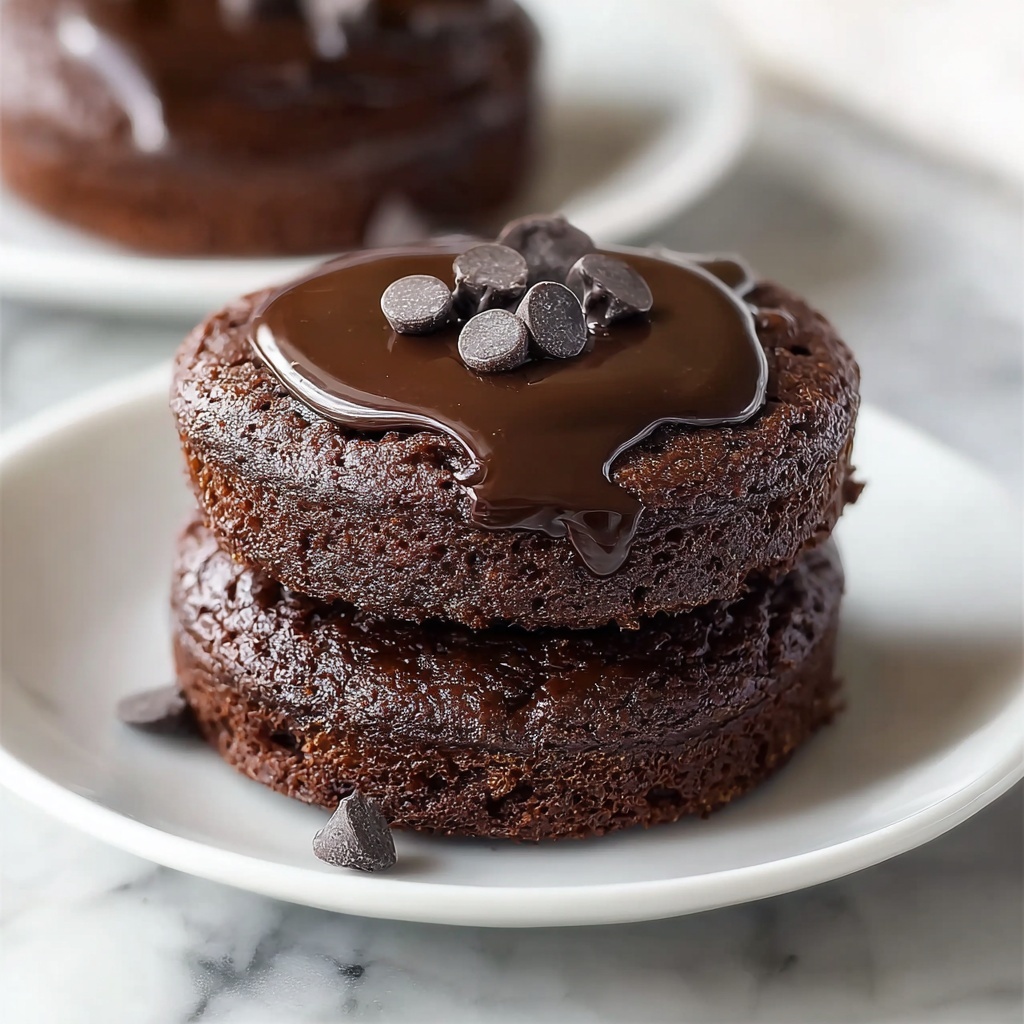
If you have a serious sweet tooth and love chocolate in any form, you are going to adore this Mini Chocolate Fudge Cakes Recipe. These little cakes pack all the rich, gooey, and fudgy goodness of a classic chocolate dessert into a perfectly sized treat that’s ideal for any occasion. They come out with a tender outer crust and a soft, almost molten center that feels effortlessly indulgent. Whether you’re looking to impress guests or just want a comforting pick-me-up, these mini cakes are an absolute showstopper that also happens to be quick and straightforward to make.
Ingredients You’ll Need
Gathering your ingredients for this Mini Chocolate Fudge Cakes Recipe is a breeze because each one plays a crucial role in delivering incredible texture and flavor. Every element, from the semi-sweet chocolate chips to the optional espresso powder, contributes to making these cakes rich, decadent, and unforgettable.
- Semi-sweet chocolate chips (½ cup / 85g): The star ingredient that provides that luscious, deep chocolate base.
- Salted butter (4 tablespoons / 56g): Adds richness and helps achieve a smooth, silky batter.
- Large eggs (2): Whipped to aerate, they give the cakes lift and a fluffy yet fudgy texture.
- All-purpose flour (¼ cup / 30g): Just enough to give the cakes structure without making them cakey.
- Espresso powder (½ teaspoon, optional): Intensifies the chocolate flavor without overpowering it.
- Vanilla extract (½ teaspoon): Adds subtle warmth and a nuanced depth to the chocolate profile.
- Powdered sugar: For that perfect dusting that adds elegance and a hint of sweetness at the end.
- Fresh berries: A natural and vibrant topping that balances the rich fudge with light tartness.
- Whipped cream: Offers a creamy, airy contrast to the dense cake.
- Ice cream: A classic pairing that melts beautifully into the warm mini cakes.
How to Make Mini Chocolate Fudge Cakes Recipe
Step 1: Prepare Your Tartlet Pans
Start by preheating your toaster oven to 400°F (200°C) – this sets the stage for perfectly baked mini cakes. Line the bottoms of four tartlet pans with parchment paper to ensure easy removal later, and lightly spray the sides with non-stick baking spray. Placing the pans on a half-sheet or quarter-sheet pan will make handling safer and simpler.
Step 2: Melt the Chocolate and Butter
Combine the semi-sweet chocolate chips and salted butter in a microwave-safe bowl. Heat them in short 20-second bursts, stirring in between, until the mixture is silky smooth and glossy. This gentle melting process prevents the chocolate from scorching and keeps the texture velvety.
Step 3: Whisk the Eggs
In a separate bowl, beat the eggs on medium-low speed until they become frothy. Increase the speed to high and keep going until the eggs triple in volume and look light and fluffy. This step is crucial because it lends air to the batter, ensuring your mini cakes have the ideal balance of tender crumb and rich fudge.
Step 4: Combine Ingredients
Stir in the all-purpose flour and espresso powder, if you’re using it, directly into the melted chocolate and butter mixture. Next, gently fold this chocolate mixture into the whipped eggs, taking care to maintain as much airiness as possible. The goal is a beautifully blended batter that’s smooth and ready to bake.
Step 5: Bake the Cakes
Distribute the batter evenly among the prepared tartlet pans, then slide them into your preheated toaster oven. Bake for about 15 minutes, just long enough for the tops to set while keeping the centers irresistibly soft and fudgy. Let the cakes rest in their pans for 30 minutes after baking to allow them to finish setting and cool down gently.
Step 6: Serve and Enjoy
Once cooled, carefully remove the cakes from their pans and get ready to wow your taste buds. These mini chocolate fudge cakes are best served with a dusting of powdered sugar and a handful of fresh berries or a generous dollop of whipped cream. For extra extravagance, add a scoop of your favorite ice cream for a delightful warm-cold sensation.
How to Serve Mini Chocolate Fudge Cakes Recipe
Garnishes
Simple garnishes can elevate these mini cakes from delicious to unforgettable. Dusting the tops with powdered sugar gives them a delicate, snowy appearance. Fresh berries such as raspberries, strawberries, or blueberries add bright color and a refreshing tartness that complements the deep chocolate. Whipped cream introduces a light, creamy texture that balances the intensity of the fudge, making each bite pure bliss.
Side Dishes
While the mini cakes hold their own as a sweet treat, pairing them with sides like a fresh fruit salad or a scoop of vanilla or salted caramel ice cream can round out the dessert. The coolness and softness of ice cream contrast superbly with the rich fudge cake, making every bite a harmonious delight. For a slightly more grown-up experience, consider serving with a light espresso or a glass of dessert wine to highlight the chocolate’s complex notes.
Creative Ways to Present
Presentation is half the fun with this Mini Chocolate Fudge Cakes Recipe! Serve each mini cake in elegant tartlet pans for a boutique patisserie feel, or place them on small dessert plates with artistic drizzles of chocolate or caramel sauce. Surrounding each cake with edible flowers or mint leaves adds a fresh, vibrant touch. For casual gatherings, individual glass jars or ramekins layered with cream and berries can turn these cakes into adorable parfait-style desserts.
Make Ahead and Storage
Storing Leftovers
If you have any leftovers, store the mini cakes in an airtight container at room temperature for up to two days. Keeping them sealed prevents the cakes from drying out, preserving their fudgy texture and rich flavor. If your kitchen is warm, refrigeration might be necessary, but be sure to bring the cakes to room temperature before serving for the best taste experience.
Freezing
These mini chocolate fudge cakes freeze beautifully. Place them on a baking sheet to freeze individually until firm, then transfer them to a sealed freezer-safe container or bag. They can be stored in the freezer for up to a month. When you’re ready to indulge, thaw the cakes in the refrigerator overnight or at room temperature for a few hours before warming gently.
Reheating
Warm your mini cakes slightly before serving to revive their soft, gooey centers. Pop them in a toaster oven or microwave for 15-20 seconds, just enough to take the chill off without warming them too much. This quick reheat will bring back that irresistible fudgy texture and make them taste freshly baked all over again.
FAQs
Can I make this Mini Chocolate Fudge Cakes Recipe without espresso powder?
Absolutely! The espresso powder is optional and primarily used to enhance the chocolate flavor. If you choose to omit it, your mini cakes will still be deeply chocolatey and delightful, just with a slightly different flavor profile.
What if I don’t have tartlet pans? Can I use something else?
If tartlet pans aren’t on hand, small ramekins or even muffin tins lined with parchment paper work great. Just keep an eye on the baking time, as the size and shape might affect how quickly they cook.
How do I know when the mini cakes are done baking?
The tops should be set and firm to the touch while the centers remain soft and fudgy underneath. Avoid overbaking to keep that perfect molten texture inside, which is the hallmark of this recipe.
Can I use dark chocolate instead of semi-sweet chocolate chips?
Certainly! Dark chocolate chips can be used if you prefer a more intense chocolate flavor. Just be mindful that it may make the cakes slightly less sweet, so you might want to balance with a little extra powdered sugar on top.
How long can I keep the mini cakes in the refrigerator?
When refrigerated in an airtight container, the mini cakes stay fresh for up to 3 days. Always allow them to come back to room temperature or lightly warm before serving for the best texture and taste.
Final Thoughts
Sharing this Mini Chocolate Fudge Cakes Recipe feels like handing over a little bundle of happiness that can transform any day into a celebration. They are simple yet sophisticated, quick to whip up yet impressive enough to serve for special moments. You really can’t go wrong with these, so don’t wait another minute—bake a batch, gather your favorite toppings, and treat yourself and your loved ones to chocolate heaven in miniature form.
Print
Mini Chocolate Fudge Cakes Recipe
- Prep Time: 15 minutes
- Cook Time: 15 minutes
- Total Time: 30 minutes
- Yield: 4 mini cakes
- Category: Dessert
- Method: Baking
- Cuisine: American
Description
These Mini Chocolate Fudge Cakes are rich, decadent, and perfectly sized for individual servings. With a fudgy center and a slightly firm top, they make an ideal dessert for any occasion. Enhanced with optional espresso powder to deepen the chocolate flavor, these cakes bake quickly in a toaster oven and can be dressed up with powdered sugar, fresh berries, whipped cream, or ice cream for an indulgent treat.
Ingredients
Chocolate Mixture
- ½ cup (85g) semi-sweet chocolate chips
- 4 tablespoons (56g) salted butter
Batter
- 2 large eggs
- ¼ cup (30g) all-purpose flour
- ½ teaspoon espresso powder (optional, enhances chocolate flavor)
- ½ teaspoon vanilla extract
Toppings (Optional)
- Powdered sugar
- Fresh berries
- Whipped cream
- Ice cream
Instructions
- Prepare the Tartlet Pans: Preheat your toaster oven to 400°F (200°C) to ensure it reaches the correct temperature for baking.
- Line the Pans: Line the bottoms of four individual tartlet pans with parchment paper and lightly spray the sides with non-stick baking spray to prevent sticking.
- Arrange Pans for Baking: Place the tartlet pans on a quarter sheet pan or any tray that fits in your toaster oven for easy handling.
- Melt the Chocolate and Butter: In a microwave-safe bowl, combine the semi-sweet chocolate chips and salted butter.
- Microwave in Intervals: Heat the chocolate and butter mixture in 20-second intervals, stirring well between each, until fully melted and smooth, about 2 minutes total.
- Cool the Mixture: Set aside the melted chocolate and butter to cool slightly before proceeding to the next step.
- Whisk the Eggs: In a separate bowl, beat the eggs on medium-low speed until frothy.
- Increase Egg Volume: Raise the mixer speed to high and continue whisking until the eggs become light, fluffy, and roughly triple in volume, which adds air to the batter.
- Incorporate Dry Ingredients: Stir the all-purpose flour and optional espresso powder into the melted chocolate mixture until well combined.
- Combine with Eggs: Gently fold the chocolate mixture into the whipped eggs, taking care to maintain the airiness of the eggs for a light texture.
- Fill the Tartlet Pans: Evenly divide the batter among the prepared tartlet pans, smoothing the tops slightly.
- Bake the Cakes: Bake in the preheated toaster oven for 15 minutes, or until the tops are set and firm but the centers remain soft and fudgy.
- Cool the Cakes: Let the cakes cool in the pans for 30 minutes to set completely before removing them carefully to avoid breaking.
- Serve and Garnish: Dust with powdered sugar and optionally top with fresh berries, whipped cream, or a scoop of ice cream for an extra indulgent dessert experience.
Notes
- Using espresso powder is optional but highly recommended as it intensifies the chocolate flavor without adding a strong coffee taste.
- Be careful not to overbake; the center should remain fudgy for the perfect texture.
- Allow cakes to cool completely in the pans before removing to maintain their structure.
- Parchment paper helps in easy removal and ensures the cakes do not stick to the pans.
- These mini cakes are best served fresh but can be refrigerated and gently warmed before serving.


