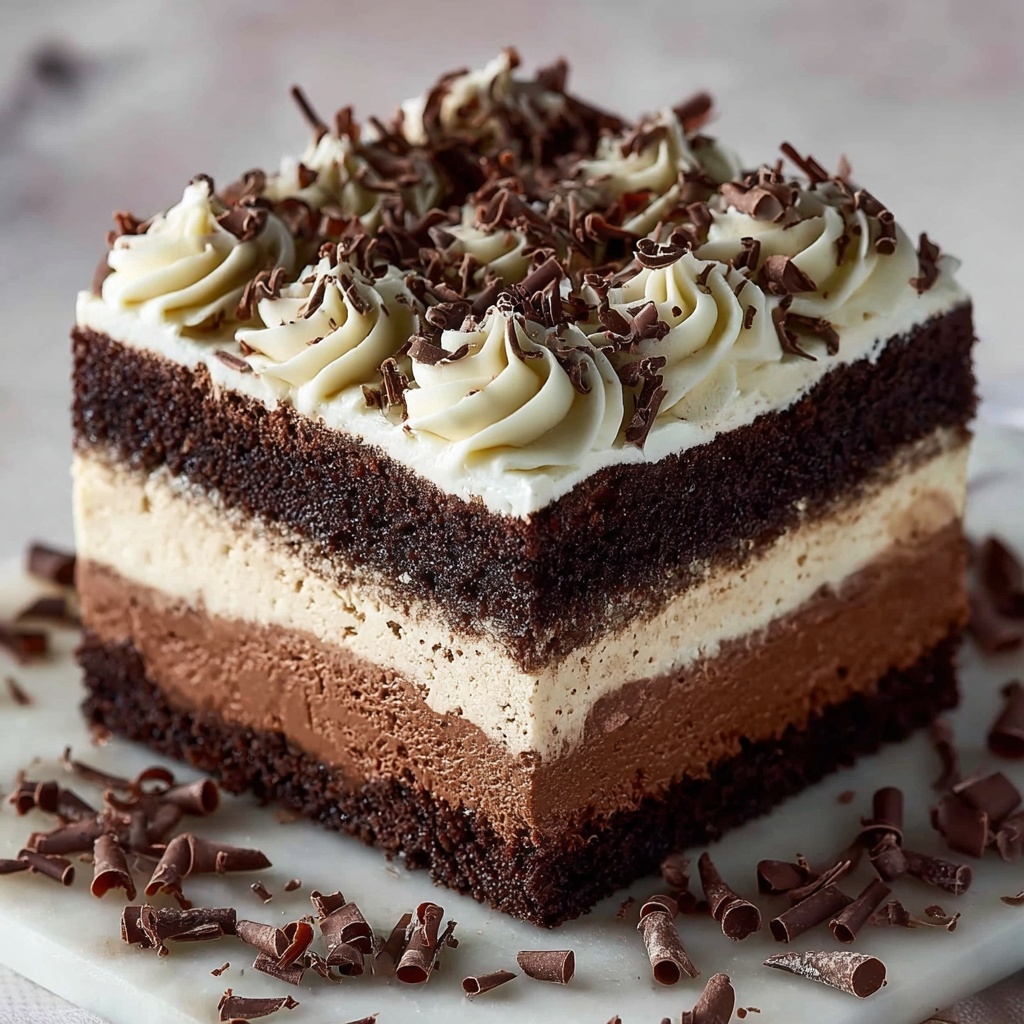
If you’re looking for a dessert that combines rich chocolatey goodness with a creamy, luscious texture that’s perfect for any occasion, this Brownie Refrigerator Cake Recipe is an absolute winner. Imagine a fudgy brownie base topped with a dreamy cream cheese layer, silky chocolate pudding, and fluffy whipped topping—all chilled to perfection. This no-fuss dessert not only tastes incredible but also gives you the freedom to prepare it ahead of time, making it a stellar choice for gatherings or last-minute sweet cravings.
Ingredients You’ll Need
The magic behind this Brownie Refrigerator Cake Recipe lies in how simple, everyday ingredients come together to create layers of flavor and texture. Each component brings something special—from the dense brownie base to the airy whipped topping, every element plays a crucial role in making this dessert unforgettable.
- 1 box brownie mix (plus eggs, oil, water): Your fudgy foundation that’s easy and reliable.
- 8 oz cream cheese, softened: Adds a tangy richness that balances the sweetness.
- ½ cup powdered sugar: Sweetens the cream cheese layer perfectly without grittiness.
- 1 tsp vanilla extract: Enhances the overall flavor with warm aromatic notes.
- 4 oz whipped topping (half of an 8 oz tub), thawed: Makes the cream cheese layer light and fluffy.
- 1 box (3.9 oz) instant chocolate pudding mix: Creates a rich, smooth chocolate filling.
- 2 cups cold milk: Essential to thicken the pudding with the right consistency.
- 4 oz remaining whipped topping, thawed: The crowning layer that brings an inviting creaminess.
- Chocolate curls or shavings for garnish: Adds a beautiful, elegant finishing touch.
How to Make Brownie Refrigerator Cake Recipe
Step 1: Bake the Brownie Base
Start by preheating your oven according to the brownie mix instructions—this sets you up for success right from the start. Prepare the brownie batter as directed on the package, ensuring the mix is smooth and well combined. Pour the batter into a greased 9×13-inch baking dish, which creates the perfect sturdy base that will hold up the layers above. Bake until the brownies are set but still moist, then allow them to cool completely. Cooling prevents the cream cheese layer from melting when added later.
Step 2: Prepare the Creamy Layer
Once the brownie base has cooled, it’s time to create that irresistible creamy layer. Beat the softened cream cheese, powdered sugar, and vanilla extract together until the mixture is light and fluffy—this will add a dreamy texture and subtle sweetness. Then, gently fold in half of the whipped topping until fully incorporated, making this layer airy and smooth. Spread the mixture evenly over your cooled brownies to form a luscious blanket of creaminess.
Step 3: Make the Chocolate Filling
In a separate bowl, combine the instant chocolate pudding mix with cold milk. Whisk the mixture steadily until it thickens, usually within a couple of minutes. Letting it sit for 2 to 3 minutes helps it set perfectly. After that, spread this rich chocolate pudding layer over the cream cheese crust with a smooth, even hand—this luscious middle layer will bring incredible chocolate intensity.
Step 4: Add the Final Layer and Chill
Spread the remaining whipped topping gently over the chocolate pudding layer for a light and fluffy finish. Scatter chocolate curls or shavings on top for an attractive and delicious garnish. Cover the dish with plastic wrap and refrigerate for at least 4 hours, or better yet, overnight. This chilling step allows all the layers to meld together beautifully and makes slicing easier for serving.
How to Serve Brownie Refrigerator Cake Recipe
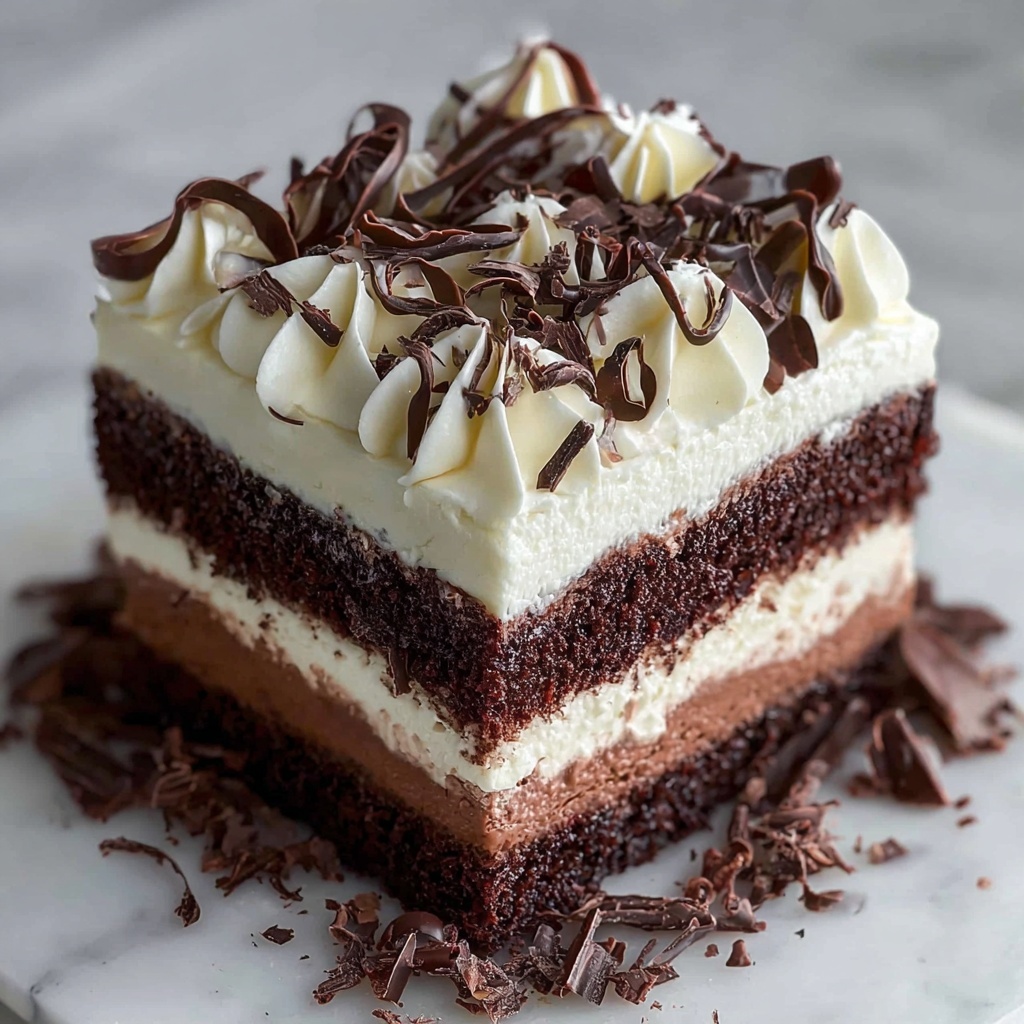
Garnishes
Chocolate curls or shavings are the classic choice to garnish your Brownie Refrigerator Cake Recipe, providing a striking visual appeal and an extra bit of chocolate crunch. For some extra flair, try adding fresh berries or a dusting of cocoa powder. These small touches can elevate how stunning your dessert looks without taking away from the simplicity that makes this cake so popular.
Side Dishes
This rich and creamy cake pairs wonderfully with fresh fruit to lighten the palate—think raspberries, strawberries, or even a simple fruit salad. For coffee lovers, a cup of strong black coffee or a velvety latte complements the chocolate layers perfectly. A scoop of vanilla ice cream can also add a delightful contrast that’s irresistible.
Creative Ways to Present
If you want to wow your guests, consider serving the Brownie Refrigerator Cake Recipe in individual clear dessert cups to show off the beautiful layers. You can also cut it into fun shapes using cookie cutters after chilling, making it festive for parties. Another idea is to add a drizzle of caramel or chocolate sauce on top before serving to enhance the indulgence factor.
Make Ahead and Storage
Storing Leftovers
Since this dessert is kept chilled, store any leftovers in an airtight container in the refrigerator. It will keep its texture and flavor for up to 4 days, making it a perfect treat to enjoy spontaneously or as a make-ahead dessert for gatherings.
Freezing
If you want to save your Brownie Refrigerator Cake Recipe for even longer, you can freeze it wrapped tightly in plastic wrap and placed in an airtight container. Keep in the freezer for up to 1 month. When ready to eat, thaw overnight in the refrigerator to keep all the dreamy layers intact.
Reheating
This cake is best served chilled, so reheating isn’t recommended as it will alter the creamy texture and whipped topping. Instead, enjoy it straight from the fridge for the best flavor and consistency every time.
FAQs
Can I use homemade brownies instead of a boxed mix?
Absolutely! If you prefer, you can bake your own brownies from scratch. Just make sure they are fully cooled and have a sturdy texture to support the creamy layers for the best results.
Is this dessert suitable for making ahead of time?
Yes, one of the best things about the Brownie Refrigerator Cake Recipe is that it benefits from chilling overnight. This gives the flavors time to meld and makes slicing and serving so much easier.
Can I substitute the whipped topping with whipped cream?
You can use homemade whipped cream instead of store-bought whipped topping, but keep in mind that whipped cream is softer and may not hold its shape as well once layered. To keep it stable, you might want to add a bit of gelatin.
How do I ensure the pudding layer sets properly?
Use cold milk straight from the fridge and whisk the instant pudding mix thoroughly. Let the pudding sit for at least 2-3 minutes after whisking to allow it to thicken fully before spreading it over the cream cheese layer.
Can I make this recipe gluten-free?
To make a gluten-free version, opt for a gluten-free brownie mix and double-check that your pudding and whipped topping ingredients are also gluten-free. This way, everyone can enjoy this indulgent treat.
Final Thoughts
This Brownie Refrigerator Cake Recipe is one of those desserts you’ll find yourself returning to again and again—whether you’re hosting a party, need a quick dessert fix, or want to impress without hours of baking. Its simple ingredients, effortless layers, and cool, creamy finish make it a true crowd-pleaser that feels decadent but is surprisingly easy. Dive in and treat yourself to a slice of pure chocolatey heaven!
Print
Brownie Refrigerator Cake Recipe
- Prep Time: 20 minutes
- Cook Time: 25-30 minutes (baking brownies)
- Total Time: 4 hours 30 minutes (including chilling time)
- Yield: 12 servings
- Category: Dessert
- Method: Baking
- Cuisine: American
Description
This delightful Brownie Refrigerator Cake combines a rich homemade brownie base with creamy layers of cream cheese, whipped topping, and instant chocolate pudding. Easy to prepare and requiring no additional baking beyond the base, this no-bake layered dessert is chilled to perfection, making it a crowd-pleaser for any occasion.
Ingredients
Brownie Base
- 1 box brownie mix (plus required ingredients: eggs, oil, water)
Creamy Layer
- 8 oz cream cheese, softened
- ½ cup powdered sugar
- 1 tsp vanilla extract
- 4 oz whipped topping (half of an 8 oz tub), thawed
Chocolate Filling
- 1 box (3.9 oz) instant chocolate pudding mix
- 2 cups cold milk
Final Layer and Garnish
- 4 oz remaining whipped topping, thawed
- Chocolate curls or shavings for garnish
Instructions
- Bake the Brownie Base: Preheat your oven according to the instructions provided on the brownie mix package to ensure the perfect baking temperature.
- Prepare the Brownie Batter: Mix the brownie batter as directed on the box, then pour it evenly into a greased 9×13-inch baking dish for an even base layer.
- Bake the Brownies: Place the dish in the oven and bake until the brownies are set. Once done, remove and allow them to cool completely before layering.
- Prepare the Creamy Layer: In a mixing bowl, beat together the softened cream cheese, powdered sugar, and vanilla extract until the mixture becomes light and fluffy.
- Incorporate Whipped Topping: Gently fold in half of the thawed whipped topping into the cream cheese mixture, blending until smooth and creamy.
- Spread Creamy Layer: Evenly spread this creamy mixture over the cooled brownie base to form the second layer.
- Make the Chocolate Filling: In a separate bowl, whisk the instant chocolate pudding mix with the cold milk until the mixture thickens, usually within a couple of minutes.
- Spread Pudding Layer: After allowing the pudding to sit for 2-3 minutes to fully set, spread it evenly over the creamy layer.
- Add the Final Whipped Topping Layer: Spread the remaining whipped topping evenly over the pudding layer to complete the dessert’s top layer.
- Garnish: Decorate the top with chocolate curls or shavings to add a touch of elegance and extra chocolate flavor.
- Chill: Cover the entire dish and refrigerate for at least 4 hours or preferably overnight to allow all layers to set and flavors to meld.
- Serve: Slice the chilled cake into servings and enjoy this rich, creamy, and chocolatey treat.
Notes
- Ensure the brownies are completely cooled before adding the creamy layers to prevent melting.
- For a firmer texture, refrigerate the cake overnight.
- This dessert can be prepared a day in advance, making it ideal for parties and gatherings.
- Use full-fat cream cheese and whipped topping for the best flavor and texture.
- Chocolate curls can be made by shaving a chocolate bar with a vegetable peeler or purchased pre-made.


