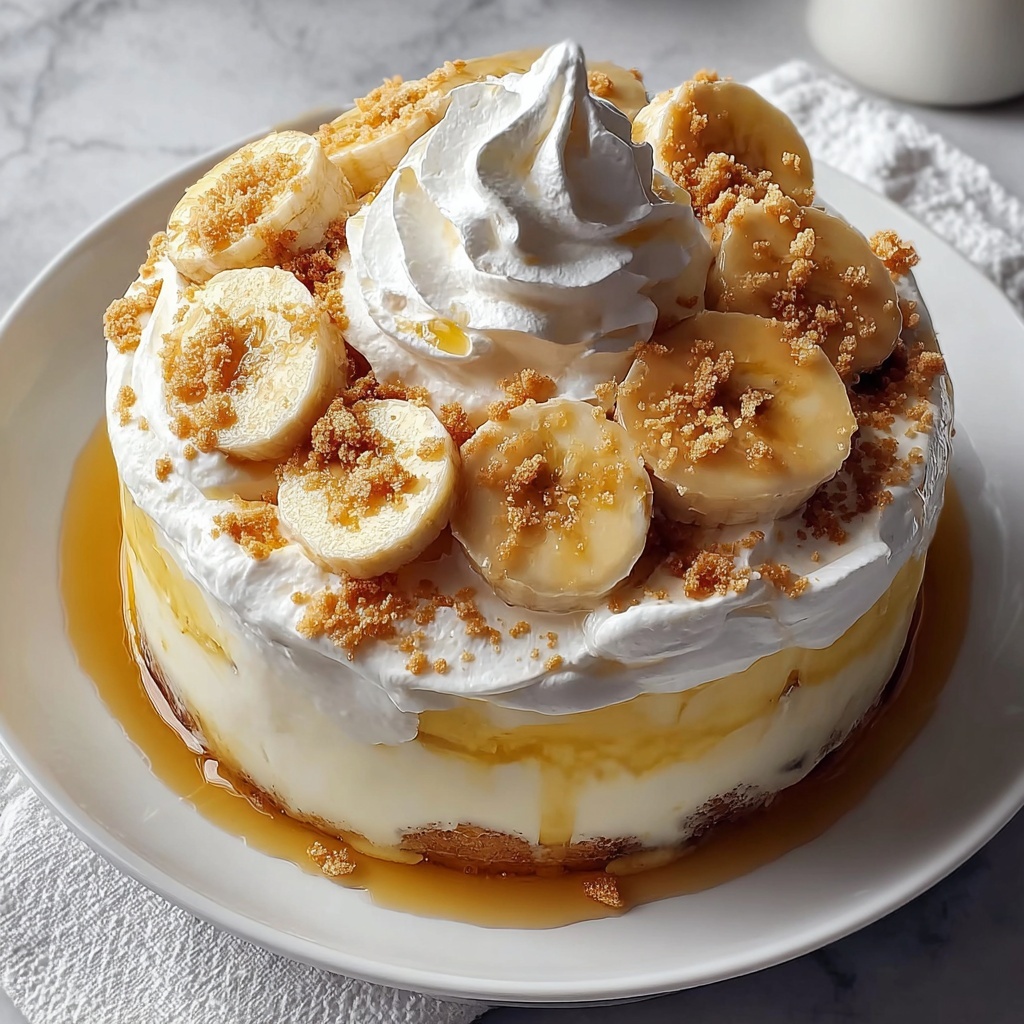
If you’ve ever craved a dessert that wraps you in a cozy hug, then this Old-Fashioned Homemade Banana Pudding Recipe is exactly what your kitchen needs. It’s an inviting blend of creamy, smooth pudding layered with sweet bananas and crispy vanilla wafers that melt into the dessert’s velvety texture. Every bite bursts with nostalgic comfort, reminding you of lazy Sunday afternoons and family gatherings. The beauty here is in its simplicity and charm—each element harmonizes perfectly to create a timeless Southern classic that’s both luscious and utterly irresistible.
Ingredients You’ll Need
This recipe uses simple, everyday ingredients that come together to create extraordinary flavor and comforting texture. Each one plays an essential role — from thickening the pudding to lending sweetness and that special homemade touch that only fresh bananas and real vanilla can provide.
- Granulated sugar: Sweetens the pudding just right, balancing the natural tartness of the bananas.
- All-purpose flour: Acts as the thickening agent to give the pudding its luscious, silky texture.
- Salt: Enhances the overall flavor and rounds out the sweetness.
- Whole milk: The creamy base that delivers richness and smoothness.
- Egg yolks: Lightly beaten to provide body and a rich golden color to the pudding.
- Vanilla extract: Adds warmth and depth for that classic flavor everyone loves.
- Vanilla wafers: Bring the perfect amount of crunch and nostalgic flavor in every layer.
- Ripe bananas: The star ingredient, sliced just right, giving natural sweetness and fresh creaminess.
- Heavy whipping cream: Whipped into soft peaks to top the pudding with fluffy indulgence.
- Powdered sugar: Sweetens the whipped cream delicately for a light, airy finish.
How to Make Old-Fashioned Homemade Banana Pudding Recipe
Step 1: Prepare the pudding base
First, whisk together the sugar, flour, and salt in a large saucepan to create an even base. Gradually pour in the milk while whisking continuously to avoid lumps. This mixture forms the creamy backbone of your pudding, ensuring a smooth and silky texture from the get-go.
Step 2: Cook until thickened
Place your saucepan over medium heat, stirring steadily. Watch carefully as the mixture transforms, thickening and coating the back of your spoon—this usually takes about 10 to 12 minutes. This patience pays off with a pudding that’s perfectly velvety and luscious.
Step 3: Temper the eggs gently
Remove the saucepan from heat, then whisk about one cup of the hot pudding mixture into your beaten egg yolks slowly and carefully. This step is crucial because it gradually raises the temperature of the eggs, preventing them from scrambling when added back to the pan.
Step 4: Finish the pudding on the stove
Return the egg-enriched mixture to the saucepan, continuing to stir constantly over medium heat for another 2 to 3 minutes. Remove from the heat and stir in the vanilla extract—the fragrant note that brings this classic recipe to life.
Step 5: Assemble the layers
Take a glass baking dish and start with a layer of vanilla wafers, followed by a layer of banana slices. Pour over a generous portion of the pudding mixture. Repeat the process twice more, making sure to end with a top layer of pudding. This layering is what gives the dessert its irresistible texture contrasts.
Step 6: Chill to perfection
Press plastic wrap directly onto the pudding’s surface to prevent a skin from forming. Refrigerate the dessert for at least 4 hours, or overnight if you can wait that long—this allows the flavors to meld beautifully and the wafers to soften just enough while still holding their shape.
Step 7: Whip the cream topping
Before serving, whip the heavy cream and powdered sugar together until soft peaks form. This fluffy crown adds an airy lightness that complements the dense pudding layers beneath.
Step 8: Garnish and serve
Spread or dollop the whipped cream over the chilled pudding. For that extra touch of homemade charm, garnish with a few vanilla wafers or banana slices. Your Old-Fashioned Homemade Banana Pudding Recipe is now ready to be devoured!
How to Serve Old-Fashioned Homemade Banana Pudding Recipe
Garnishes
Fresh banana slices are a natural choice to brighten the dish visually and add a burst of freshness to each bite. A sprinkling of crushed vanilla wafers adds texture and an appealing rustic look. For an indulgent twist, a light dusting of cinnamon or nutmeg can awaken the flavors even more.
Side Dishes
This pudding pairs wonderfully with lighter dishes—think fresh fruit salads or a crisp green salad with a tangy vinaigrette. It also stands beautifully solo as a sweet finale to any Southern-inspired meal, making it the perfect crowd-pleaser whenever dessert is on the menu.
Creative Ways to Present
For a fun twist, try serving your banana pudding in individual mason jars or clear glasses to show off the gorgeous layers. You can also turn it into a trifle by adding extra layers of cake or graham crackers. No matter how you present it, this classic recipe always feels special and homey.
Make Ahead and Storage
Storing Leftovers
Because banana pudding is best enjoyed fresh and creamy, store any leftovers covered tightly in the refrigerator. It will keep for about 3 days, during which the flavors will continue to develop, though the wafer layers may become softer over time.
Freezing
Freezing banana pudding is not recommended as the texture can change dramatically, causing the pudding to separate and the bananas to become mushy. For best results, enjoy it within a few days of making.
Reheating
This pudding is meant to be served chilled, so reheating is not ideal. If you find yourself with leftovers after they’ve been refrigerated, just give it a good stir and serve cold—refreshing and delicious every time.
FAQs
Can I use instant pudding mix instead of making it from scratch?
While instant pudding mixes can be a quick shortcut, they don’t capture the rich, homemade flavor and silky texture achieved by making pudding from scratch in this Old-Fashioned Homemade Banana Pudding Recipe. The difference is truly worth the extra effort.
What kind of bananas should I use?
Choose ripe bananas with a few brown spots—their sweetness and flavor intensify as they ripen, making them perfect for this classic pudding. Avoid bananas that are too green or overly mushy for the best texture.
Can I make this recipe vegan or dairy-free?
This traditional recipe relies on dairy and eggs for its classic flavor and texture. However, you can experiment with plant-based milks and egg substitutes, but keep in mind the results will be different and may require additional thickening agents.
How long does it take for the pudding to set properly?
Chilling the pudding for at least 4 hours is essential for it to set perfectly and for the flavors to meld. Overnight chilling is even better, allowing the wafers to soften just right while keeping the pudding creamy and delicious.
Can I prepare this recipe ahead of a party?
Absolutely! The Old-Fashioned Homemade Banana Pudding Recipe actually benefits from resting overnight in the fridge, making it an excellent make-ahead dessert that saves time when you have guests coming.
Final Thoughts
Nothing beats the warm nostalgia and satisfying comfort of this Old-Fashioned Homemade Banana Pudding Recipe. It’s a true crowd-pleaser with its layers of creamy pudding, ripe bananas, and vanilla wafers topped with fluffy whipped cream. I can’t encourage you enough to give this timeless dessert a try—you’ll soon understand why it remains a beloved favorite in so many homes. Happy baking, and even happier eating!
Print
Old-Fashioned Homemade Banana Pudding Recipe
- Prep Time: 0h 30m
- Cook Time: 0h 15m
- Total Time: 4h 45m
- Yield: 8 servings
- Category: Dessert
- Method: Stovetop
- Cuisine: Southern American
Description
This Old-Fashioned Homemade Banana Pudding is a classic Southern dessert featuring layers of creamy vanilla pudding, ripe banana slices, and vanilla wafers topped with freshly whipped cream. The pudding is cooked on the stovetop and cooled to develop rich, comforting flavors, making it a timeless treat perfect for family gatherings or any sweet craving.
Ingredients
Pudding:
- 1 cup granulated sugar
- 1/2 cup all-purpose flour
- 1/2 teaspoon salt
- 4 cups whole milk
- 6 large egg yolks, lightly beaten
- 2 teaspoons vanilla extract
Assembly:
- 1 box vanilla wafers (approximately 11 ounces)
- 5 to 6 ripe bananas, sliced
Topping:
- 1 cup heavy whipping cream
- 2 tablespoons powdered sugar
Instructions
- Make the pudding base: In a large saucepan, whisk together the sugar, flour, and salt. Gradually add the milk while whisking continuously until the mixture is smooth and free of lumps.
- Cook until thickened: Place the saucepan over medium heat and stir constantly to prevent scorching. Continue cooking for about 10-12 minutes until the mixture thickens and coats the back of a spoon.
- Temper the egg yolks: Remove the saucepan from heat. Slowly whisk about 1 cup of the hot pudding mixture into the beaten egg yolks to gently warm them. Then, return the warmed egg yolk mixture back into the saucepan, stirring continuously to incorporate.
- Finish cooking the pudding: Return the saucepan to medium heat. Cook the mixture for another 2-3 minutes, stirring constantly until it thickens further. Remove from heat and stir in the vanilla extract for flavor.
- Assemble the layers: In a glass baking dish, layer one-third of the vanilla wafers evenly on the bottom. Top with one-third of the banana slices, then pour one-third of the pudding mixture over the bananas. Repeat these layers two more times, finishing with a final layer of pudding on top.
- Chill the pudding: Cover the dish tightly with plastic wrap, pressing it directly onto the surface of the pudding to prevent a skin from forming. Refrigerate for at least 4 hours, though overnight chilling is ideal for best texture and flavor melding.
- Prepare whipped cream topping: Just before serving, whip the heavy cream and powdered sugar together in a chilled mixing bowl until soft peaks form. This will create a light and creamy topping.
- Serve and garnish: Spread or dollop the freshly whipped cream over the chilled banana pudding. Optionally, garnish with extra vanilla wafers or banana slices for an attractive presentation.
Notes
- To prevent browning, slice bananas just before layering or toss them lightly in lemon juice.
- For a lighter version, substitute whole milk with 2% milk and heavy cream with whipped topping.
- Covering the pudding surface with plastic wrap helps prevent a thick skin from forming during chilling.
- Allowing the pudding to chill overnight enhances the flavor and helps the layers blend beautifully.
- Use ripe bananas for maximum sweetness and softer texture.

