
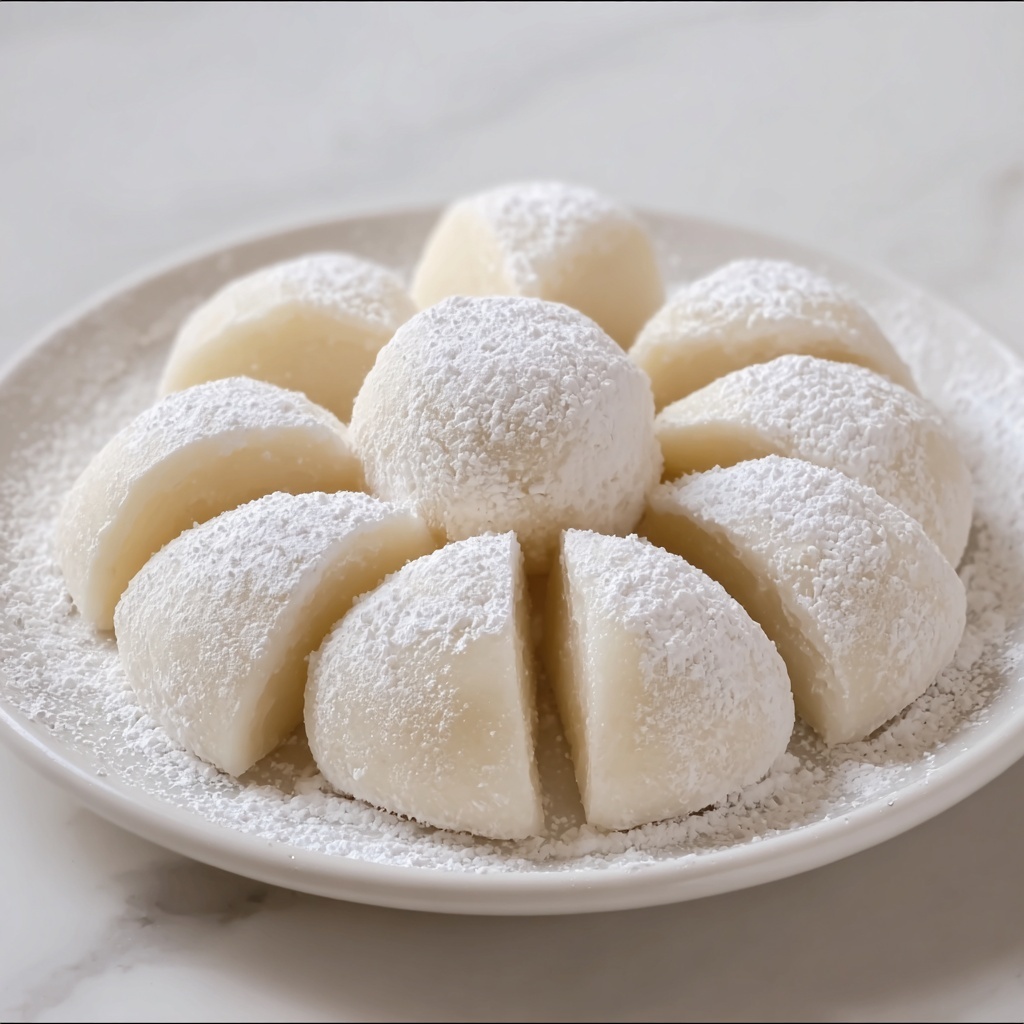
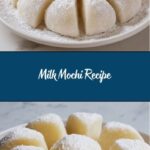
If you are craving a delightfully chewy, subtly sweet treat that feels like a soft cloud in your mouth, this Milk Mochi Recipe is exactly what you need. This simple, quick dessert combines glutinous rice flour with creamy milk and a touch of butter to create a glossy, sticky mochi that’s utterly addictive. Perfect for those who love a chewy texture and a mildly sweet flavor, this Milk Mochi Recipe brings an easy yet authentic taste of Asian dessert culture right to your kitchen in just minutes.
Ingredients You’ll Need
These ingredients are straightforward but crucial—they each bring their unique touch to the Milk Mochi Recipe, giving you the perfect balance of flavor and texture.
- Glutinous rice flour: The foundation of mochi, this flour gives the dessert its signature chewy texture.
- Granulated sugar: Adds just the right amount of sweetness without overpowering the delicate flavors.
- Whole milk: Brings creaminess and moisture, helping to bind the dough smoothly.
- Unsalted butter (melted): Introduces a subtle richness and silkiness to the mochi.
- Cornstarch for dusting: Prevents the mochi pieces from sticking together and makes handling easier.
How to Make Milk Mochi Recipe
Step 1: Mix the Dry Ingredients
Start by whisking together the glutinous rice flour and granulated sugar in a microwave-safe bowl. This ensures that your mochi will have an even sweetness and a smooth texture from the start.
Step 2: Add Milk Gradually
Slowly pour in the whole milk while whisking constantly. This step prevents lumps and helps the batter become silky smooth—an essential part for achieving the perfect mochi consistency.
Step 3: Incorporate Melted Butter
Stir in the melted unsalted butter to add a lovely depth of flavor and a touch of richness that enhances the overall softness of the mochi.
Step 4: Microwave Cooking Cycles
Cover the bowl loosely with plastic wrap before microwaving on high for one minute. Then, remove and stir vigorously to break up any thick spots. Repeat microwaving for another minute, stir again, and finish with a final 30 to 45 seconds. The mixture will transform into a thick, glossy, sticky dough that’s ready to be handled.
Step 5: Shape and Cut
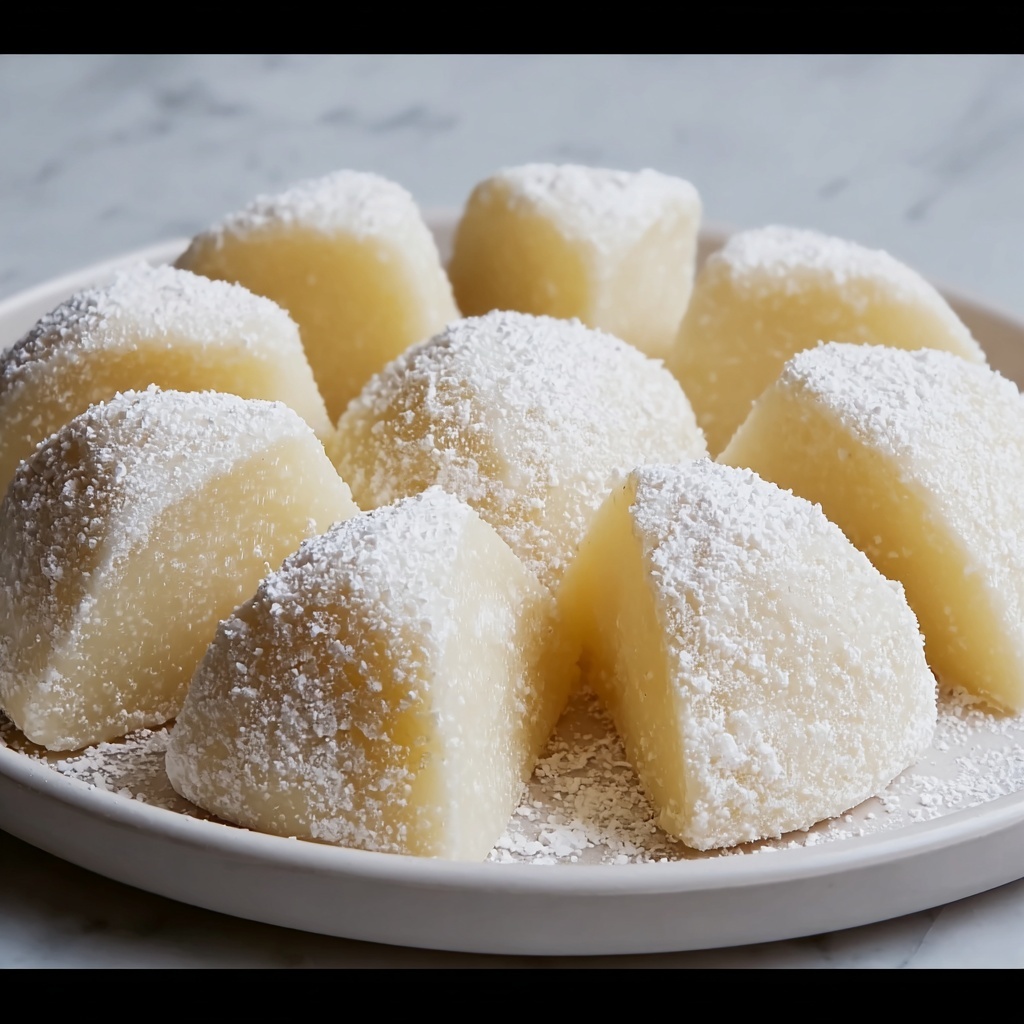
Transfer the hot mochi dough carefully onto a surface dusted generously with cornstarch. Allow it to cool just enough to handle safely, then dust the top with more cornstarch. Cut into small, bite-sized pieces and toss them gently to coat all sides, which keeps them from sticking together and makes serving a breeze.
How to Serve Milk Mochi Recipe
Garnishes
While the classic Milk Mochi Recipe tastes wonderful on its own, a light dusting of toasted sesame seeds or a sprinkle of kinako powder (roasted soybean flour) can add a nutty flavor and extra dimension that makes each bite even more memorable.
Side Dishes
Mochi pairs beautifully with a cup of green tea or a refreshing mango sorbet. These accompaniments balance the rich chewiness of the mochi with bright, fresh flavors, creating a well-rounded dessert experience.
Creative Ways to Present
For a playful presentation, arrange the Milk Mochi pieces atop a bed of sweet red bean paste or alongside fruit slices like strawberries and kiwi. You can even skewer them for easy-to-eat snacks at parties or drizzle with a touch of honey or condensed milk for added indulgence.
Make Ahead and Storage
Storing Leftovers
Because mochi tends to harden as it cools, it’s best to store leftovers in an airtight container at room temperature for no more than one day to maintain their soft texture and chewy delight.
Freezing
Freezing is not ideal for this Milk Mochi Recipe since it can alter the mochi’s delicate, chewy texture. If you must freeze, wrap pieces individually and thaw them gently at room temperature before serving.
Reheating
If the mochi firm up, lightly warming in the microwave for 10-15 seconds can bring back their soft, supple feel. Just be careful not to overheat as it may become too sticky and gooey.
FAQs
Can I substitute whole milk with non-dairy milk?
Yes, you can use coconut milk or almond milk to make this Milk Mochi Recipe dairy-free, but coconut milk will add a subtle tropical flavor that changes the taste slightly.
What is the difference between glutinous rice flour and regular rice flour?
Glutinous rice flour is made from sticky rice and is key to achieving the mochi’s chewy texture. Regular rice flour won’t give you that signature chewiness and will result in a different texture.
Can I add flavors to this Milk Mochi Recipe?
Absolutely! Vanilla extract, matcha powder, or even fruit purées can be mixed into the batter before cooking to personalize your mochi.
Why do I need to dust with cornstarch?
Cornstarch prevents the sticky mochi pieces from sticking to surfaces and one another, making it easier to handle and serve them.
Is this Milk Mochi Recipe gluten-free?
Yes, this recipe uses glutinous rice flour, which contains no gluten, making it a great gluten-free dessert option.
Final Thoughts
Once you try this Milk Mochi Recipe, you’ll see why it’s quickly become a favorite for both beginners and seasoned cooks. Its simplicity, combined with that unbelievably chewy texture and subtle sweetness, makes it a perfect treat any time of day. Give it a go and share the joy of homemade mochi with your friends and family—you might just create a new favorite dessert tradition!
Print
Milk Mochi Recipe
- Prep Time: 5 minutes
- Cook Time: 3 minutes
- Total Time: 8 minutes
- Yield: 12 pieces
- Category: Dessert
- Method: Microwaving
- Cuisine: Asian
- Diet: Vegetarian, Gluten Free
Description
Milk Mochi is a delightful, chewy dessert made with glutinous rice flour, sugar, and milk, quickly prepared in the microwave. This easy and gluten-free snack offers a glossy, sticky texture and a subtly sweet flavor, perfect for a quick treat or dessert.
Ingredients
Ingredients
- 1 cup glutinous rice flour
- 0.25 cup granulated sugar
- 1 cup whole milk
- 1 tablespoon unsalted butter, melted
- Cornstarch, for dusting
Instructions
- Mix dry ingredients: In a microwave-safe bowl, whisk together the glutinous rice flour and sugar until evenly combined.
- Add milk: Gradually pour in the whole milk while whisking continuously to create a smooth, lump-free batter.
- Incorporate butter: Stir the melted unsalted butter into the mixture for extra richness.
- Microwave in intervals: Loosely cover the bowl with plastic wrap and microwave on high for 1 minute. Remove, stir well, then microwave for another 1 minute. Stir again and microwave a final 30 to 45 seconds until the mixture thickens, becomes glossy, and sticky.
- Prepare the surface: Dust a clean surface generously with cornstarch to prevent sticking. Carefully transfer the hot mochi dough onto this surface.
- Cool and cut: Let the dough cool slightly, then dust the top with additional cornstarch. Cut the mochi into small pieces with a knife.
- Toss to coat: Gently toss the pieces in cornstarch to coat all sides, preventing sticking. Serve the mochi at room temperature.
Notes
- For extra flavor, add 0.5 teaspoon vanilla extract or replace part of the milk with coconut milk.
- Store leftovers in an airtight container at room temperature for up to one day.


