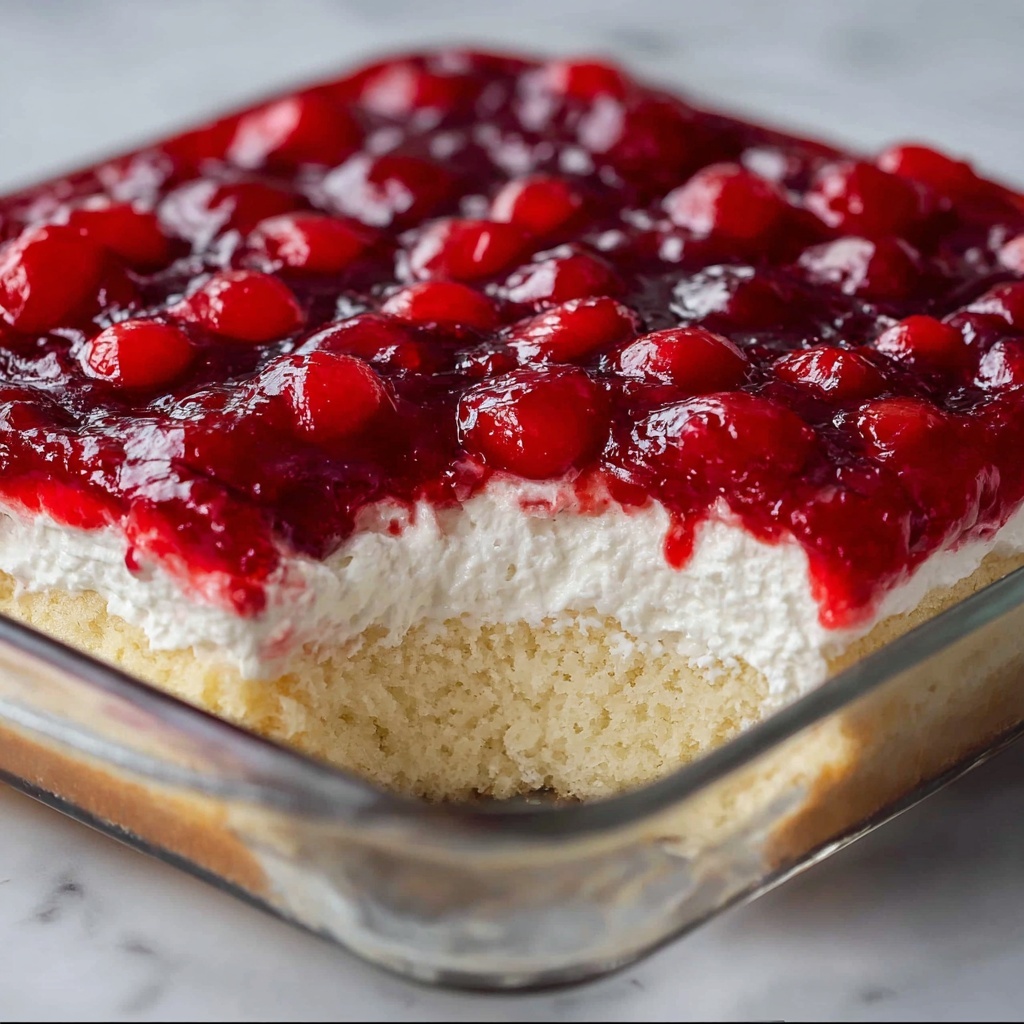
If you’ve ever been on the hunt for a dessert that’s both delightfully simple and irresistibly charming, look no further than the Cherries in the Snow Dessert Recipe. This crowd-pleaser brings together fluffy angel food cake, creamy sweetened cream cheese, and luscious cherry pie filling to create a dessert that’s like a cool, fruity cloud on your plate. Perfect for feeding a crowd or sweetening up a casual get-together, it’s light, creamy, and bursting with vibrant pops of cherry flavor that will have you coming back for seconds and thirds.
Ingredients You’ll Need
This recipe calls for straightforward, pantry-friendly ingredients that magically come together to give you that iconic cherry-topped dessert. Each ingredient plays a specific role to build layers of texture, flavor, and eye-catching color.
- Cream cheese (8 ounces, room temperature): Provides a rich and tangy base that’s smooth and creamy when whipped.
- Powdered sugar (1/2 cup): Sweetens the cream cheese while ensuring a silky texture without any graininess.
- 2% milk (1/2 cup, divided): Helps thin and lighten the cream cheese mixture for a luscious mouthfeel.
- Cool Whip whipped topping (12 ounces, thawed): Adds airy fluffiness that gives the dessert its signature cloud-like texture.
- Pre-baked angel food cake (9-inch): Soft, spongy cake that soaks up cream cheese flavors and keeps the dessert light.
- Cherry pie filling (2 cans, 21 ounces each): Brings vibrant red color and that tart-sweet cherry burst on top everyone loves.
How to Make Cherries in the Snow Dessert Recipe
Step 1: Make the Cream Cheese Base
Start by whipping the cream cheese and powdered sugar together in a large bowl with a hand mixer until it’s completely smooth and creamy. Next, gradually mix in the milk in two parts, blending thoroughly each time. This will yield a silky, sweet canvas for the rest of the dessert.
Step 2: Fold in the Whipped Topping
Gently fold the thawed Cool Whip into your cream cheese mixture using a spatula. The key here is to keep it light and fluffy, so avoid overmixing. This step transforms the dense cream cheese into a dreamy, airy filling that perfectly contrasts with the cake pieces.
Step 3: Add Cake Pieces
Break your pre-baked angel food cake into bite-sized chunks. Carefully fold these chunks into the cream cheese and whipped topping mixture until each piece is fully coated. This infuses moistness and a slight sponge-like texture that makes every bite heavenly.
Step 4: Assemble the Dessert
Transfer the mixture into a 9×13-inch glass baking pan, spreading it evenly to create a nice, uniform layer. This creates the base that will hold all your creamy cake goodness.
Step 5: Top with Cherries
Evenly spoon the cherry pie filling over the cake mixture, covering the entire surface with that luscious, jewel-red topping. This not only adds a stunning visual appeal but also delivers the perfect balance of tart and sweet.
Step 6: Chill and Serve
Cover the dessert and refrigerate it for at least two hours to allow it to chill and the flavors to meld. When ready, simply slice and serve straight from the pan. It’s best enjoyed cold for that refreshing “snowy” effect.
How to Serve Cherries in the Snow Dessert Recipe
Garnishes
A sprinkle of shaved white chocolate or a few fresh cherries on top can elevate this dessert’s presentation and add a hint of elegance. Even a light dusting of powdered sugar mimics a dusting of fresh snow and amps up that wintery vibe.
Side Dishes
Pairing this dessert with a scoop of vanilla or cherry-flavored ice cream takes the experience to the next level. For a brighter contrast, a cup of hot black coffee or a fruit-forward white wine complements the creamy sweetness beautifully.
Creative Ways to Present
Swap out the traditional 9×13 pan for a trifle bowl and layer the components for a stunning visual display of cake, cream, and cherries. Alternatively, serve it in individual glass cups with a cherry atop each for a charming, portion-controlled treat your guests will adore.
Make Ahead and Storage
Storing Leftovers
Your leftovers will keep beautifully in the refrigerator, covered tightly with plastic wrap or an airtight lid, for up to 3 days. This makes it a convenient dessert to prepare in advance for busy days or unexpected guests.
Freezing
Although the texture is best when fresh, you can freeze the dessert for up to a month. Freeze it in an airtight container and thaw overnight in the refrigerator before serving. Keep in mind that the whipped topping may lose some fluffiness after thawing.
Reheating
This dessert is best enjoyed cold and should not be reheated. If you find it too firm after refrigeration, let it sit at room temperature for about 10 minutes before serving to soften slightly without losing its light, dreamy texture.
FAQs
Can I use a different type of cake for this recipe?
Angel food cake is ideal because of its light, airy texture, but you can experiment with sponge cake or chiffon cake if you prefer. Just make sure it is not too dense or moist to prevent sogginess.
Is it possible to make this dessert vegan or dairy-free?
This recipe relies heavily on dairy-based ingredients, but you could try substituting vegan cream cheese and whipped toppings. Just keep in mind the texture and flavor might vary slightly from the original.
Can I make the dessert ahead of time for a party?
Absolutely! This dessert is great for making a day ahead since chilling helps the flavors meld. Just keep it covered in the fridge and serve chilled for the best experience.
What type of cherry pie filling works best?
Using a good-quality cherry pie filling with real fruit chunks will give you the best flavor and texture. Some homemade cherry pie fillings can work too if you want a fresher taste.
How should I cut and serve the dessert?
Use a sharp knife dipped in warm water and wiped dry to make clean cuts. Serve straight from the pan with a wide spatula to keep the layers intact and maintain that beautiful “snowy” look on each plate.
Final Thoughts
The Cherries in the Snow Dessert Recipe is a charming, crowd-pleasing treat that’s as easy as it is tasty. Whether you’re serving it at a family gathering or simply craving something sweet and refreshing, this dessert is sure to brighten any occasion. Give it a try and watch it become an instant favorite in your recipe collection.
Print
Cherries in the Snow Dessert Recipe
- Prep Time: 15 minutes
- Cook Time: 0 minutes
- Total Time: 2 hours 15 minutes
- Yield: 15 servings
- Category: Dessert
- Method: No-Cook
- Cuisine: American
- Diet: Vegetarian
Description
Cherries in the Snow is a delightful no-bake dessert featuring a creamy cream cheese and Cool Whip base mixed with fluffy angel food cake pieces and topped with sweet cherry pie filling. This chilled treat combines smooth textures with fruity bursts, perfect for gatherings or a refreshing dessert on a warm day.
Ingredients
Cream Cheese Base
- 8 ounces cream cheese, room temperature
- 1/2 cup powdered sugar
- 1/2 cup 2% milk, divided
- 12 ounces Cool Whip whipped topping, thawed
Cake
- 1 (9-inch) pre-baked angel food cake
Topping
- 2 cans (21 ounces each) cherry pie filling
Instructions
- Make the Cream Cheese Base: In a large bowl, use a hand mixer to whip the cream cheese and powdered sugar together until smooth and creamy. Mix in 1/4 cup of milk, then add the remaining 1/4 cup milk and blend again until the mixture is smooth and well-combined.
- Fold in the Whipped Topping: Gently fold the thawed Cool Whip into the cream cheese mixture using a spatula. Be careful not to overmix to retain the light and fluffy texture.
- Add Cake Pieces: Break the pre-baked angel food cake into small bite-sized pieces. Add these pieces into the cream cheese and Cool Whip mixture, folding gently until all cake pieces are coated evenly.
- Assemble the Dessert: Spoon the cake mixture into a 9×13-inch glass baking pan. Spread it out evenly in the pan to form a uniform layer.
- Top with Cherries: Evenly spread the cherry pie filling over the cake mixture, ensuring the whole surface is covered with the luscious cherry topping.
- Chill and Serve: Cover the dessert and refrigerate until chilled, at least 2 hours or until ready to serve. Slice and enjoy directly from the pan.
Notes
- For best results, make sure the cream cheese is softened to room temperature before mixing to avoid lumps.
- Be gentle when folding the Cool Whip to maintain the dessert’s light texture.
- This dessert can be prepared a day in advance and refrigerated, allowing flavors to meld beautifully.
- If angel food cake is unavailable, sponge cake or chiffon cake can be used as alternatives.
- Leftovers should be stored covered in the refrigerator and consumed within 2-3 days for best freshness.

