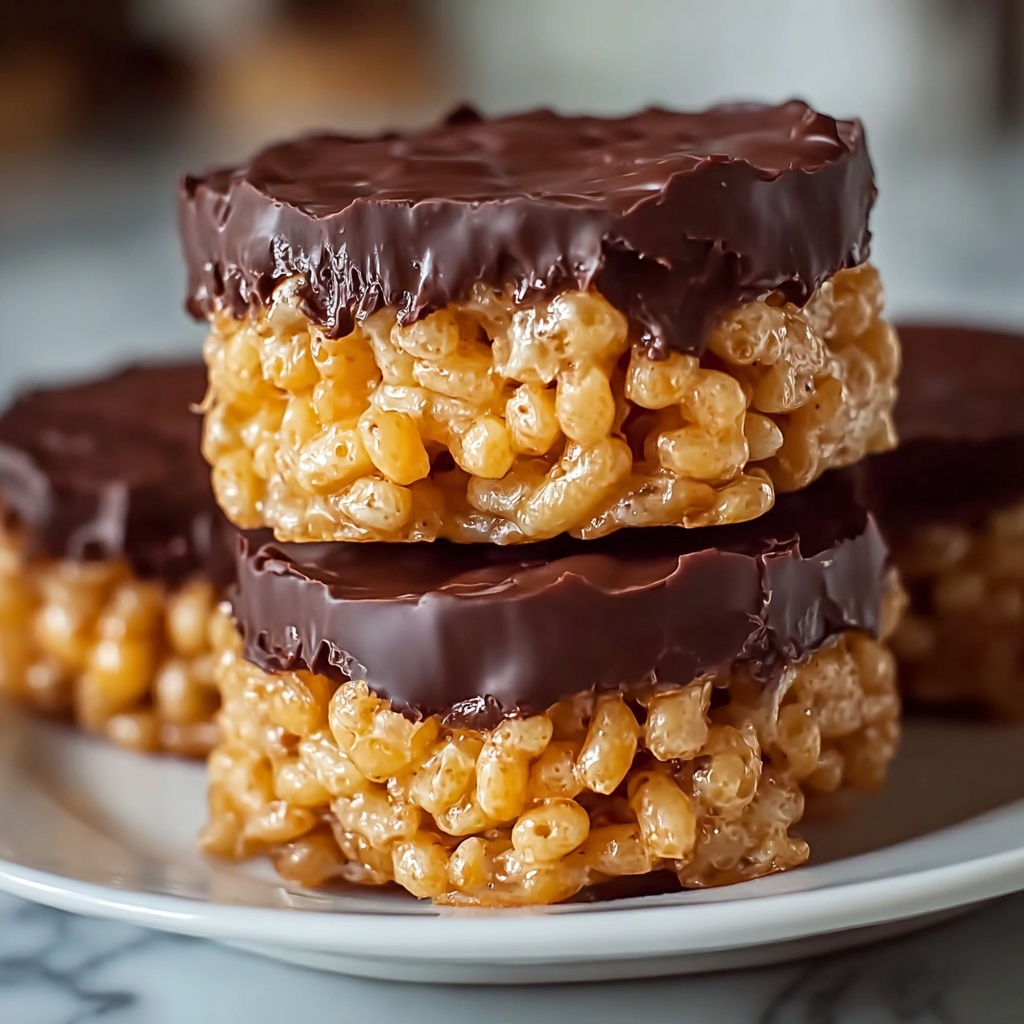
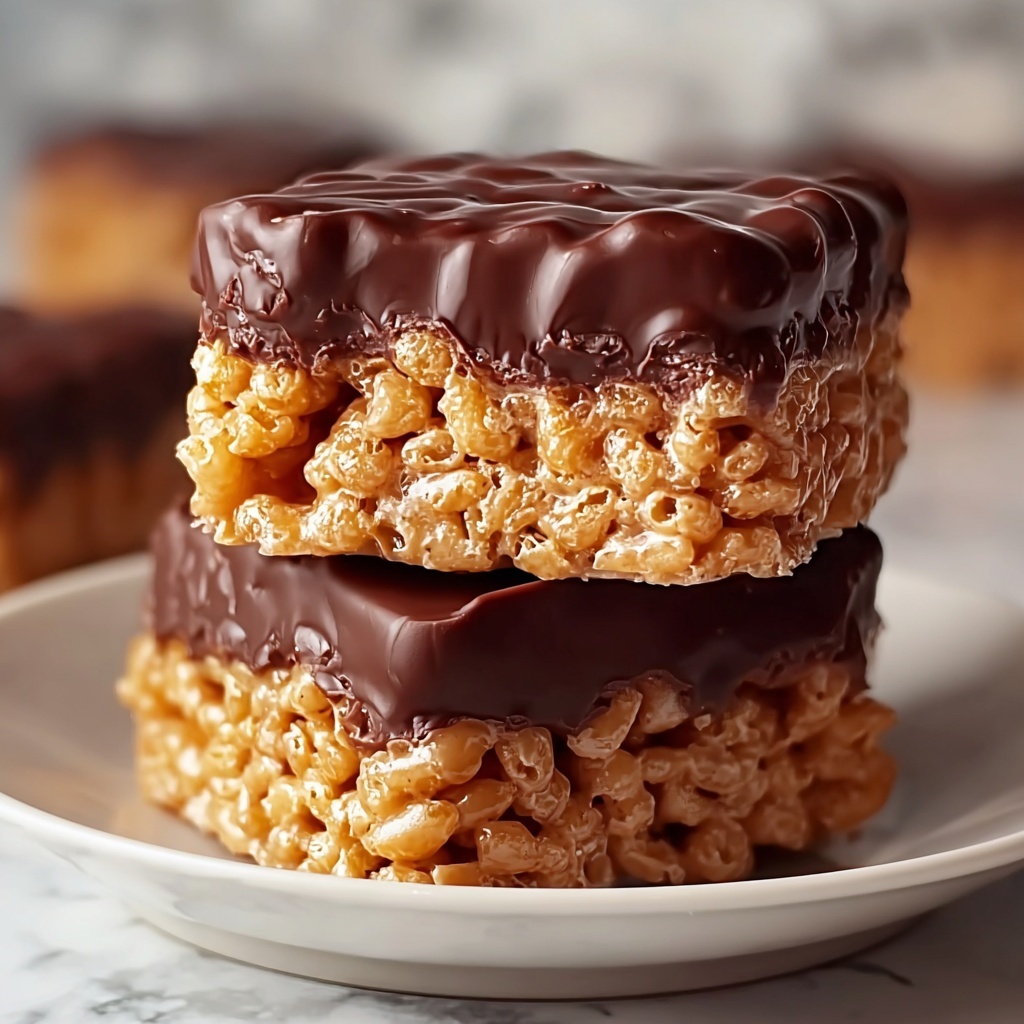
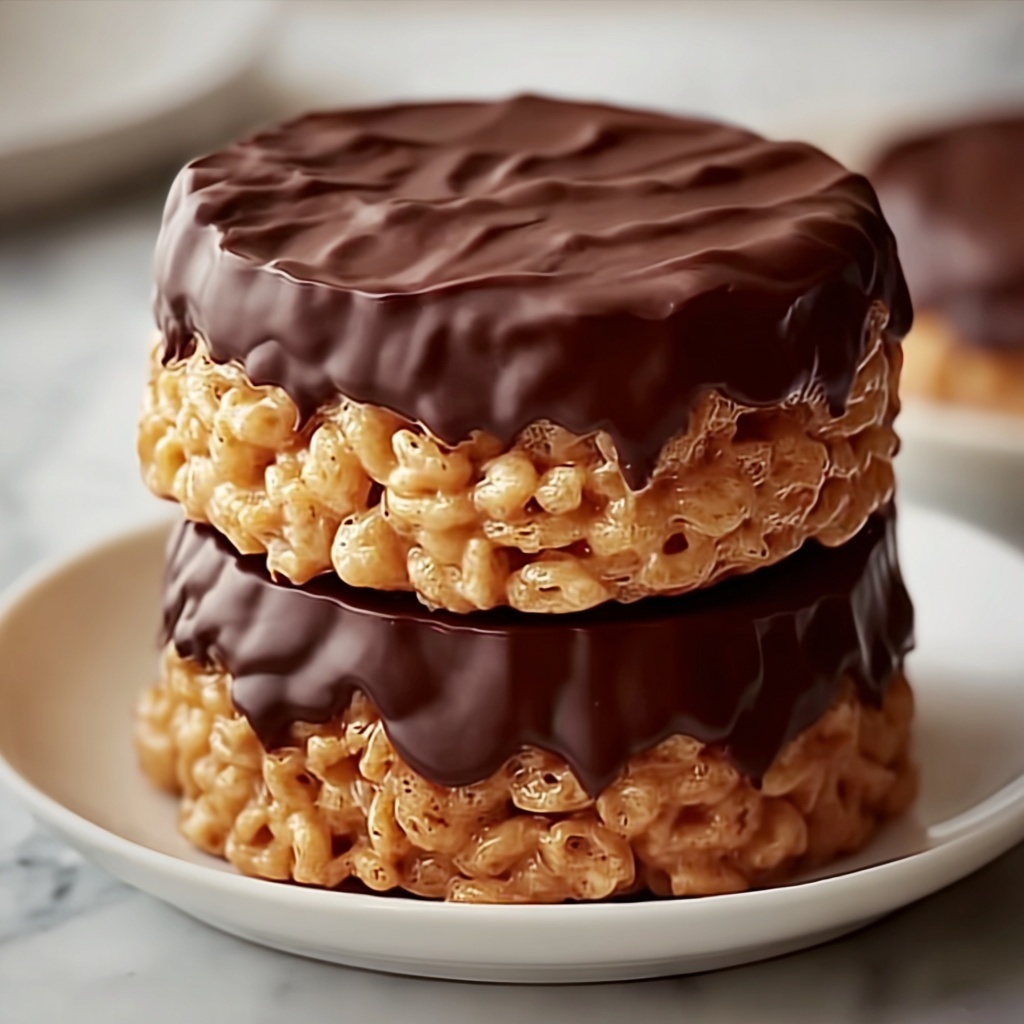
If you love the comforting combo of peanut butter and chocolate with a fun, crunchy twist, then this Peanut Butter Chocolate Rice Krispie Treat Cups Recipe is exactly what you need in your life. These delightful little cups capture the nostalgic joy of classic Rice Krispies treats but elevate it with luscious peanut butter and a glossy chocolate top. They are irresistibly tasty, easy to make, and perfect for sharing or simply enjoying as a special snack. Trust me, once you try these, they’ll become a go-to sweet treat that brings smiles every time.
Ingredients You’ll Need
Simple, everyday ingredients come together in this Peanut Butter Chocolate Rice Krispie Treat Cups Recipe to create layers of rich flavor and crispy texture. Each one plays an important role in building that perfect balance between creamy, crunchy, and sweet.
- 3 cups Rice Krispies cereal: Provides that iconic crispy crunch and light texture that makes these cups so fun.
- 1 1/2 cups chocolate chips: Choose your favorite type—classic milk, dark, or even vegan chocolate—to create a silky, shiny topping.
- 1 cup chunky peanut butter: Adds creamy nuttiness and a bit of texture for extra bite.
- 2 tablespoons honey: Naturally sweetens and helps bind everything together; swap with maple syrup for a vegan twist.
- 1/8 teaspoon salt: A pinch that enhances all the other flavors and keeps them from feeling one-dimensional.
How to Make Peanut Butter Chocolate Rice Krispie Treat Cups Recipe
Step 1: Prepare Your Muffin Tin
Start by lining your muffin tin with paper or silicone liners. This little prep step makes sure your Peanut Butter Chocolate Rice Krispie Treat Cups come out clean and intact, without any sticking or mess. It’s a simple touch that makes life easier and presentation prettier.
Step 2: Melt the Peanut Butter Mixture
Next, gently warm up the peanut butter, honey, and salt in a saucepan over low heat. Stirring continuously until smooth ensures the mixture is fluid enough to coat the cereal evenly. Removing it from heat at the right moment keeps it creamy and ready for mixing.
Step 3: Coat the Rice Krispies
Fold the Rice Krispies cereal into the warm peanut butter mixture carefully, coating every crunchy bit. This is the core of the recipe where that signature peanutty goodness binds with the crispy cereal for a texture combo that’s downright addictive.
Step 4: Form the Cups
Spoon the coated cereal mixture into your lined muffin cups. Lightly press them down with the back of a spoon or your fingers to create a sturdy but soft base for your chocolate topping. This step sets the shape and keeps everything nicely compact.
Step 5: Melt and Add the Chocolate Topping
In a separate pan, melt the chocolate chips over low heat until glossy and smooth. Then spoon the melted chocolate on top of each peanut butter base, spreading gently if needed. This top layer adds irresistible shine and rich flavor to your Peanut Butter Chocolate Rice Krispie Treat Cups Recipe.
Step 6: Chill and Set
Pop the muffin tin into the refrigerator for at least an hour to let the chocolate harden and the cups firm up. This chilling step is crucial if you want neat, neat cups that hold their shape and have that perfect bite.
Step 7: Enjoy!
Once chilled properly, remove the cups from the fridge, peel off the liners, and you’re ready to savor. These treat cups bring together childhood memories and grown-up flavors in every delightful mouthful.
How to Serve Peanut Butter Chocolate Rice Krispie Treat Cups Recipe
Garnishes
Add a finishing touch by sprinkling crushed peanuts, sea salt flakes, or even mini chocolate chips on top before the chocolate sets for a bit of extra texture and visual appeal. A drizzle of caramel or a few edible gold sprinkles can also elevate these cups into a party-worthy dessert.
Side Dishes
These cups shine as is but can be paired with fresh fruit like strawberries or banana slices to balance the richness. A scoop of vanilla ice cream or a glass of cold milk also complement the combination wonderfully, making for a satisfying dessert experience.
Creative Ways to Present
Serve these Peanut Butter Chocolate Rice Krispie Treat Cups Recipe on a pretty platter with colorful cupcake liners for gatherings or gift them in clear bags tied with a bow as homemade goodies. You can even layer the mixture in small jars or clear cups for individual portions that look as good as they taste.
Make Ahead and Storage
Storing Leftovers
Store any leftover cups in an airtight container at room temperature for up to 3 days to maintain their crunch. If you prefer them chilled, the refrigerator keeps them fresh for about a week but might harden the chocolate slightly more.
Freezing
You can freeze these treat cups by wrapping them individually in plastic wrap and placing them in a freezer-safe container. They will keep well for up to 2 months. Just thaw them at room temperature before enjoying to regain that chewy, crunchy texture.
Reheating
Since these cups are best enjoyed cold or at room temperature, reheating is not recommended. If you want a gooey experience, briefly microwave a cup for about 10 seconds, but be careful not to melt the chocolate completely.
FAQs
Can I use natural peanut butter in this recipe?
Absolutely! Natural peanut butter works great, but it may be a bit runnier, so just keep an eye on the consistency when mixing. Using chunky natural peanut butter will add a lovely texture contrast.
Is it possible to make these dairy-free or vegan?
Yes! Swap honey for maple syrup and use vegan chocolate chips to make this Peanut Butter Chocolate Rice Krispie Treat Cups Recipe completely vegan-friendly without sacrificing taste or texture.
Can I substitute the Rice Krispies with another cereal?
Sure thing! Puff rice cereals or crispy corn flakes can be fun alternatives, but stick to cereals that have a similar crunch to maintain that classic treat texture.
Do I have to use silicone or paper liners?
You don’t have to, but liners make removing the cups much easier and keep cleanup simple. If you skip liners, consider lightly greasing the muffin tin for best results.
How long will these treat cups keep fresh?
When stored properly in an airtight container, these cups will stay fresh and delicious for about 3 to 7 days, depending on whether they’re kept at room temperature or refrigerated.
Final Thoughts
This Peanut Butter Chocolate Rice Krispie Treat Cups Recipe is one of those magical recipes that feels like a warm hug and a party all in one bite. It’s simple enough to whip up on a whim yet impressive enough to wow friends and family. Don’t hesitate to give it a try—you might just find your new favorite snack that’s irresistible every time!
Print
Peanut Butter Chocolate Rice Krispie Treat Cups Recipe
- Prep Time: 15 minutes
- Cook Time: 15 minutes
- Total Time: 30 minutes
- Yield: 12 servings
- Category: Dessert
- Method: Stovetop
- Cuisine: American
- Diet: Vegetarian
Description
These Peanut Butter Chocolate Rice Krispie Treat Cups combine the classic crispy texture of Rice Krispies with creamy, rich peanut butter and a decadent chocolate topping. Perfectly portioned in muffin tins, these no-bake treats are easy to make, vegan-friendly with simple substitutions, and make for a delightful snack or dessert that’s both nostalgic and satisfying.
Ingredients
Base
- 3 cups Rice Krispies cereal
- 1 cup chunky peanut butter
- 2 tablespoons honey (or maple syrup for a vegan version)
- 1/8 teaspoon salt
Topping
- 1 1/2 cups chocolate chips (vegan options available)
Instructions
- Prepare the muffin tin: Line a muffin tin with paper or silicone liners to ensure easy removal of the treats after they set.
- Make the peanut butter mixture: In a saucepan over low heat, combine the peanut butter, honey (or maple syrup), and salt. Stir continuously until the mixture is smooth and fluid, then remove it from the heat.
- Combine with Rice Krispies: Fold the Rice Krispies cereal into the peanut butter mixture, ensuring every piece is well coated for an even texture and flavor.
- Form the base: Spoon the peanut butter and cereal mixture into the lined muffin cups, pressing down lightly to create an even base layer in each cup.
- Melt the chocolate topping: In a separate pan, melt the chocolate chips over low heat, stirring until the chocolate is glossy and fully melted.
- Add the chocolate layer: Spoon the melted chocolate over the peanut butter bases in each muffin cup, spreading gently to cover the surface.
- Chill to set: Place the muffin tin in the refrigerator for at least 1 hour, allowing the chocolate to set and the cups to firm up.
- Serve: After chilling, remove the cups from the fridge, peel off the liners, and enjoy these delicious, crunchy, and chocolatey treats!
Notes
- For a vegan version, substitute honey with maple syrup and use vegan chocolate chips.
- Ensure the heat is low when melting peanut butter and chocolate to prevent scorching.
- Press the mixture firmly in the muffin cups to help the treats hold together well.
- Store any leftovers in an airtight container in the refrigerator to maintain freshness.
- These treats can be customized with additional mix-ins like chopped nuts or dried fruit if desired.


