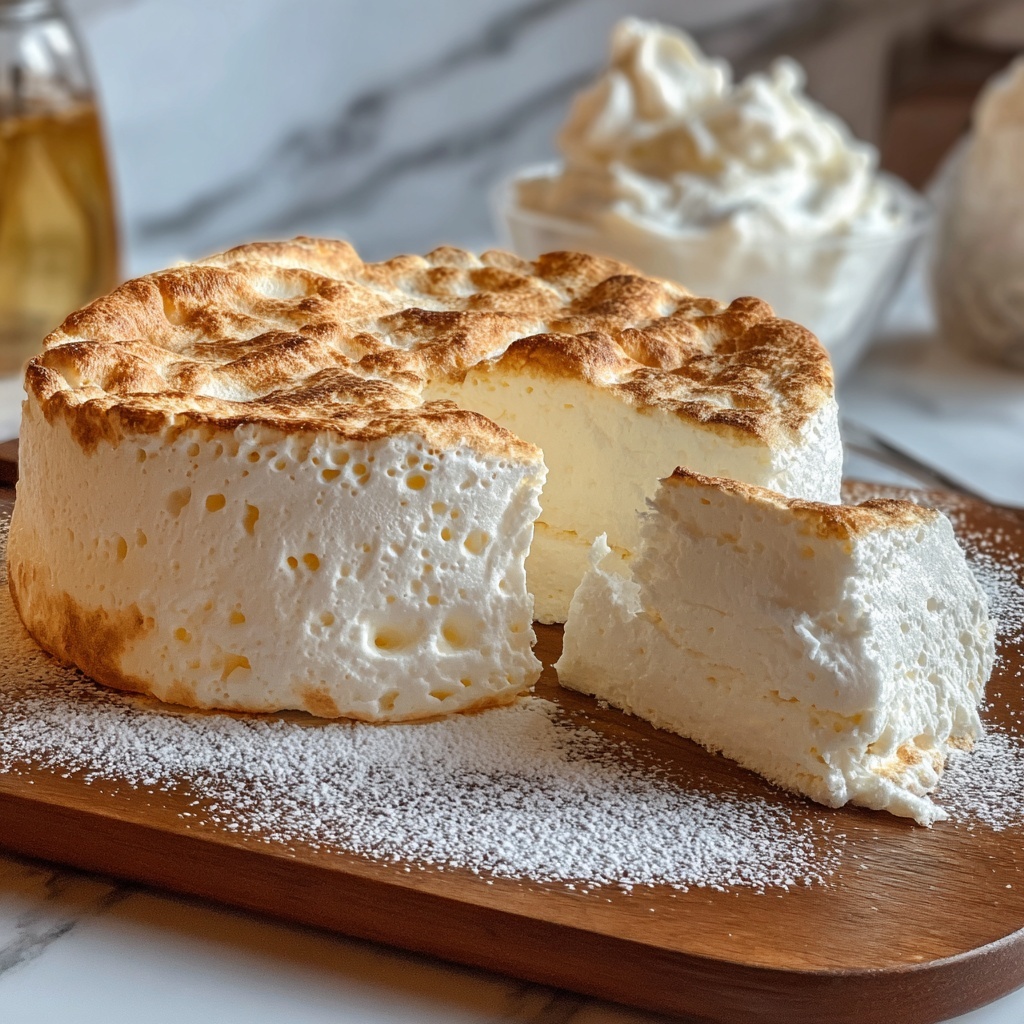
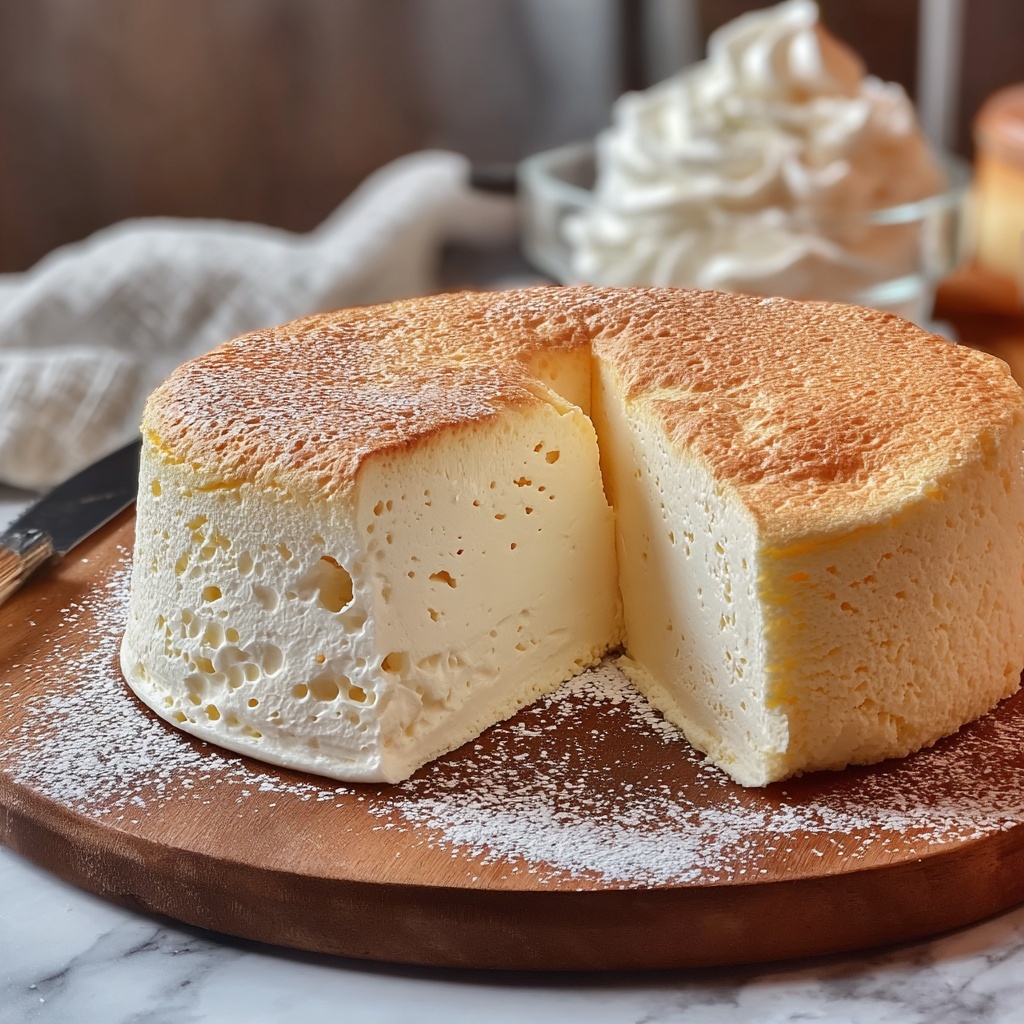
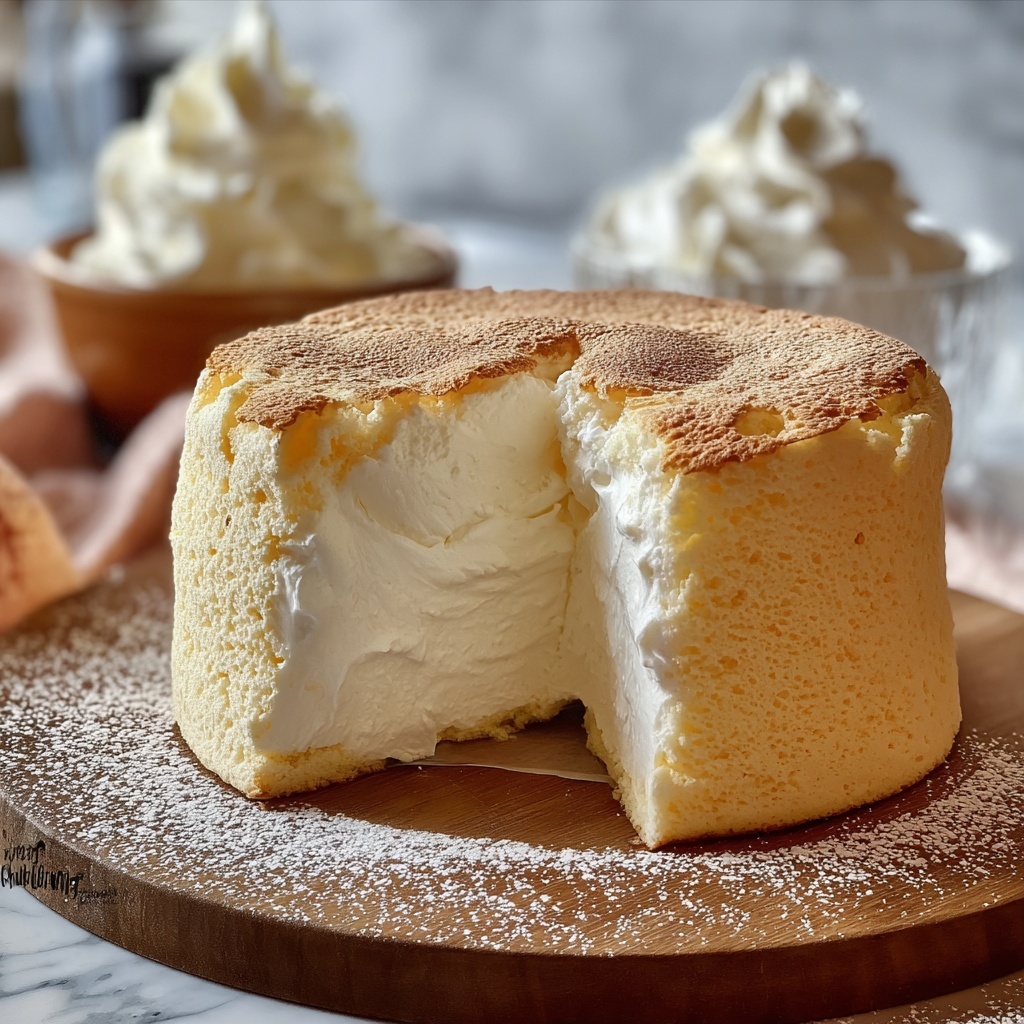
If you’ve been on the hunt for a dessert that feels like a cloud in every bite, your search ends here with this Light & Fluffy Yogurt Cloud Cake Recipe. This cake is an absolute dream—airy and tender with a subtle tang from the yogurt that keeps it delightfully moist. It’s the kind of treat that’s elegant enough for a special occasion but simple enough to whip up any day when you crave something sweet yet light. Trust me, once you try this recipe, it will become one of your go-to favorites for celebrating life’s little moments!
Ingredients You’ll Need
This Light & Fluffy Yogurt Cloud Cake Recipe calls for straightforward, pantry-friendly ingredients that come together to create magic in your oven. Each one is crucial, whether it lends richness, moisture, or just the right lift for that perfect airy texture.
- 1 1/2 cups all-purpose flour: The backbone of the cake, providing structure without weighing it down.
- 2 teaspoons baking powder: This is the secret to the cake’s beautiful rise and fluffy crumb.
- 1/4 teaspoon salt: Just a pinch to enhance all the flavors and balance the sweetness.
- 3 large eggs: Eggs add richness and help trap air for that cloud-like softness.
- 1 cup yogurt: The star ingredient that brings moistness and a gentle tang that makes this cake totally unforgettable.
- 1 cup granulated sugar: Sweetness that’s perfect—not overpowering—allowing the yogurt to shine.
- 1/4 cup vegetable oil: Keeps the cake tender and moist without heaviness.
- 1 teaspoon vanilla extract: Adds warmth and depth to the flavor profile.
- 1 tablespoon fresh lemon zest (optional): A fresh citrus note that brightens the cake beautifully.
How to Make Light & Fluffy Yogurt Cloud Cake Recipe
Step 1: Prepare Your Oven and Pan
Start by preheating your oven to 350°F (175°C), ensuring the perfect baking temperature for a golden crust and tender crumb. Grease an 8-inch round cake pan—this simple prep step guarantees your cake will come out easily without sticking, preserving its delicate surface.
Step 2: Mix the Dry Ingredients
In a medium bowl, whisk together the flour, baking powder, and salt. This step may feel simple, but it’s essential to evenly distribute the leavening agent and salt throughout the flour, so your cake rises evenly and tastes balanced.
Step 3: Combine the Wet Ingredients
In a large bowl, whisk the eggs, yogurt, sugar, vegetable oil, and vanilla extract until the mixture is smooth and homogenous. If you’re using lemon zest, add it now to infuse a fresh, citrusy aroma into the batter. This wet mixture is what makes the Light & Fluffy Yogurt Cloud Cake Recipe so uniquely moist and tender.
Step 4: Fold Dry Ingredients Into Wet
Gradually fold the dry ingredients into your wet mixture, carefully combining them until just mixed. Be gentle here—overmixing can make the cake dense, but folding ensures everything is incorporated while keeping the batter airy and light.
Step 5: Pour and Smooth Batter
Pour your batter into the prepared cake pan, then smooth the top with a spatula. This small detail helps the cake bake evenly, creating a perfect, flat surface ready for garnish or frosting.
Step 6: Bake Until Golden
Bake your cake for 30 to 35 minutes. Keep an eye out for that beautiful golden hue and test its doneness by inserting a toothpick into the center—it should come out clean. This confirms that your Light & Fluffy Yogurt Cloud Cake Recipe has baked through without becoming dry.
Step 7: Cool the Cake Properly
After baking, let the cake cool in the pan for about 10 minutes to set its structure, then transfer it to a wire rack to cool completely. Cooling fully prevents sogginess and readies this delightful cloud cake for serving or decorating.
Step 8: Add Your Finishing Touches
Once cooled, your Light & Fluffy Yogurt Cloud Cake Recipe is ready to be enjoyed just as it is or with a dusting of powdered sugar or fresh berries to elevate its natural charm. This last step adds a pretty presentation and a fresh burst of flavor.
How to Serve Light & Fluffy Yogurt Cloud Cake Recipe
Garnishes
This cake loves simple garnishes that enhance without overwhelming its delicate texture. Sprinkle powdered sugar for an elegant look, or pile on fresh berries like strawberries or blueberries to add a juicy contrast that pairs perfectly with the cake’s subtle tanginess.
Side Dishes
Serve slices alongside a dollop of whipped cream or a scoop of vanilla ice cream to turn this light treat into an indulgent dessert experience. A cup of tea or coffee also complements the Light & Fluffy Yogurt Cloud Cake Recipe beautifully, making it perfect for afternoon tea or weekend brunch.
Creative Ways to Present
For a visually stunning presentation, slice the cake horizontally and layer it with lemon curd or fruit preserves. Alternatively, serve individual mini cakes using muffin tins for a charming twist. The possibilities are endless with such a versatile recipe!
Make Ahead and Storage
Storing Leftovers
Store any leftover Light & Fluffy Yogurt Cloud Cake Recipe in an airtight container at room temperature for up to two days to maintain its soft texture. For longer keeping, refrigeration is fine but may slightly change the moist crumb, so bring it back to room temperature before serving.
Freezing
You can freeze slices of this cake wrapped tightly in plastic wrap and then foil for up to two months. When you’re ready to enjoy, thaw overnight in the fridge, and your cake will taste just as delightful as fresh.
Reheating
Warm slices gently in the microwave for about 15 seconds to revive the softness and enhance the flavors. Avoid overheating to keep the cake from drying out—this way, every bite feels as light and dreamy as when freshly baked.
FAQs
Can I use Greek yogurt instead of regular yogurt?
Absolutely! Greek yogurt works great and adds a nice richness with its creamier texture, just be sure to use plain, unsweetened to keep the balance of flavors right.
Is it possible to make this cake gluten-free?
Yes, you can substitute the all-purpose flour with a gluten-free flour blend, but make sure it includes xanthan gum to help with structure and maintain the cake’s fluffiness.
Can I add other flavors to this cake?
Definitely! While vanilla and lemon zest are classic, you can experiment with almond extract, orange zest, or even a pinch of cinnamon for a new twist on the Light & Fluffy Yogurt Cloud Cake Recipe.
How do I know when the cake is done baking?
The best test is inserting a toothpick into the center; if it comes out clean or with just a few crumbs, your cake is perfectly baked and ready to cool.
Can I double this recipe for a larger cake?
You can! Simply double all ingredients and bake in a larger pan, adjusting the baking time as necessary—check it regularly to avoid overbaking.
Final Thoughts
This Light & Fluffy Yogurt Cloud Cake Recipe is truly a standout for anyone who loves a cake that’s both simple and sophisticated. It’s one of those recipes you’ll want to keep on hand for whenever you want a slice of something special that doesn’t weigh you down. Give it a try and let this cake bring a little cloud-like joy to your table—you won’t regret it!
Print
Light & Fluffy Yogurt Cloud Cake Recipe
- Prep Time: 10 minutes
- Cook Time: 35 minutes
- Total Time: 45 minutes
- Yield: 8 servings
- Category: Dessert
- Method: Baking
- Cuisine: American
- Diet: Vegetarian
Description
This Light & Fluffy Yogurt Cloud Cake is a moist and airy dessert made with simple ingredients like yogurt, eggs, and flour. Its tender crumb, enhanced by subtle lemon zest and vanilla, makes it perfect for a delightful snack or a light finish to any meal. Easy to prepare and bake, this cake offers a balanced sweetness and a soft texture that melts in your mouth.
Ingredients
Dry Ingredients
- 1 1/2 cups all-purpose flour
- 2 teaspoons baking powder
- 1/4 teaspoon salt
Wet Ingredients
- 3 large eggs
- 1 cup yogurt (plain, whole or low-fat)
- 1 cup granulated sugar
- 1/4 cup vegetable oil
- 1 teaspoon vanilla extract
- 1 tablespoon fresh lemon zest (optional)
Instructions
- Preheat and Prepare Pan: Preheat your oven to 350°F (175°C) and grease an 8-inch round cake pan to prevent sticking.
- Mix Dry Ingredients: In a medium bowl, whisk together the all-purpose flour, baking powder, and salt. Set this mixture aside.
- Combine Wet Ingredients: In a large bowl, whisk the eggs, yogurt, granulated sugar, vegetable oil, and vanilla extract until smooth and well blended. If you like, add fresh lemon zest for extra flavor.
- Fold Dry into Wet: Gradually fold the dry flour mixture into the wet ingredients just until combined, being careful not to overmix to maintain the cake’s fluffy texture.
- Pour Batter and Smooth: Pour the batter into the greased cake pan and smooth the top evenly with a spatula.
- Bake the Cake: Bake in the preheated oven for 30 to 35 minutes or until the cake turns golden and a toothpick inserted in the center comes out clean.
- Cool the Cake: Let the cake cool in the pan for about 10 minutes, then transfer it onto a wire rack to cool completely to avoid sogginess.
- Serve: Serve the cake as is, or topped with powdered sugar or fresh berries for an added touch of sweetness and visual appeal.
Notes
- Ensure not to overmix the batter to keep the cake light and fluffy.
- You can substitute plain yogurt with Greek yogurt for a tangier flavor, but it may affect texture slightly.
- Adding lemon zest is optional but recommended for a fresh citrus twist.
- For a dairy-free version, use plant-based yogurt and oil alternatives, but note that texture may vary.
- Storage: Keep the cake in an airtight container at room temperature for up to 2 days or refrigerate for up to 4 days.


