“`html
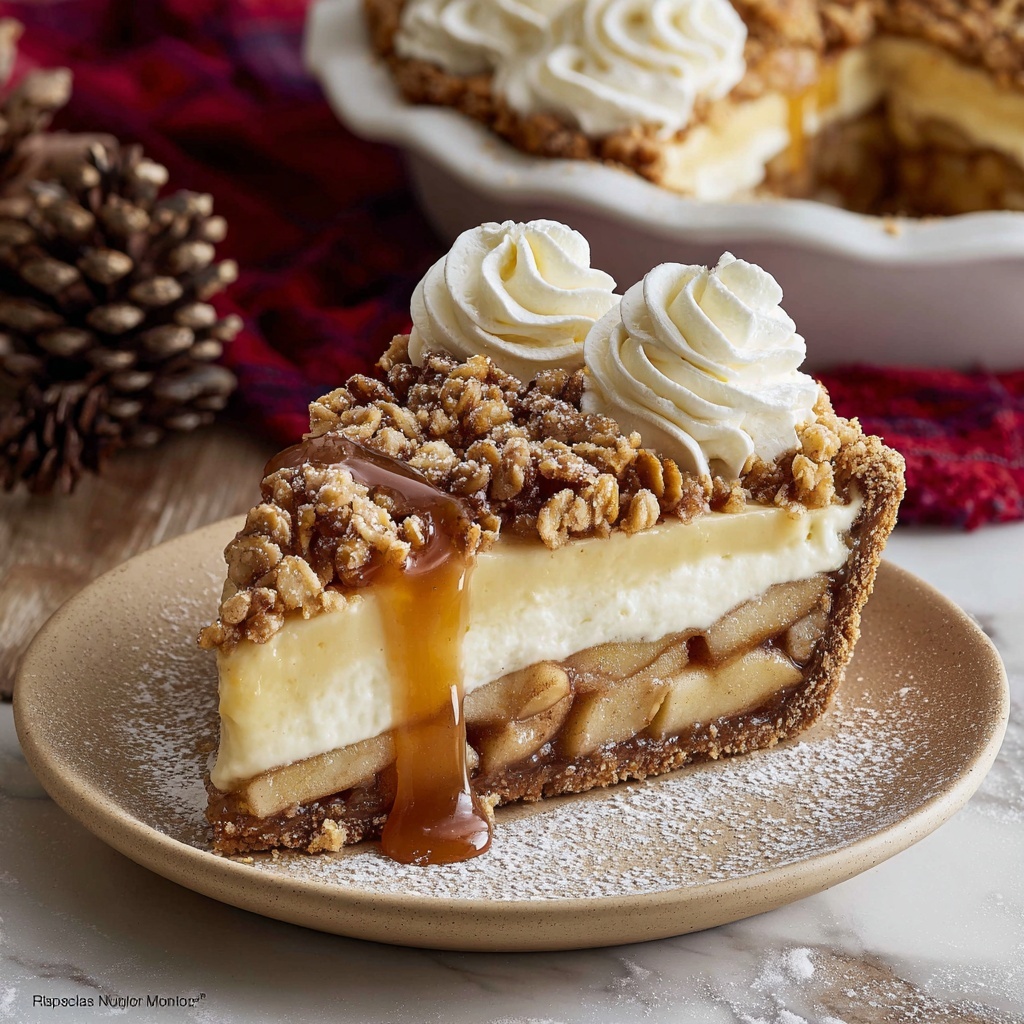
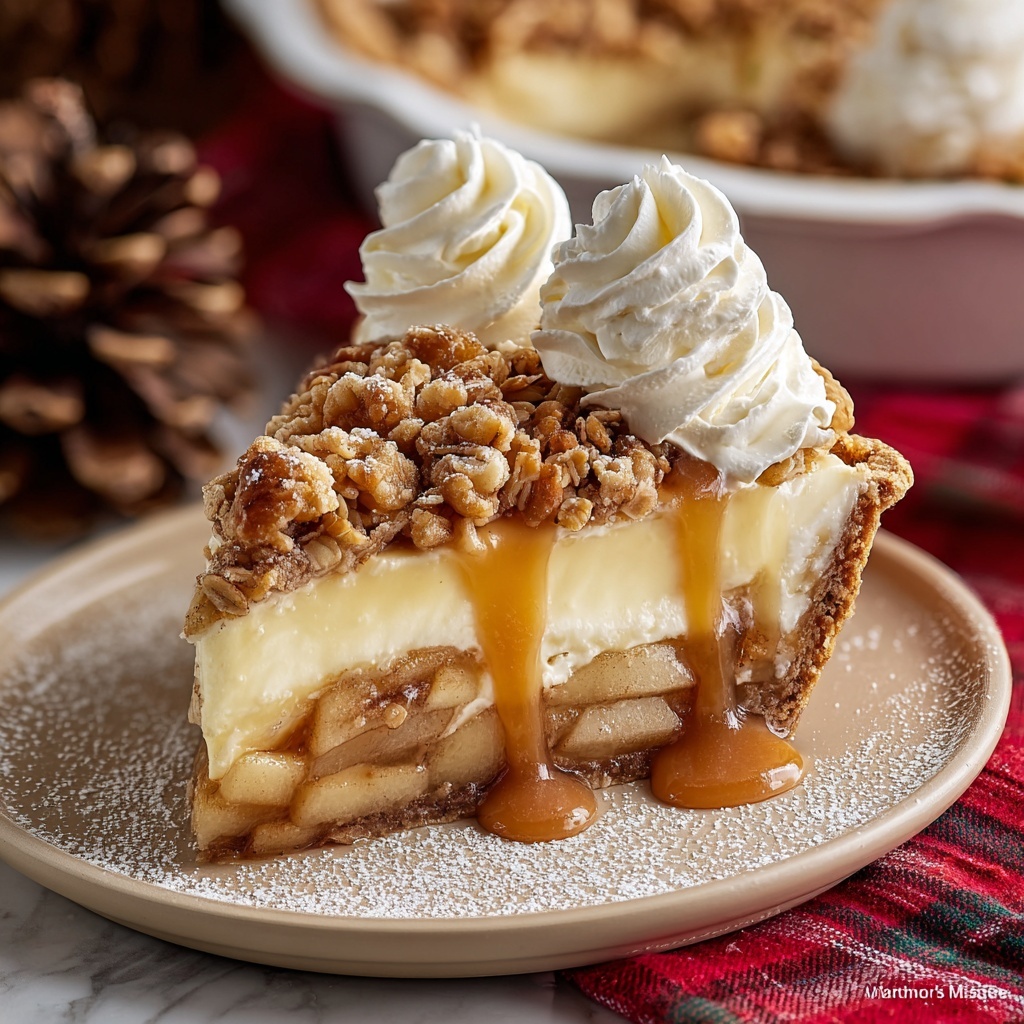
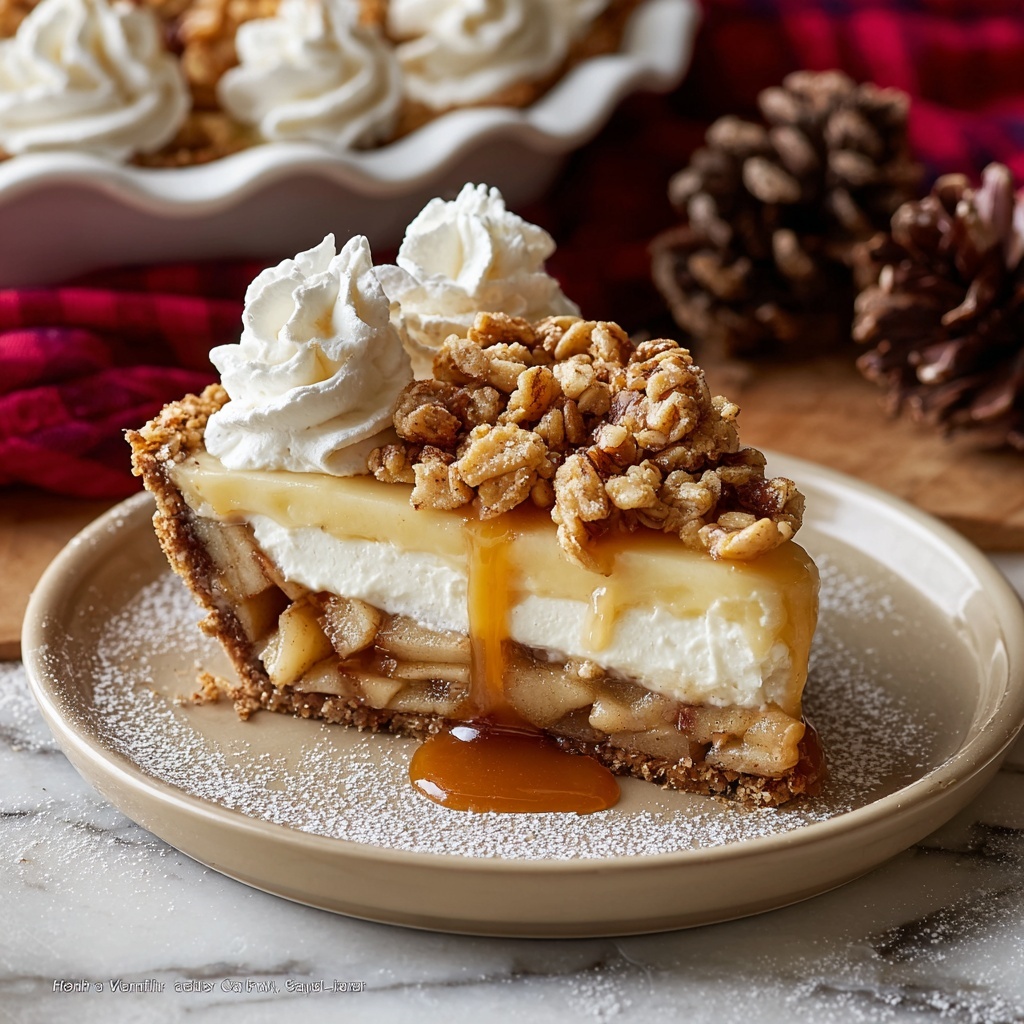
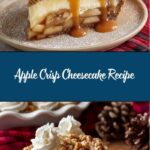
If you’re searching for a dessert that perfectly marries the cozy warmth of fall with creamy indulgence, this Apple Crisp Cheesecake Recipe is your new best friend. Imagine a buttery graham cracker crust, layered with velvety cheesecake, topped with tender cinnamon-spiced apples and a golden, crunchy crisp topping. It’s every comfort food lover’s dream come true, ideally balanced between tart and sweet, creamy and crumbly. Once you try this Apple Crisp Cheesecake Recipe, it’ll become a treasured staple for family gatherings, special occasions, or whenever you simply want to treat yourself with something spectacular.
Ingredients You’ll Need
Each ingredient in this Apple Crisp Cheesecake Recipe has been thoughtfully chosen to create layers of contrasting textures and flavors. From the buttery crust that supports the rich cheesecake filling to the cinnamon-kissed apples and crumbly crisp topping, these essentials come together to create pure magic.
- Graham cracker crumbs: Provide a buttery, crunchy base that holds the cheesecake perfectly.
- Granulated sugar: Used in multiple layers, it sweetens without overpowering the dish.
- Unsalted butter: Adds richness and helps bind both crust and crisp topping.
- Cream cheese: The star of the filling, delivering that luscious, smooth texture.
- Large eggs: Give structure and help the cheesecake set beautifully.
- Vanilla extract: Brings warmth and depth to the cheesecake layer.
- Chopped apples: Fresh and juicy, they add natural sweetness and a tender bite.
- Ground cinnamon: A spice that awakens the senses and complements the apples perfectly.
- All-purpose flour: Key in forming the crisp topping’s crumbly texture.
- Old-fashioned oats: Add a hearty chew and rustic crunch to the crisp topping.
- Brown sugar: Brings caramel notes that elevate the crisp topping’s flavor.
How to Make Apple Crisp Cheesecake Recipe
Step 1: Preparing your oven and pan
Start by setting your oven to 350°F (175°C) and greasing a 9-inch springform pan. This simple but crucial step ensures that your cheesecake won’t stick and will come out perfectly shaped with clean edges.
Step 2: Crafting the crust
Mix the graham cracker crumbs, granulated sugar, and melted butter until the mixture resembles wet sand. Press this firmly into the bottom of the prepared pan. This crust forms the crunchy, buttery foundation that supports the creamy layers above.
Step 3: Making the cheesecake filling
Beat the softened cream cheese with granulated sugar until irresistibly smooth and creamy. Add eggs one at a time, ensuring each is fully incorporated before adding the next, then mix in the vanilla extract. Pour this luscious filling gently over the crust, setting the stage for the next layer of flavor.
Step 4: Preparing the apple topping
Toss the peeled and chopped apples with sugar and ground cinnamon. This mixture will provide tender, fragrant fruit that contrasts beautifully with the creamy cheesecake. Spread it evenly over the cheesecake layer for that classic autumn vibe.
Step 5: Making and adding the crisp topping
Combine the flour, oats, brown sugar, cinnamon, and softened butter, mixing until a crumbly texture forms. Think of this as the crunchy crown on your cheesecake masterpiece. Sprinkle it generously over the apple layer to create the perfect balance of soft and crispy.
Step 6: Baking and cooling
Bake your cheesecake for 60 to 70 minutes, covering it loosely with foil if the top starts to brown too quickly. It should be almost set with a slight wobble in the center — that’s when it’s perfect. After baking, allow it to cool completely, then chill in the refrigerator for at least 4 hours to let all those flavors set and marry beautifully.
How to Serve Apple Crisp Cheesecake Recipe
Garnishes
Enhance your dessert’s presentation and flavor with a dollop of whipped cream or a scoop of vanilla ice cream. A light dusting of powdered sugar or a sprinkle of chopped toasted pecans adds an elegant and tasty touch that will impress every guest.
Side Dishes
Serve this cheesecake alongside warm spiced tea or freshly brewed coffee to complement its sweetness. Fresh fruit like sliced pears or a cranberry compote can add a refreshing contrast and a burst of color to your dessert plate.
Creative Ways to Present
For a stunning showstopper, cut the cheesecake into neat slices and drizzle with caramel sauce or cinnamon honey. You can also serve individual portions in small mason jars, layering the apple crisp and cheesecake filling for a rustic yet chic look perfect for parties.
Make Ahead and Storage
Storing Leftovers
Wrap any leftover Apple Crisp Cheesecake Recipe tightly with plastic wrap or keep it in an airtight container in the refrigerator. It will stay fresh and delicious for up to 4 days, allowing you to enjoy this treat well beyond the initial serving.
Freezing
To freeze, cover the chilled cheesecake tightly with plastic wrap and then aluminum foil. This will keep it safe in the freezer for up to 2 months. When ready to serve, thaw it overnight in the refrigerator for best texture and flavor.
Reheating
While cheesecake is typically enjoyed chilled, if you prefer a slightly warmed slice, gently heat it in a low oven (about 300°F) for 5-10 minutes. This brings a beguiling softness to the apples and crisp topping while keeping the cheesecake just right.
FAQs
Can I use a different type of apple for this recipe?
Absolutely! While tart apples like Granny Smith work wonderfully, feel free to experiment with Fuji, Honeycrisp, or Gala for a sweeter, milder flavor in your Apple Crisp Cheesecake Recipe.
Is it necessary to use a springform pan?
Using a springform pan is highly recommended because it makes removing the cheesecake easy and helps maintain the beautiful layers without damage. If you don’t have one, a regular cake pan with removable sides can work but handle with extra care.
Can this recipe be made gluten-free?
Yes, by replacing the graham cracker crumbs and all-purpose flour with gluten-free alternatives, you can enjoy a delicious gluten-free version of this Apple Crisp Cheesecake Recipe without sacrificing texture or taste.
How do I know when the cheesecake is done baking?
The cheesecake should be mostly set with a slight jiggle in the center when gently shaken. The edges will be firm and slightly pulling away from the pan. Avoid overbaking to keep it creamy and smooth.
Can I prepare this recipe in advance for a party?
Definitely! The Apple Crisp Cheesecake Recipe actually tastes better after resting because the flavors meld beautifully. Make it a day ahead, keep it chilled, and serve at room temperature or slightly warmed for optimal enjoyment.
Final Thoughts
There is something truly special about the Apple Crisp Cheesecake Recipe that makes every bite feel like a warm hug on a cool day. It’s the kind of dessert that brings people together and creates memories around the table. Don’t wait for a special occasion—grab your ingredients, dive into this recipe, and treat yourself and your loved ones to a truly unforgettable dessert experience.
“`
Print
Apple Crisp Cheesecake Recipe
- Prep Time: 30 minutes
- Cook Time: 1 hour 10 minutes
- Total Time: 4 hours 40 minutes
- Yield: 12 servings
- Category: Dessert
- Method: Baking
- Cuisine: American
Description
Delight in the rich and creamy Apple Crisp Cheesecake that perfectly combines a smooth cheesecake filling with a sweet apple topping and a crunchy crisp crust. This dessert features a buttery graham cracker base, velvety cream cheese layers, spiced apple slices, and a luscious oat and cinnamon streusel topping baked to golden perfection. Ideal for gatherings or a cozy treat, this cheesecake blends classic fall flavors with traditional creamy texture.
Ingredients
Crust:
- 2 cups graham cracker crumbs
- 1/4 cup granulated sugar
- 1/2 cup unsalted butter, melted
Cheesecake Filling:
- 3 packages (8 oz each) cream cheese, softened
- 1 cup granulated sugar
- 3 large eggs
- 1 teaspoon vanilla extract
Apple Topping:
- 3 cups peeled and chopped apples (about 3 large apples)
- 1/2 cup granulated sugar
- 1 teaspoon ground cinnamon
Crisp Topping:
- 1/2 cup all-purpose flour
- 1/2 cup old-fashioned oats
- 1/2 cup brown sugar
- 1/2 teaspoon ground cinnamon
- 1/4 cup unsalted butter, softened
Instructions
- Preheat Oven and Prepare Pan: Preheat your oven to 350°F (175°C) and grease a 9-inch springform pan to ensure the cheesecake doesn’t stick and is easy to remove after baking.
- Make the Crust: In a bowl, mix the graham cracker crumbs, 1/4 cup granulated sugar, and melted butter until well combined. Press this mixture firmly into the bottom of the prepared springform pan to form an even crust layer.
- Prepare the Cheesecake Filling: Using a mixer, beat the softened cream cheese and 1 cup granulated sugar together until the mixture is smooth and creamy. Blend in the eggs one at a time, ensuring they’re fully incorporated before adding the next. Stir in the vanilla extract. Pour this filling evenly over the graham cracker crust in the pan.
- Add the Apple Topping: In a separate bowl, combine the peeled and chopped apples with 1/2 cup granulated sugar and 1 teaspoon ground cinnamon. Mix until the apples are thoroughly coated. Spread this apple mixture evenly over the cheesecake filling layer.
- Prepare and Add the Crisp Topping: Combine the flour, oats, brown sugar, 1/2 teaspoon ground cinnamon, and softened butter in a bowl. Mix until the ingredients form a crumbly texture. Evenly sprinkle this crisp topping over the apples to add a crunchy, sweet finish.
- Bake the Cheesecake: Place the springform pan in the preheated oven and bake for 60–70 minutes, or until the cheesecake is mostly set but still slightly jiggly in the center. If the crisp topping starts to brown too much during baking, cover the pan loosely with aluminum foil to prevent burning.
- Cool and Chill: Once baked, remove the cheesecake from the oven and let it cool completely at room temperature. After cooling, refrigerate the cheesecake for at least 4 hours or preferably overnight to allow it to fully set and develop flavors before serving.
Notes
- Use a springform pan to easily release the cheesecake without damaging it.
- Make sure the cream cheese is softened to prevent lumps in the filling.
- Covering the top with foil during baking helps avoid over-browning of the crisp topping.
- Chilling the cheesecake thoroughly improves slice integrity and flavor melding.
- If apples are very juicy, drain excess liquid to avoid a soggy topping.
- For added flavor, use tart apples such as Granny Smith.

