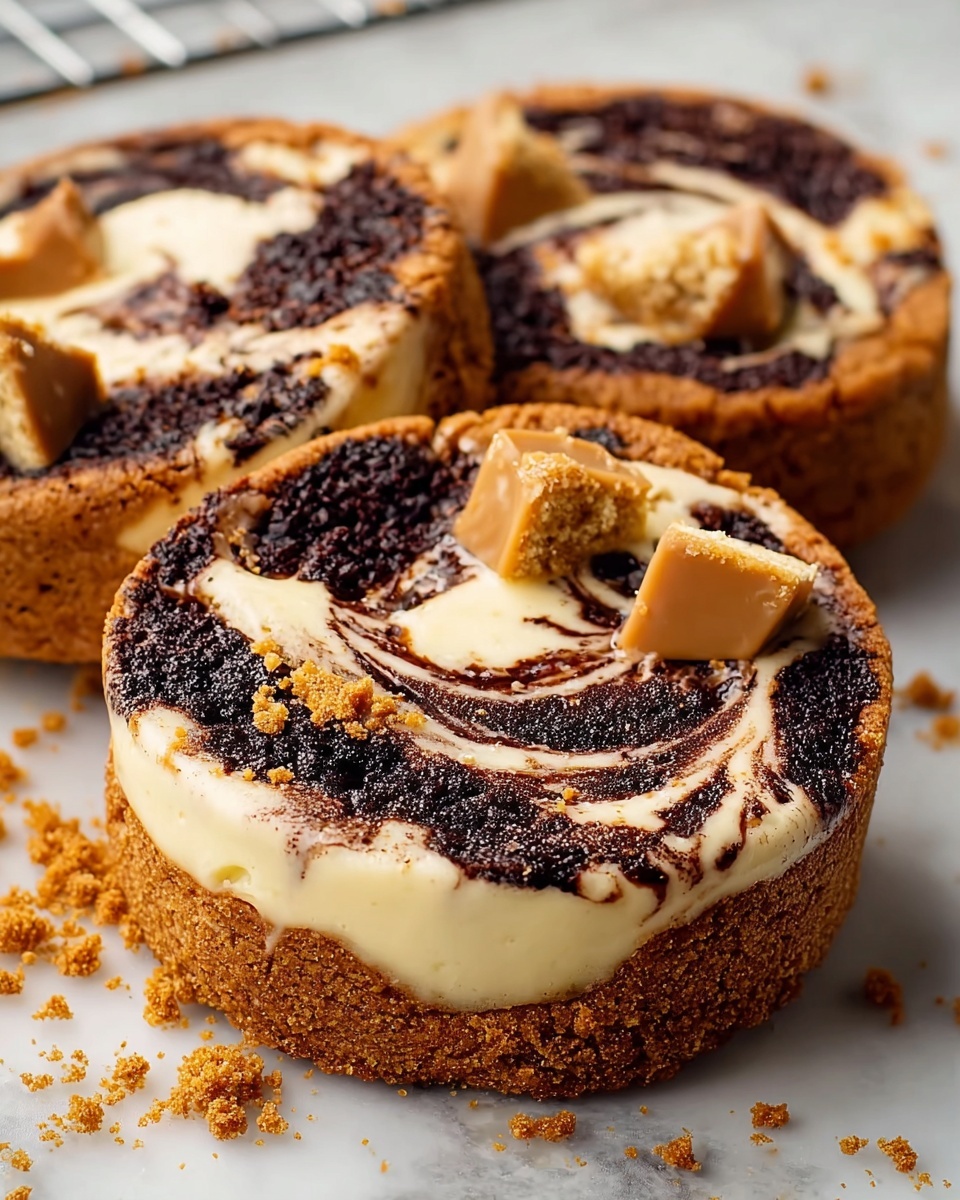
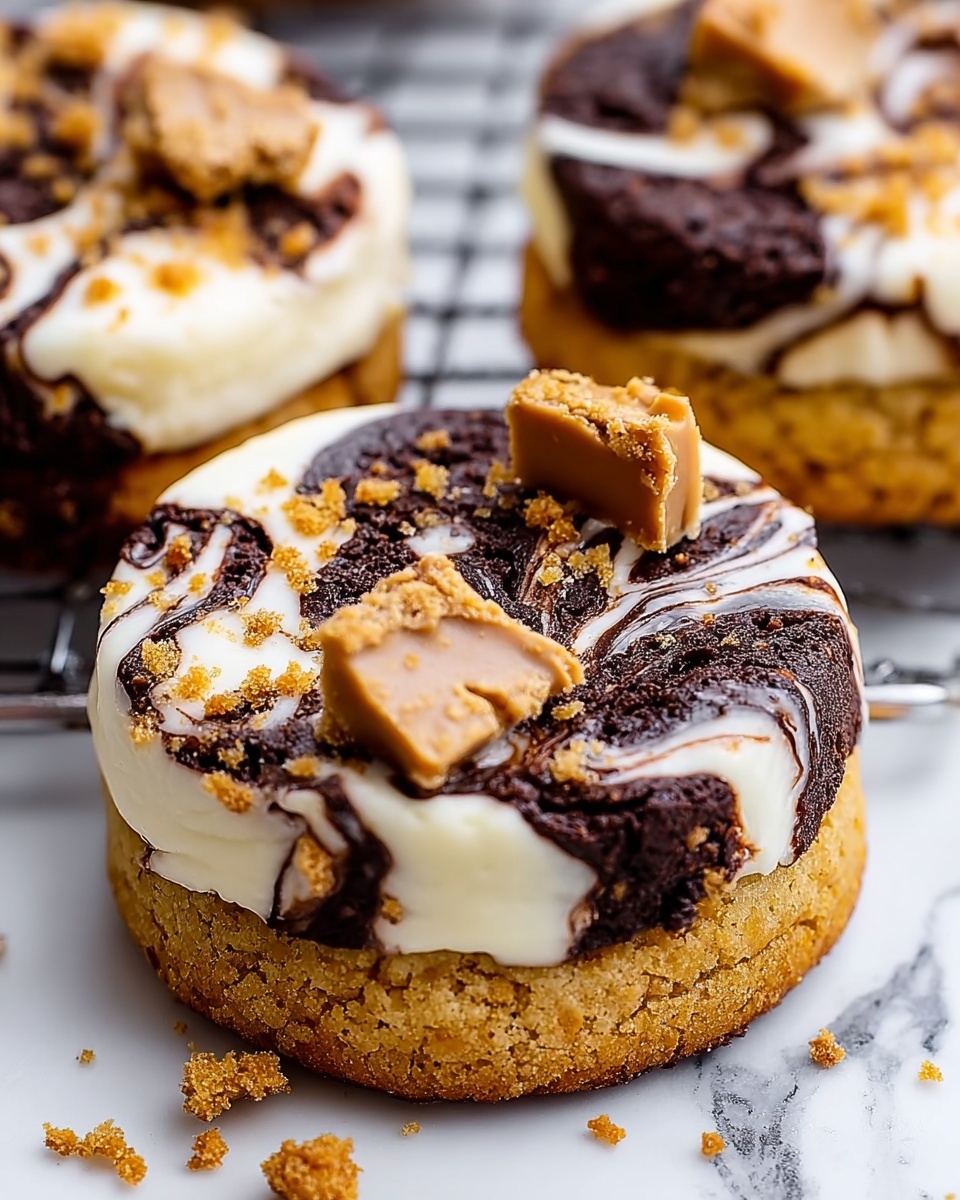
If you have a soft spot for cookies that blend rich, nutty flavors with a swirled chocolate delight, you are absolutely going to adore this Toasted Milk Marble Cookies Recipe. It’s a charming twist on classic cookies that highlights the deep, toasty notes of browned butter and baked milk powder alongside velvety pockets of milk and white chocolate. Each bite offers a gorgeous marble of dark and light dough with a surprise of molten white chocolate in the middle, making these cookies as beautiful as they are irresistibly comforting. Whether you’re baking for a cozy night in or gifting something special, this recipe is a keeper that brings both charm and warmth to the cookie jar.
Ingredients You’ll Need
This recipe uses a deceptively simple set of ingredients, each one playing a vital role in developing the complex flavors and tender texture of these cookies. From the creamy butter to the carefully toasted milk powder, every component comes together to create that iconic marble look and rich taste that make the Toasted Milk Marble Cookies Recipe so memorable.
- White chocolate spread: Freezing this creates the molten center inside the cookies for a delightful surprise.
- Unsalted butter: Browning the butter adds a deep, nutty flavor that elevates the entire cookie.
- Milk powder: Toasted to bring out a warm, caramelized note that’s essential to the cookie’s flavor profile.
- Caster sugar: Provides sweetness and helps with the cookie’s tender crumb.
- Light brown sugar: Adds moisture and a hint of molasses flavor for depth.
- Egg yolks: Contribute richness and a smooth texture to the dough.
- Semi-skimmed milk: Helps bind the ingredients without making the dough too heavy.
- Dark chocolate powder: Creates the deeply chocolatey portion of the marble dough.
- Plain flour (for dark chocolate dough): Forms the structure of the dough, giving it that perfect chew.
- Baking powder, bicarbonate of soda, cornstarch (for dark chocolate dough): These leavening agents combine to provide rise and tender crumb.
- White chocolate (chopped): Folded into the dark dough to add luscious bursts of sweetness.
- Plain flour (for toasted milk dough): Essential for creating the lighter dough contrast in the marble.
- Baking powder, bicarbonate of soda, cornstarch (for toasted milk dough): Ensure these cookies have a delicate yet satisfying bite.
- Milk chocolate (chopped): Mixed into the toasted dough for creamy chocolate pockets.
How to Make Toasted Milk Marble Cookies Recipe
Step 1: Prepare White Chocolate Centers
Start by scooping the white chocolate spread onto a parchment-lined baking sheet — about 12 tablespoons distributed evenly. Pop this in the freezer for 1 to 2 hours until it hardens completely. These frozen centers will help create that gooey surprise in the middle of your cookies.
Step 2: Toast the Milk Powder
Preheat your oven to 100°C (212°F) and spread the milk powder evenly on a parchment-lined tray. Bake it for 10 to 15 minutes, stirring in between, until it turns a lovely golden shade. This toasting step is a real game-changer as it deepens the flavor and adds a buttery, caramel note that sets this recipe apart.
Step 3: Brown the Butter
In a saucepan over medium heat, melt the unsalted butter and watch closely as it foams and then turns a beautiful brown color, releasing a nutty aroma. This usually takes about 5 to 7 minutes. Once browned, transfer the butter to a bowl and let it cool slightly to prepare for mixing.
Step 4: Mix Wet Ingredients
Combine the browned butter with your toasted milk powder, caster sugar, and light brown sugar, creaming them together until smooth. Next, add the egg yolks one at a time, mixing well after each addition, then pour in the milk. This creates a rich, glossy base for your dough.
Step 5: Divide Dough for Marble Effect
Split your mixture equally into two bowls. This is where the magic of the marble comes in. Each bowl gets its own unique dry ingredients to build the contrasting flavors and colors.
Step 6: Make the Dark Chocolate Dough
In one bowl, sift together dark chocolate powder, 110g plain flour, baking powder, bicarbonate of soda, and cornstarch. Mix these into the wet mix, then fold in chopped white chocolate, adding bursts of creamy sweetness to the rich dough.
Step 7: Make the Toasted Milk Dough
In the other bowl, sift together 160g plain flour, baking powder, bicarbonate of soda, and cornstarch before mixing them into the wet ingredients. Fold in chopped milk chocolate for a luscious, smooth chocolate note that complements the toasted milk dough beautifully.
Step 8: Form Marble Cookie Balls
Using a scoop or spoon, alternate dollops of the two doughs to create a marbled swirl. Place a frozen white chocolate spread piece in the center of each portion, then roll it all gently into a ball. This step is key to getting that gorgeous visual and surprise chocolate center.
Step 9: Chill the Dough
Place your marble cookie balls on a parchment-lined tray and refrigerate them overnight. This chilling step helps the dough relax, which means better texture and shape retention during baking.
Step 10: Bake to Perfection
Preheat the oven to 180°C (350°F). Bake your chilled cookies for 12 to 15 minutes, just until the edges set and the centers look soft. Allow them to cool on the baking sheet briefly before transferring to a wire rack to finish cooling. The result is a tender, moist cookie with that signature marble look.
How to Serve Toasted Milk Marble Cookies Recipe

Garnishes
This recipe shines on its own, but a light dusting of powdered sugar or a drizzle of melted milk chocolate can add an elegant touch for special occasions. A sprinkle of flaky sea salt truly enhances the chocolate and butter flavors if you want a salty-sweet kick.
Side Dishes
Serve these cookies alongside a glass of cold milk, a warm cup of coffee, or a comforting mug of chai tea. The cozy toasted milk flavor in these cookies pairs beautifully with drinks that offer warmth and subtle spice, making snack time feel like a mini celebration.
Creative Ways to Present
Try stacking these marble beauties on a decorative platter for guests to admire the swirling patterns up close, or arrange them in clear jars layered with parchment paper for gifting. You can also break a few into chunks and sprinkle over vanilla ice cream for a decadent dessert twist.
Make Ahead and Storage
Storing Leftovers
Once fully cooled, store your Toasted Milk Marble Cookies Recipe cookies in an airtight container at room temperature. They stay fresh and soft for up to 5 days, perfect for nibbling throughout the week.
Freezing
You can freeze the baked cookies for up to 2 months. Just wrap them individually in plastic wrap and place them in a freezer-safe container or bag. Thaw at room temperature before serving for a just-baked taste.
Reheating
Warm your cookies gently in a low-temperature oven (around 150°C/300°F) for 5 minutes to bring back that soft, melty texture, or microwave them for 10-15 seconds if you’re in a hurry. The white chocolate center will be perfectly gooey again.
FAQs
What makes these cookies ‘toasted milk’ cookies?
The key is baking the milk powder until it turns golden and releases a caramelized, nutty flavor. Combined with browned butter, this brings a deep warmth to the dough that’s both unique and irresistible.
Can I use different types of chocolate for the dough?
Absolutely! While milk and white chocolates are used here to balance the flavors, feel free to experiment with dark or ruby chocolates for a different twist on the marbled effect.
Why do I need to freeze the white chocolate spread before baking?
Freezing the spread ensures it stays solid inside the cookie dough during baking, creating a gooey molten center that melts perfectly as the cookie bakes.
Can I make this recipe gluten-free?
To make it gluten-free, substitute the plain flour with a gluten-free all-purpose flour blend that includes xanthan gum for structure. Expect a similar texture and taste, but always test bake first!
How long does the dough need to chill before baking?
Overnight chilling is best to let the dough firm up for easy shaping. However, a minimum of 4 hours will also work if you’re short on time.
Final Thoughts
Nothing beats the cozy charm and sophisticated flavor of the Toasted Milk Marble Cookies Recipe. These cookies feel special yet are wonderfully approachable to bake and share. Once you try them, they’ll quickly become a treasured classic for your baking repertoire — I promise, they’re absolutely worth every step and second of the wait.
Print
Toasted Milk Marble Cookies Recipe
- Prep Time: 30 minutes (plus overnight chilling and freezing time)
- Cook Time: 22 minutes (10-15 minutes to toast milk powder + 12-15 minutes baking cookies)
- Total Time: Approximately 1 hour 30 minutes active time plus overnight chilling
- Yield: 20 servings (about 20 cookies)
- Category: Dessert
- Method: Baking
- Cuisine: International
Description
These Toasted Milk Marble Cookies are a delightful treat combining rich toasted milk flavor with a beautiful marbled effect of dark and milk chocolate doughs. Featuring a creamy white chocolate center frozen in place before baking, these cookies offer a perfect balance of nutty, buttery depth and luscious chocolate, ideal for a sophisticated yet comforting dessert.
Ingredients
White Chocolate Spread
- 12 tbsp white chocolate spread
Browned Butter and Toasted Milk Mixture
- 225g unsalted butter, cubed
- 100g milk powder
- 150g caster sugar
- 150g light brown sugar
- 3 large egg yolks
- 45ml semi-skimmed milk
Dark Chocolate Dough
- 50g dark chocolate powder
- 110g plain flour
- ¾ tsp baking powder
- ¼ tsp bicarbonate of soda
- 1½ tbsp cornstarch
- 100g white chocolate, chopped
Toasted Milk Dough
- 160g plain flour
- ¾ tsp baking powder
- ¼ tsp bicarbonate of soda
- 1½ tbsp cornstarch
- 100g milk chocolate, chopped
Instructions
- Freeze White Chocolate Spread: Scoop 12 tablespoons of white chocolate spread onto a parchment-lined baking sheet and freeze until solid, approximately 1–2 hours. This frozen center will add a creamy surprise inside the cookies.
- Toast Milk Powder: Preheat the oven to 100°C (212°F). Spread 100g milk powder evenly on a parchment-lined baking sheet. Bake for 10–15 minutes, stirring occasionally, until it turns lightly golden. Remove from oven and let cool completely to enhance its nutty flavor.
- Brown the Butter: In a saucepan over medium heat, melt the 225g unsalted butter. Continue cooking until it foams and then browns, releasing a nutty aroma, about 5–7 minutes. Immediately transfer to a bowl to cool slightly to avoid cooking the eggs later.
- Mix Sugars and Egg Yolks: Add the toasted milk powder, 150g caster sugar, and 150g light brown sugar to the browned butter. Cream these ingredients together thoroughly. Add 3 large egg yolks one at a time, mixing well after each addition to maintain a smooth batter. Stir in 45ml semi-skimmed milk until incorporated.
- Divide the Batter: Split the wet mixture evenly into two separate bowls for preparing the two dough variations.
- Prepare Dark Chocolate Dough: In the first bowl, sift together 50g dark chocolate powder, 110g plain flour, ¾ teaspoon baking powder, ¼ teaspoon bicarbonate of soda, and 1½ tablespoons cornstarch. Gently fold these dry ingredients into the wet batter. Incorporate 100g chopped white chocolate for texture and flavor contrast.
- Prepare Toasted Milk Dough: In the second bowl, sift together 160g plain flour, ¾ teaspoon baking powder, ¼ teaspoon bicarbonate of soda, and 1½ tablespoons cornstarch. Fold these into the wet mixture. Stir in 100g chopped milk chocolate evenly.
- Form Marble Dough Balls: Using a scoop or spoon, alternate spoonfuls of dark chocolate and toasted milk dough to create a marbled effect. Place one frozen piece of white chocolate spread into the center of each ball and enclose it by rolling into a smooth ball, ensuring the chocolate is sealed inside.
- Chill the Dough: Place the formed cookie balls on a parchment-lined tray and refrigerate overnight. This step helps flavors meld and the dough to firm up, preventing excessive spreading during baking.
- Bake the Cookies: Preheat the oven to 180°C (350°F). Bake the chilled cookie dough balls for 12–15 minutes, or until the edges are set but the centers remain soft. Allow cookies to cool on the baking sheet for a few minutes before transferring to a wire rack to cool completely.
Notes
- Freezing the white chocolate spread is crucial to avoid melting inside the dough during baking and to maintain a distinct melted center.
- Toasting the milk powder intensifies the flavor and adds a subtle nutty depth to the cookies.
- Browned butter adds a richer flavor than regular melted butter, so don’t skip the browning step.
- Overbaking will result in less soft cookie centers; remove them once edges are firm.
- Store baked cookies in an airtight container at room temperature for up to 5 days or freeze for longer storage.


