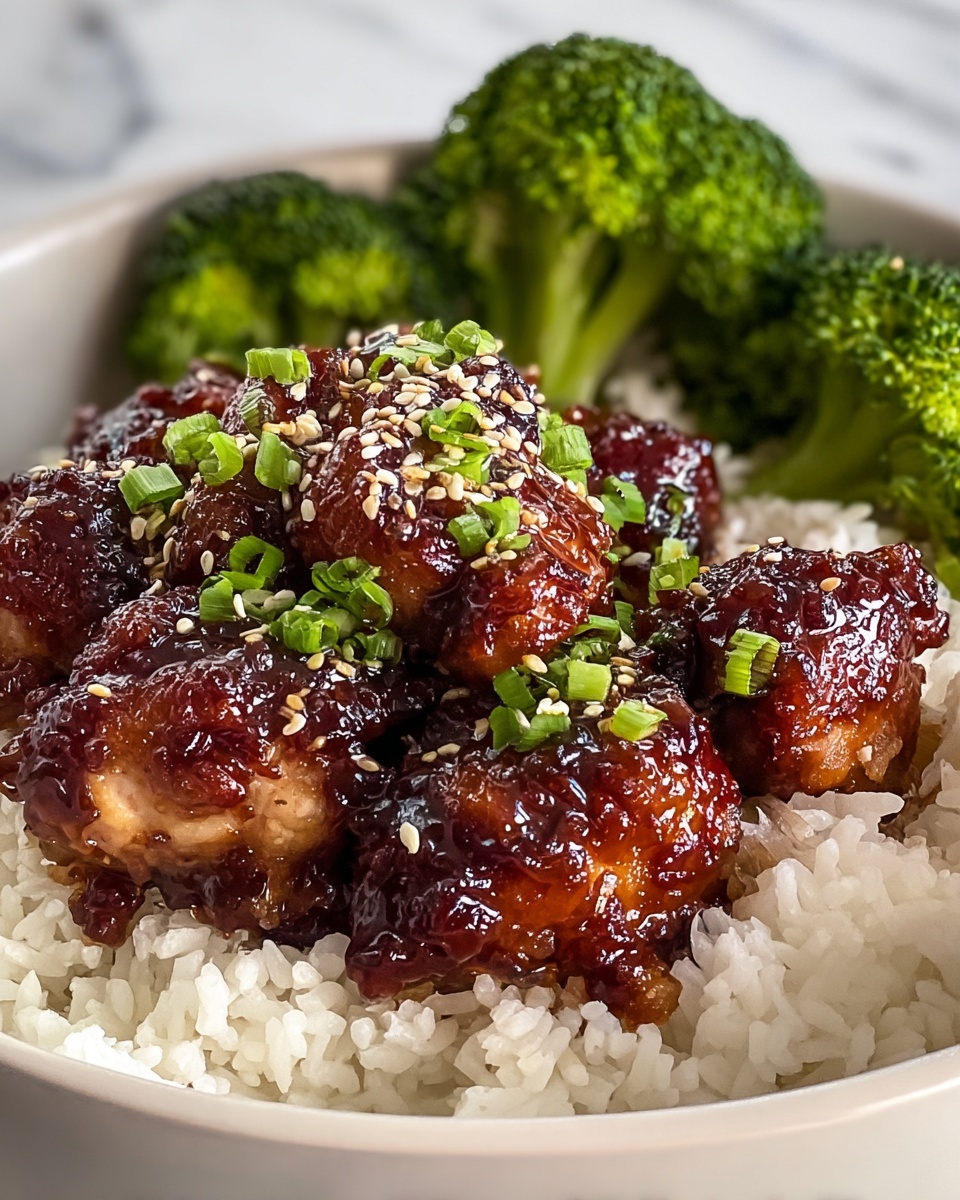
If you adore bold, savory flavors with just the right hint of sweetness, you’re going to fall head over heels for this Soy Garlic Chicken Thighs Recipe. It’s the kind of dish that feels both comforting and exciting, combining tender, juicy chicken thighs with a perfectly balanced sauce made from soy, honey, garlic, and a touch of vinegar. Every bite bursts with a delightful harmony of salty, sweet, and umami notes that will keep you coming back for more. Whether it’s a weeknight dinner or a special occasion, this recipe is a guaranteed crowd-pleaser that’s surprisingly simple to master.
Ingredients You’ll Need
Getting the flavors just right in this Soy Garlic Chicken Thighs Recipe is all about using simple, well-chosen ingredients. Each one plays a vital role in building the delicious layers of taste, texture, and color that make this dish unforgettable.
- Boneless, skinless chicken thighs: Tender and juicy, perfect for soaking up the flavors.
- Potato starch and all-purpose flour: Create a light, crispy coating that locks in moisture.
- Garlic powder: Adds a warm, aromatic depth to the coating.
- Salt and black pepper: Essential seasonings that enhance every bite.
- Neutral oil (vegetable or canola): Ideal for frying without overpowering the flavors.
- Chicken stock: Forms the savory base for the sauce with rich, meaty notes.
- Honey: Brings a subtle sweetness that balances the soy and garlic.
- Rice vinegar: Adds a bright, tangy contrast to the sweet elements.
- Dark soy sauce: Provides deep umami and color.
- Cornstarch: Thickens the sauce to a perfect glaze-like consistency.
- Green onions (green parts only): Deliver a fresh, slightly sharp finish.
- Sesame seeds: Add a toasty crunch and nutty flavor as the final touch.
How to Make Soy Garlic Chicken Thighs Recipe
Step 1: Prepare the sauce
Start by whisking together chicken stock, honey, rice vinegar, dark soy sauce, and cornstarch in a bowl. This mix is the heart of your sauce, packing in bold flavors that will transform the chicken. Setting it aside lets the ingredients marry while you prep the chicken.
Step 2: Prep the chicken
Dry the chicken thighs thoroughly with a paper towel. This step is key for achieving a crisp crust. A damp surface will steam rather than fry, so don’t skip this.
Step 3: Coat the chicken
Combine the potato starch, all-purpose flour, garlic powder, salt, and black pepper in a shallow dish. Coat each chicken thigh lightly but evenly in this mixture, creating a delicate crust that crisps up beautifully in the pan.
Step 4: Fry the chicken
Heat the neutral oil over medium-high heat in a large frying pan, then add the chicken thighs. Cook each side for about 7 minutes until golden brown and cooked through. The sizzle while cooking and that golden crust are what make this dish irresistible.
Step 5: Sauté aromatics
Remove the chicken and set aside. In the same pan, sauté minced garlic, the white parts of the green onions, and red chili flakes for around 3 minutes until the garlic turns golden and fragrant, infusing the oil with incredible flavor.
Step 6: Finish the sauce and coat the chicken
Pour your prepared sauce into the pan with the aromatics, cooking for about a minute until it thickens into a luscious glaze. Toss the chicken back into the pan, coating each piece generously in the silky sauce. Let it cook for an additional 5 minutes so every bite bursts with flavor.
Step 7: Garnish and serve
Top the chicken with chopped green onions and toasted sesame seeds for that perfect pop of color, flavor, and texture before serving.
How to Serve Soy Garlic Chicken Thighs Recipe
Garnishes
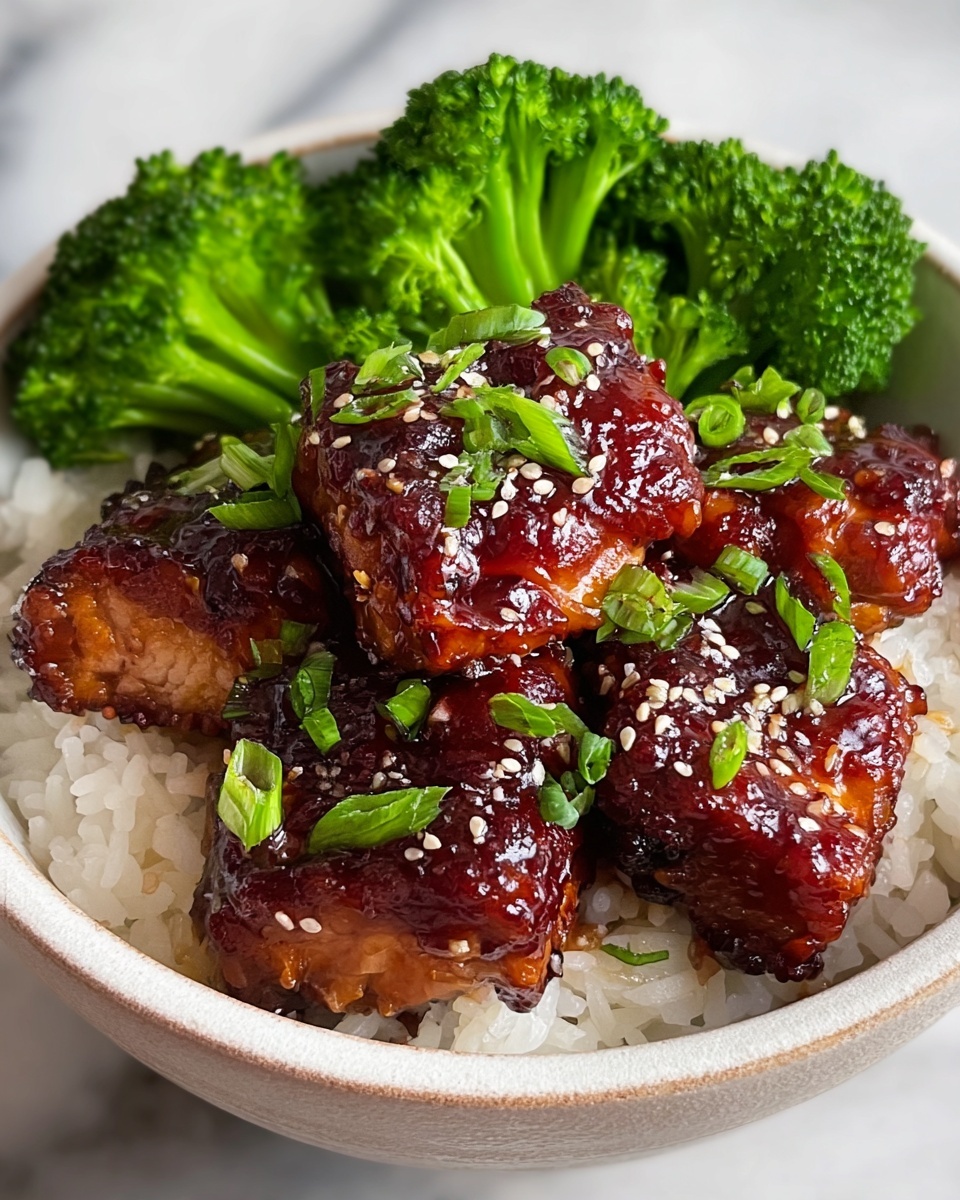
Finishing touches like fresh green onions and crunchy sesame seeds bring brightness and a nutty contrast to the rich sauce. These simple garnishes elevate the dish visually and flavor-wise, making each plate look and taste restaurant-quality.
Side Dishes
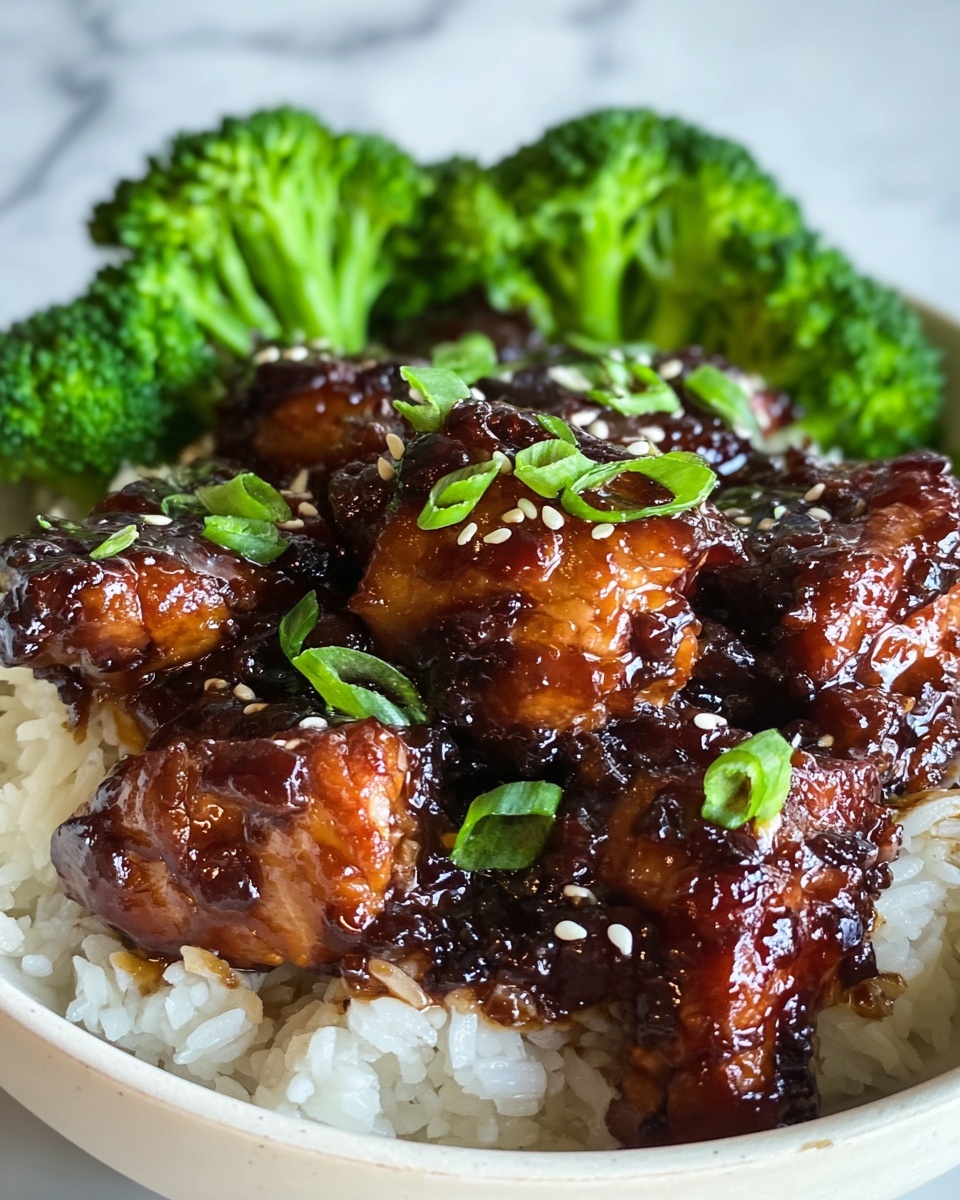
This Soy Garlic Chicken Thighs Recipe pairs beautifully with fluffy steamed rice to soak up all that delicious sauce, along with lightly stir-fried or steamed veggies like broccoli, bok choy, or snap peas for freshness and crunch. The delicate balance of sides supports the bold main flavors perfectly.
Creative Ways to Present
For a fun twist, serve this chicken sliced over a bed of noodles or use it to top a crisp Asian-inspired salad featuring cabbage and carrots. You can also pile it onto a rice bowl with avocado slices and pickled radish for a colorful, satisfying meal that’s perfect for casual lunches or dinners.
Make Ahead and Storage
Storing Leftovers
Allow any leftover chicken to cool before transferring it to an airtight container. Stored properly in the refrigerator, it will keep well for up to 3 days, maintaining its flavor and tenderness.
Freezing
If you want to save this Soy Garlic Chicken Thighs Recipe for later, freeze the cooked chicken in airtight containers or heavy-duty freezer bags. It’s best consumed within 2 months for optimal taste and texture. Just thaw overnight in the fridge before reheating.
Reheating
Reheat leftovers gently in a skillet over medium heat to keep the crust crispy and the sauce glossy. Microwaving is convenient but may soften the crust slightly. Adding a splash of water or chicken stock while reheating helps maintain the saucy consistency.
FAQs
Can I use chicken breasts instead of thighs?
While chicken breasts can be used, thighs are ideal for this Soy Garlic Chicken Thighs Recipe because they stay juicier and more flavorful, especially when coated and pan-fried. Breasts might dry out more easily during cooking.
Is potato starch necessary?
Potato starch is preferred for its light, crispy texture, but if unavailable, cornstarch makes a decent substitute. The starch helps create that perfect crust which balances beautifully with the saucy coating.
How spicy is this recipe?
This recipe has a gentle warmth from red chili flakes when sautéing the aromatics, but it’s not overly spicy. You can adjust the amount of chili flakes to make it milder or kick it up for more heat, according to your taste.
Can I prepare this recipe gluten-free?
Yes! Substitute the all-purpose flour with a gluten-free flour blend and use tamari or a gluten-free soy sauce. Make sure the chicken stock or bouillon you use is also gluten-free for the best results.
How do I make the sauce thicker?
The sauce thickens thanks to the cornstarch, but if you’d like it thicker, simply add a bit more cornstarch dissolved in water while cooking the sauce, stirring constantly until you reach the desired consistency.
Final Thoughts
There’s something incredibly satisfying about making a dish like this Soy Garlic Chicken Thighs Recipe at home — it’s flavorful, comforting, and a little bit special all at once. Whether you’re cooking for your family or treating friends, it’s bound to become a beloved favorite in your recipe rotation. So don’t hesitate: grab your ingredients, follow these steps, and enjoy every delicious bite of this wonderful meal!
Print
Soy Garlic Chicken Thighs Recipe
- Prep Time: 10 minutes
- Cook Time: 30 minutes
- Total Time: 40 minutes
- Yield: 4 servings
- Category: Main Course
- Method: Frying
- Cuisine: Asian
Description
This Soy Garlic Chicken Thighs recipe features juicy, golden-brown boneless chicken thighs coated in a flavorful garlic-infused sauce with a perfect balance of honey sweetness, soy umami, and tangy rice vinegar. Crispy on the outside and tender on the inside, these chicken thighs are complemented by a rich, thickened sauce and garnished with fresh green onions and sesame seeds. Ideal for a quick weeknight dinner, served best with steamed rice and vegetables.
Ingredients
Chicken and Coating
- 1 lb boneless, skinless chicken thighs
- 3 tablespoons potato starch
- 3 tablespoons all-purpose flour
- 1 teaspoon garlic powder
- ½ teaspoon salt
- ½ teaspoon black pepper
- 3 tablespoons neutral oil (e.g., vegetable or canola oil) for frying
Sauce
- ½ cup chicken stock (or water with chicken bouillon)
- 3 tablespoons honey
- 1 tablespoon rice vinegar
- 1 tablespoon dark soy sauce
- 1 teaspoon cornstarch
Garnish
- Green onions (green parts only), chopped
- Sesame seeds
Instructions
- Prepare the sauce: In a bowl, combine chicken stock, honey, rice vinegar, dark soy sauce, and cornstarch. Mix well until fully blended and set aside for later use.
- Dry the chicken: Pat the chicken thighs dry thoroughly with paper towels to help the coating stick and to promote browning during frying.
- Mix coating ingredients: In a shallow dish, blend together potato starch, all-purpose flour, garlic powder, salt, and black pepper evenly.
- Coat chicken: Lightly dredge each chicken thigh in the flour mixture, ensuring each piece is evenly coated on all sides.
- Heat oil: Pour neutral oil into a large frying pan and heat over medium-high heat until shimmering but not smoking.
- Fry chicken: Add the coated chicken thighs to the hot pan and fry for about 7 minutes per side, or until golden brown and fully cooked through.
- Set chicken aside: Remove the cooked chicken from the pan and place on a plate to rest temporarily.
- Sauté aromatics: In the same pan, add minced garlic, the white parts of the green onions, and optionally red chili flakes. Sauté for 3 minutes until garlic turns golden and aromatic.
- Cook the sauce: Pour the prepared sauce mixture into the pan with the aromatics. Stir and cook for about 1 minute, allowing the sauce to thicken slightly.
- Add chicken to sauce: Return the chicken thighs to the pan, tossing them in the sauce to fully coat each piece.
- Simmer together: Let the chicken simmer in the sauce for an additional 5 minutes to meld the flavors and heat through.
- Garnish: Sprinkle chopped green onion greens and sesame seeds over the chicken before serving.
- Serve: Serve hot alongside steamed rice and your choice of vegetables for a complete meal.
Notes
- For a spicier version, add red chili flakes when sautéing garlic.
- You can substitute chicken stock with vegetable broth for a vegetarian broth base but keep in mind this will change the flavor slightly.
- To make the coating crispier, double dredge the chicken in the starch and flour mixture.
- Ensure the chicken is cooked to an internal temperature of 165°F (74°C) for safety.
- Store leftovers in an airtight container in the refrigerator for up to 3 days—reheat gently to avoid drying out.


