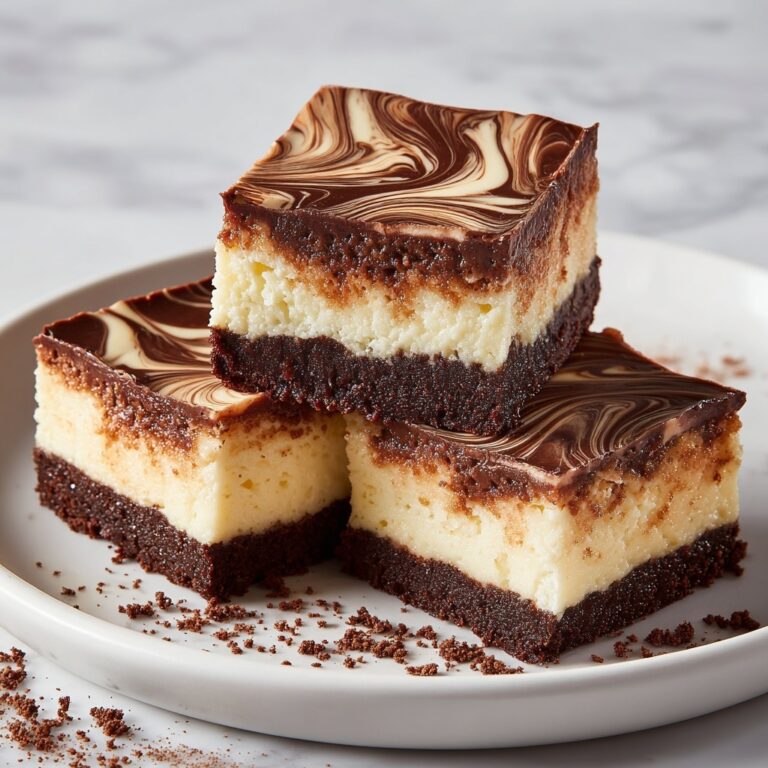
If you’ve ever dreamed of creating your own rich, creamy, and utterly irresistible frozen treat at home, this Classic Vanilla Ice Cream Recipe is your golden ticket. Packed with simple yet premium ingredients, it delivers that perfect balance of smooth texture and genuine vanilla flavor that beats any store-bought tub. From the fragrant vanilla bean infusion to the silky custard base, you’ll be amazed at how approachable and rewarding making ice cream from scratch can be. Whether it’s for a special celebration or a spontaneous sweet craving, this recipe will quickly become a cherished staple in your dessert repertoire.
Ingredients You’ll Need
The beauty of this Classic Vanilla Ice Cream Recipe lies in its simplicity. Every ingredient plays an essential role to build the creamy texture, the depth of flavor, and that perfectly sweet vanilla essence you’re after.
- Heavy cream (2 cups): Provides richness and luxurious creaminess that’s key to smooth ice cream.
- Whole milk (1 cup): Lightens the texture while balancing the fat content for the ideal mouthfeel.
- Granulated sugar (3/4 cup): Sweetens the custard and helps with the smooth consistency.
- Vanilla bean or pure vanilla extract (1 bean or 2 tsp extract): Delivers that unmistakable, aromatic vanilla flavor that defines the recipe.
- Large egg yolks (4): Emulsify the custard and create silkiness while thickening the base.
How to Make Classic Vanilla Ice Cream Recipe
Step 1: Prepare the Vanilla
Start by carefully splitting your vanilla bean and scraping out the tiny seeds—the true magic carriers of flavor in this recipe. Pop both the seeds and pod into a saucepan with your cream and milk. If you’re using vanilla extract instead, hold off adding it just yet; it comes later to preserve its bright aroma.
Step 2: Heat the Milk and Cream
Gently warm the cream, milk, and half of your sugar over medium heat, stirring often. You want it to simmer lightly but avoid boiling—it’s this slow warmth that infuses the vanilla beautifully into your base.
Step 3: Whisk the Egg Yolks
While your dairy warms, whisk together the egg yolks and remaining sugar until the mix becomes pale and slightly thick. This step is crucial to give your ice cream that luscious, velvety body.
Step 4: Temper the Eggs
To prevent scrambling, slowly pour about half a cup of your warm milk mixture into the egg yolks while whisking vigorously. This evens out temperatures, then return the yolk mixture to the saucepan to cook gently on low heat.
Step 5: Cook the Custard
Stir constantly and watch carefully as the custard thickens—between 170 and 175 degrees Fahrenheit (77 to 80 degrees Celsius) is your sweet spot. Once thickened, remove it from heat immediately; overcooking can lead to a grainy texture.
Step 6: Add Vanilla Extract
If you opted for vanilla extract, now’s the time to stir it in. Its fresh, floral notes will brighten up the custard, perfectly complementing the richer vanilla bean scent if you used a bean earlier.
Step 7: Chill the Custard
For the creamiest results, strain the custard through a fine sieve to remove the pod and any cooked egg bits. Cover with plastic wrap pressed onto the surface to prevent a skin from forming, then chill in your fridge for at least 4 hours or ideally overnight.
Step 8: Churn the Ice Cream
Once chilled, pour your custard into an ice cream maker and churn according to the manufacturer’s directions until it reaches a soft-serve consistency. If you don’t have a machine, no worries! Freeze it in a shallow dish, stirring every hour or so to break up ice crystals until creamy, about 3 to 4 hours.
Step 9: Freeze and Serve
Transfer your freshly churned or stirred ice cream into an airtight container and freeze for at least 2 hours to firm up. Then scoop generously, savor, and enjoy the indescribable joy of homemade vanilla ice cream.
How to Serve Classic Vanilla Ice Cream Recipe
Garnishes
The simple elegance of this Classic Vanilla Ice Cream Recipe pairs beautifully with a variety of garnishes. Fresh berries add bright tartness while a drizzle of warm caramel or chocolate sauce creates irresistible sweetness. For a bit of crunch, toasted nuts or crumbly cookies top it off perfectly.
Side Dishes
Classic vanilla ice cream isn’t just a standalone delight. It’s a showstopper alongside warm apple pie, gooey brownies, or a decadent chocolate cake. It’s also the perfect cool companion to grilled peaches or pineapple for a fresh, summery treat.
Creative Ways to Present
Think outside the bowl. Serve scoops in waffle cones for a fun handheld option, layer it between cake slices for a quick ice cream sandwich, or float a scoop atop a rich espresso for an elegant affogato. Your Classic Vanilla Ice Cream Recipe is versatile and ready to shine in countless imaginative presentations.
Make Ahead and Storage
Storing Leftovers
If you’re lucky enough to have leftovers, keep them in an airtight container to prevent ice crystals and freezer burn. Properly stored, your ice cream remains delicious and creamy for about two weeks.
Freezing
Freeze your ice cream at a consistent temperature and ensure the container seals tightly to preserve its texture. Avoid frequent thawing and refreezing, which can compromise creaminess and create ice chunks.
Reheating
Unlike savory leftovers, ice cream isn’t meant to be reheated. If it’s too hard to scoop after freezing, leave it out at room temperature for 5 to 10 minutes, and it’ll soften just enough to serve without losing that dreamy texture.
FAQs
Can I use vanilla extract instead of a vanilla bean?
Absolutely! Pure vanilla extract adds wonderful flavor and is a convenient choice. Just add it after cooking the custard to keep its bright notes intact.
What if I don’t have an ice cream maker?
No problem. You can still make this recipe by freezing it in a shallow dish and stirring every hour or so. It takes a bit longer but yields a delightful homemade ice cream.
Why do I need egg yolks in this recipe?
Egg yolks are crucial for creating a rich, silky custard base. They thicken the mixture and help prevent ice crystals, resulting in smooth, creamy ice cream.
How long should I chill the custard before churning?
At least 4 hours, but overnight chilling is best. The cold custard churns better and produces a creamier texture with less ice crystal formation.
Can I add mix-ins like chocolate chips or fruit? When should I add them?
Yes! Add mix-ins toward the end of churning so they incorporate evenly without sinking to the bottom. For no-churn versions, fold them in during the final stirring stage.
Final Thoughts
This Classic Vanilla Ice Cream Recipe is more than just a dessert—it’s a celebration of simple ingredients transformed into something absolutely magical. Once you taste the homemade difference, you’ll wonder why you ever settled for anything less. So grab your whisk and ice cream maker or trusty freezer dish, and treat yourself to this timeless, comforting delight. I promise, it’s worth every delicious scoop!
Print
Classic Vanilla Ice Cream Recipe
- Prep Time: 20 minutes
- Cook Time: 15 minutes
- Total Time: 4 hours 35 minutes
- Yield: 6 servings
- Category: Dessert
- Method: Stovetop
- Cuisine: American
Description
This Classic Vanilla Ice Cream recipe produces a rich, creamy homemade treat using simple ingredients like heavy cream, whole milk, sugar, eggs, and real vanilla. The custard base is gently cooked and chilled, then churned to create smooth, velvety ice cream perfect for any occasion.
Ingredients
Ice Cream Base
- 2 cups (500 ml) heavy cream
- 1 cup (250 ml) whole milk
- 3/4 cup (150 g) granulated sugar, divided
- 4 large egg yolks
Flavoring
- 1 vanilla bean (split and seeds scraped) or 2 tsp pure vanilla extract
Instructions
- Prepare the Vanilla: If using a vanilla bean, split it lengthwise and scrape out the seeds. Add both seeds and pod to a saucepan along with the cream and milk. If using vanilla extract, it will be added later in the process.
- Heat the Milk and Cream: In the saucepan with the cream, milk, and half of the sugar, heat over medium heat while stirring occasionally. Warm the mixture until it just begins to simmer, making sure it does not boil.
- Whisk the Egg Yolks: In a separate bowl, whisk the egg yolks together with the remaining sugar until the mixture becomes pale and slightly thickened. This prepares the yolks for tempering.
- Temper the Eggs: Slowly pour about 1/2 cup of the hot milk and cream mixture into the egg yolks while continuously whisking to gradually raise their temperature without scrambling. Then, pour this mixture back into the saucepan with the remaining milk and cream.
- Cook the Custard: Return the saucepan to low heat and stir constantly to prevent curdling. Cook until the custard thickens enough to coat the back of a spoon and reaches an internal temperature of 170–175°F (77–80°C). Immediately remove from heat to avoid overcooking.
- Add Vanilla Extract: If you are using vanilla extract instead of a vanilla bean, stir it into the custard now.
- Chill the Custard: Strain the custard through a fine mesh sieve into a clean bowl to remove vanilla pods and any cooked egg bits. Cover with plastic wrap directly on the surface to prevent a skin from forming. Refrigerate for at least 4 hours or overnight to fully chill and develop flavor.
- Churn the Ice Cream: Pour the chilled custard into an ice cream maker and churn according to the manufacturer’s instructions until it reaches a soft-serve consistency. For a no-churn method, freeze the mixture in a shallow container, stirring vigorously every hour for 3–4 hours to break up ice crystals.
- Freeze and Serve: Transfer the churned ice cream to an airtight container and freeze for an additional 2 or more hours to firm up. Scoop and enjoy your classic homemade vanilla ice cream!
Notes
- Using real vanilla beans provides the best flavor and beautiful specks in the ice cream, but pure vanilla extract works well too.
- Do not let the milk mixture boil to avoid curdling the custard.
- Ensure the custard temperature does not exceed 175°F to prevent scrambling the eggs.
- Covering the custard directly with plastic wrap while chilling prevents a skin from forming.
- If you don’t have an ice cream maker, the no-churn freezing and stirring method will still produce delicious results.
- Leftover ice cream can be stored in the freezer for up to one week for optimal freshness.

