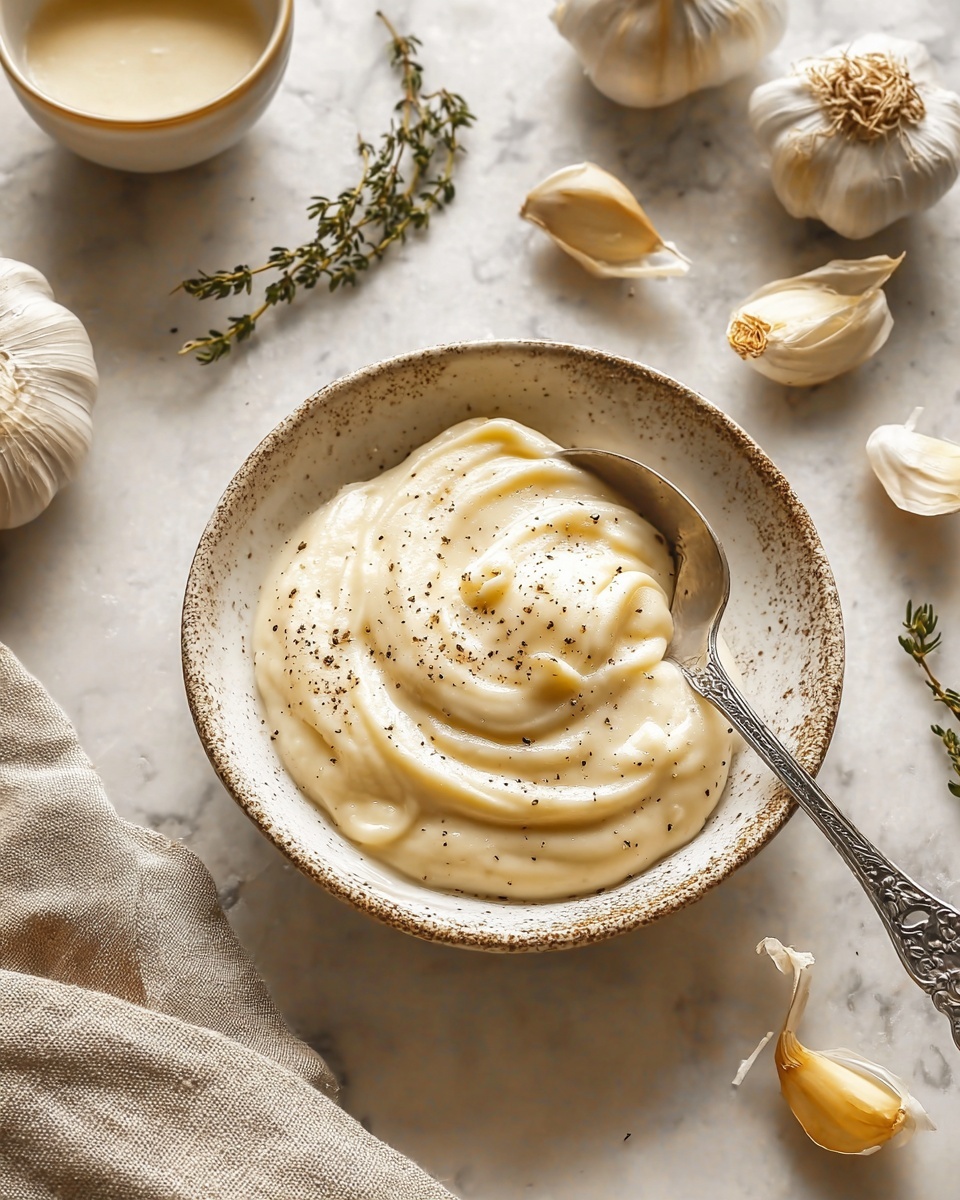
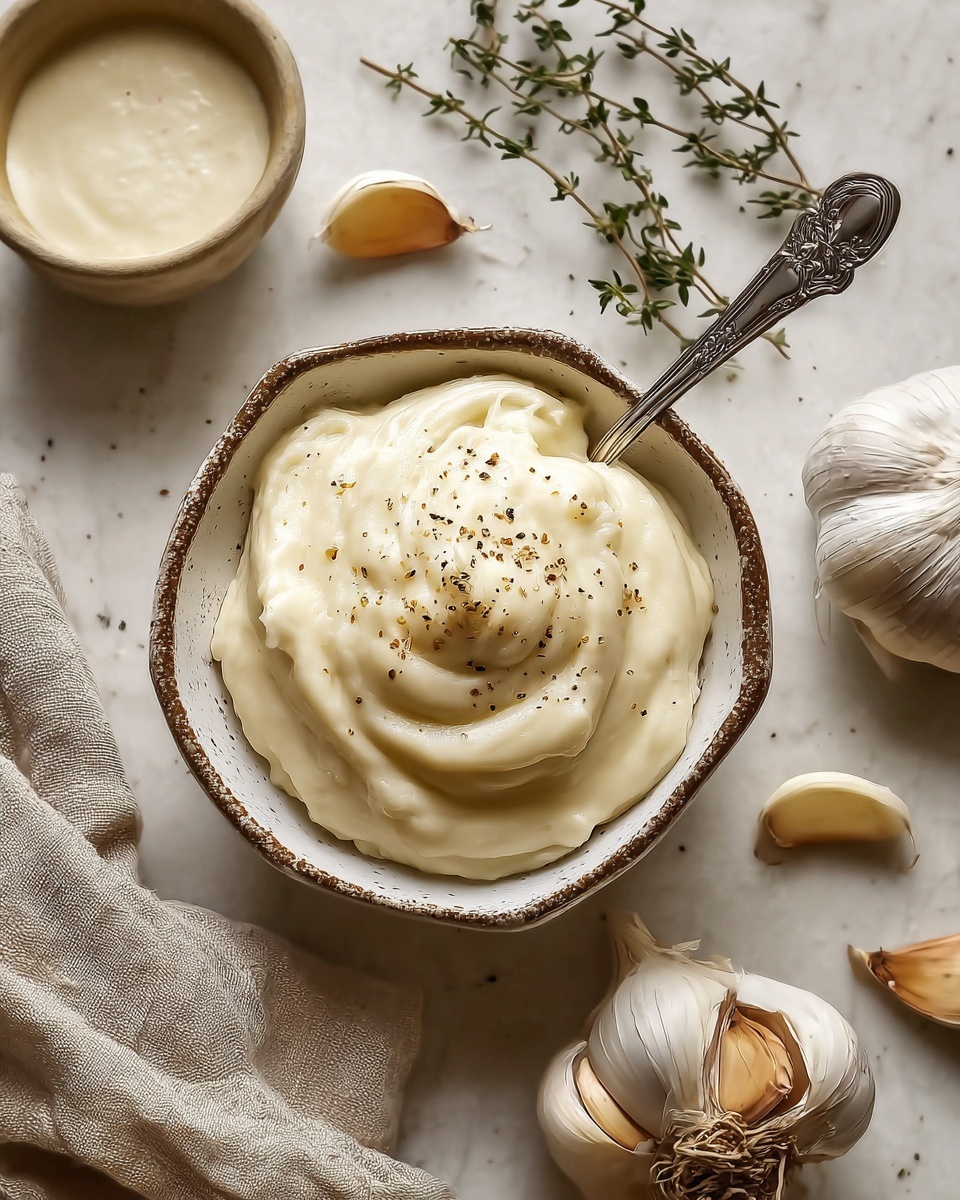
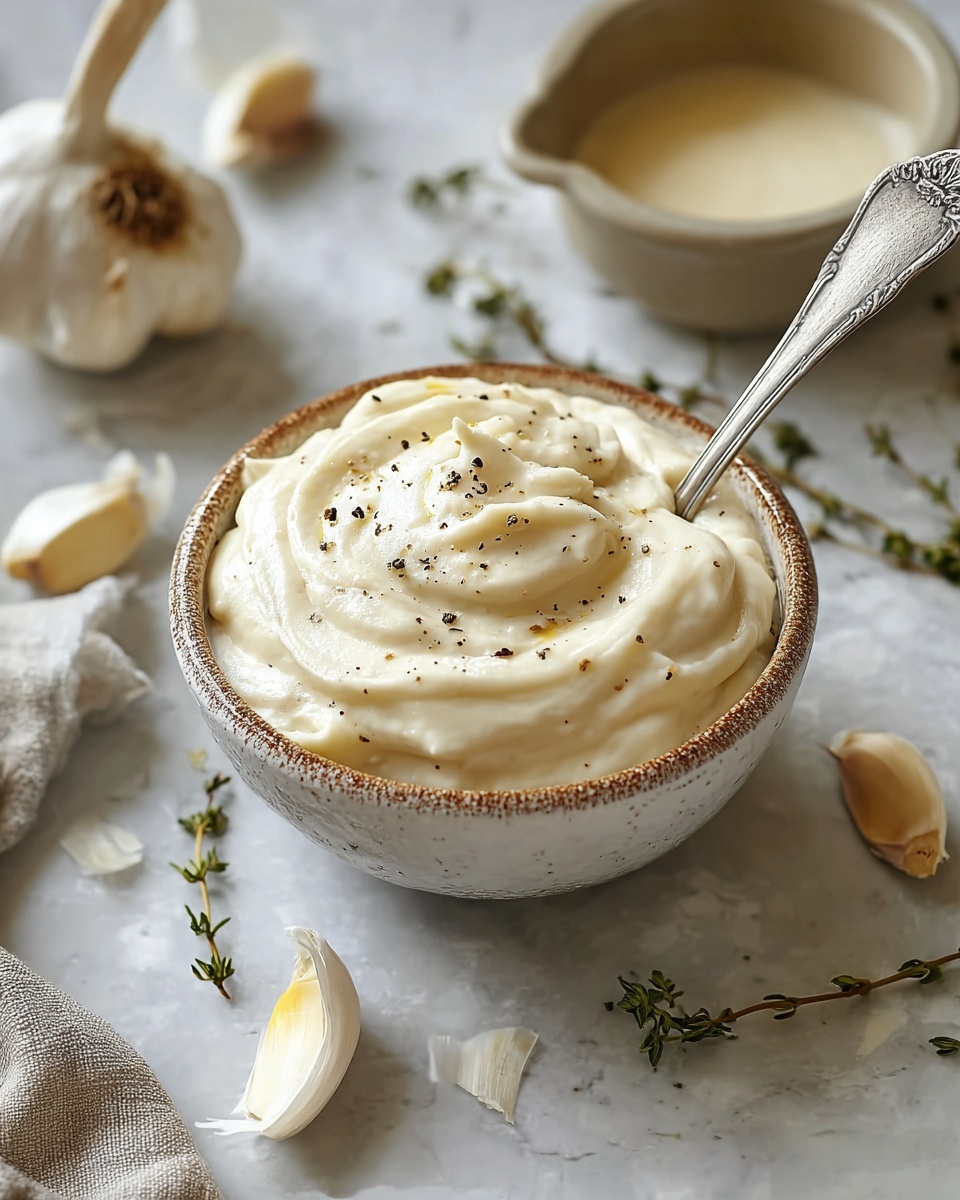
If you are looking for a luscious, flavorful sauce that elevates everything from fries to sandwiches, this Creamy Garlicky Aioli Recipe is exactly what you need in your kitchen arsenal. Rich and velvety with the perfect punch of garlic and a hint of citrusy brightness, it transforms ordinary dishes into extraordinary bites. Whether you want a dip to accompany your snacks or a spread to jazz up your sandwiches, this aioli brings a delightful depth of flavor with an irresistibly smooth texture that will have everyone reaching for more.
Ingredients You’ll Need
The secret to this Creamy Garlicky Aioli Recipe is how simple and accessible the ingredients are, yet how each one plays a crucial role in delivering that perfect harmony of taste and texture. From the creamy base to the sharp zing of garlic and the subtle warmth of olive oil, every component works together seamlessly.
- Mayonnaise: Provides the creamy, luscious base that makes the aioli smooth and rich.
- Garlic cloves, minced: Packs the bold, aromatic punch that defines the flavor profile.
- Lemon juice: Adds a fresh, zesty brightness that balances the richness.
- Dijon mustard: Enhances depth with a mild tang and subtle spice.
- Salt: Essential for bringing out all the flavors and making them shine.
- Black pepper: Adds a gentle kick and warmth.
- Olive oil: Drizzled in slowly, it enriches the texture and adds a fruity roundness.
How to Make Creamy Garlicky Aioli Recipe
Step 1: Combine the Base Ingredients
Start by whisking together the mayonnaise, minced garlic, fresh lemon juice, Dijon mustard, salt, and black pepper in a small bowl. This initial mixture creates the foundation of flavor and texture, setting the stage for the smooth creaminess and bold garlicky notes.
Step 2: Slowly Incorporate Olive Oil
Drizzle in the olive oil gradually while whisking constantly. This step is key to emulsifying the mixture, giving your aioli that signature silky, rich consistency that makes it so addictive.
Step 3: Taste and Adjust Seasoning
Give your aioli a quick taste and feel free to tweak the salt or lemon juice according to your preference. This ensures the balance of flavors is just right to suit your palate.
Step 4: Let the Flavors Meld
Allow the aioli to rest for at least 10 minutes before serving. This resting time lets the garlic soften and the flavors deepen, creating a more cohesive and mouthwatering experience.
Step 5: Serve and Enjoy
Your creamy, garlicky goodness is now ready to be enjoyed! Use it as a dip, spread, or drizzle to instantly upgrade a variety of dishes.
How to Serve Creamy Garlicky Aioli Recipe
Garnishes
For an extra touch of freshness and color, sprinkle chopped fresh herbs like parsley or chives on top of the aioli. A light dusting of smoked paprika can add a subtle smoky note, or a few lemon zest strips can brighten the presentation.
Side Dishes
This creamy garlicky aioli pairs beautifully with crispy fries, roasted vegetables, grilled meats, and even delicate seafood. It’s also wonderful alongside a crunchy crudité platter or as a dip for warm breadsticks that soak up every bit of that flavor.
Creative Ways to Present
Try using this aioli as a base layer on sandwiches or burgers to add both moisture and a garlic kick. You can also swirl it into mashed potatoes or drizzle over roasted potatoes for an elegant finish. For entertaining, serve it in a small ramekin surrounded by colorful veggies or artisan crackers for a simple yet impressive appetizer.
Make Ahead and Storage
Storing Leftovers
Keep your leftover aioli fresh by storing it in an airtight container in the refrigerator. It stays perfectly good for up to 4 days, making it a convenient condiment to have on hand for quick meals or snacks.
Freezing
Freezing is not ideal for this Creamy Garlicky Aioli Recipe as the texture may separate once thawed. It’s best enjoyed fresh or refrigerated and consumed within a few days for the best consistency and flavor.
Reheating
This aioli is typically served cold or at room temperature, so no reheating is necessary. If you want it slightly warmer, let it sit out for a few minutes to come to room temperature before serving, but avoid heat to preserve its creamy texture.
FAQs
Can I use fresh garlic instead of minced garlic?
Yes, fresh garlic is actually the best choice for this recipe because it delivers vibrant, punchy flavor. Just be sure to mince it finely to distribute the taste evenly throughout the aioli.
Is there a substitute for mayonnaise in this aioli?
If you prefer a lighter or different base, Greek yogurt can be used as a substitute, though it will change the flavor and texture slightly. Traditional aioli uses olive oil and garlic emulsified together, but mayonnaise keeps this version quick and easy.
How long does this Creamy Garlicky Aioli Recipe keep in the fridge?
Stored in an airtight container, it will stay fresh for about 4 days. Beyond this, the flavors may start to deteriorate or the texture may separate.
Can I make this aioli ahead of time?
Absolutely! Making it a few hours in advance or even the day before allows the flavors to meld beautifully and intensify, making it even tastier.
What are some dishes that pair well with this aioli?
Anything from grilled chicken, roasted veggies, sandwiches, seafood, to crispy fries benefits greatly from a generous dollop or drizzle of this creamy garlicky aioli.
Final Thoughts
This Creamy Garlicky Aioli Recipe is truly one of those magical little sauces that brings joy to everyday meals. It’s so simple to make but delivers huge flavor and versatility that will keep you reaching for it again and again. I warmly encourage you to try it out and watch how it transforms your dishes with just a spoonful of pure deliciousness.
Print
Creamy Garlicky Aioli Recipe
- Prep Time: 5 minutes
- Cook Time: 0 minutes
- Total Time: 15 minutes (including resting time)
- Yield: 4 servings
- Category: Sauce
- Method: No-Cook
- Cuisine: Mediterranean
- Diet: Low Salt
Description
This creamy, garlicky aioli is a versatile and flavorful sauce perfect for dipping, spreading, or drizzling over your favorite dishes. Made with simple ingredients like mayonnaise, garlic, lemon juice, and olive oil, it comes together in just minutes to add a zesty, rich complement to sandwiches, vegetables, fries, and more.
Ingredients
Aioli Ingredients
- 1/2 cup mayonnaise
- 2 cloves garlic, minced
- 1 teaspoon lemon juice
- 1/2 teaspoon Dijon mustard
- 1/4 teaspoon salt
- 1/8 teaspoon black pepper
- 1 tablespoon olive oil
Instructions
- Combine Ingredients: In a small bowl, whisk together the mayonnaise, minced garlic, lemon juice, Dijon mustard, salt, and black pepper until well mixed.
- Incorporate Olive Oil: Slowly drizzle in the olive oil while whisking continuously to create a smooth and creamy texture.
- Taste and Adjust: Taste the aioli and adjust the seasoning as needed by adding more salt, pepper, or lemon juice to your preference.
- Rest the Aioli: Let the aioli sit for at least 10 minutes to allow the flavors to meld together and intensify.
- Serve: Serve the aioli as a dip for vegetables or fries, spread it on sandwiches, or drizzle over dishes to enhance flavor.
Notes
- The garlic flavor intensifies if allowed to sit longer; make the aioli ahead for best taste.
- Use fresh garlic for the best flavor and avoid pre-minced garlic from jars which can be less pungent.
- This aioli keeps well refrigerated for up to 3 days in an airtight container.
- Adjust olive oil quantity to achieve desired creaminess and richness.
- For a spicier kick, add a pinch of cayenne pepper or smoked paprika.


