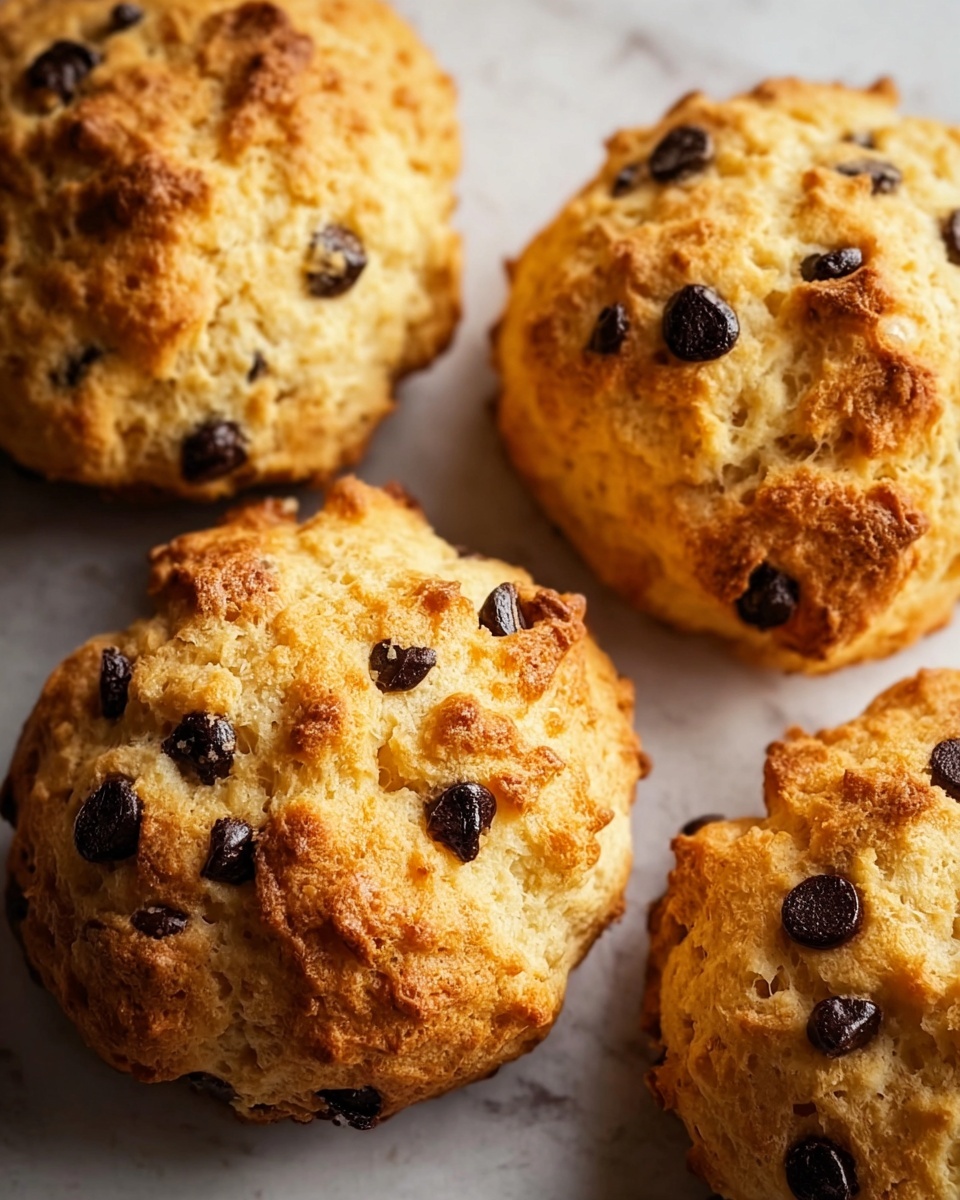
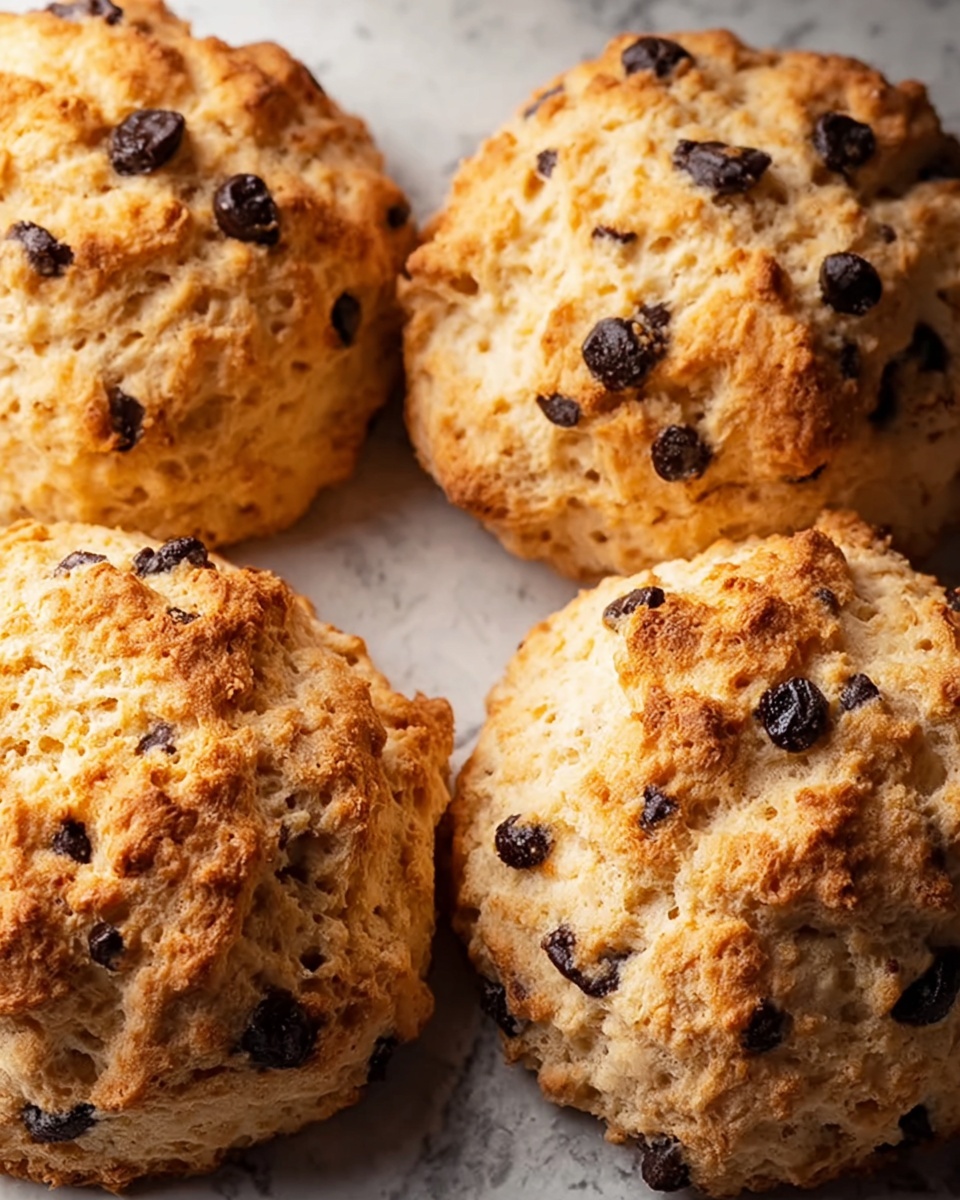
If you’ve been searching for a delightful, nostalgic treat that’s both comforting and packed with hidden gems of flavor, then this Rock Buns Recipe is about to become your new go-to. These charming little buns have a rustic, uneven texture—just like their name suggests—and boast a wonderfully crumbly bite loaded with sweet dried fruit and a gentle hint of cinnamon. Whether you want to brighten up an afternoon tea or surprise your loved ones with a homemade snack, these rock buns are irresistibly easy to make and even easier to enjoy.
Ingredients You’ll Need
To whip up this Rock Buns Recipe, you only need a handful of simple ingredients, but don’t be fooled—each one plays an essential role in building the perfect texture and taste. From the buttery crumb to the sweet burst of dried fruit, every component adds something special.
- 2 cups all-purpose flour: The foundational base that creates structure and crumb in your buns.
- 1 teaspoon baking powder: Provides the gentle rise that keeps the buns light and tender.
- 1/2 teaspoon salt: Balances the sweetness and enhances overall flavor.
- 1/2 teaspoon ground cinnamon (optional): Adds warmth and a subtle spice to make the buns extra cozy.
- 1/2 cup unsalted butter, cold and cubed: Gives the buns their flaky, buttery texture and richness.
- 1/2 cup granulated sugar: Sweetens the dough just right without overpowering the fruit.
- 1/2 cup mixed dried fruit (currants, raisins, sultanas): Brings delightful bursts of chewiness and natural sweetness.
- 1 large egg: Binds all the ingredients for a perfect dough consistency.
- 1/4 cup milk (plus extra for brushing): Softens the dough and helps create a golden finish on top.
- 1 teaspoon vanilla extract: Infuses a lovely fragrance and depth to the flavor.
How to Make Rock Buns Recipe
Step 1: Preheat and Prepare
Start by preheating your oven to 375°F (190°C) and line a baking sheet with parchment paper. This ensures your rock buns won’t stick and bake evenly.
Step 2: Mix Dry Ingredients
In a large bowl, sift together the flour, baking powder, salt, and cinnamon if you’re using it. Combining these first helps distribute the baking powder and seasoning evenly, laying the perfect foundation for your dough.
Step 3: Rub in the Butter
Add the cold, cubed butter to the flour mixture. Use your fingers or a pastry cutter to rub the butter into the flour until the mixture looks like coarse breadcrumbs. This step is what gives the buns a tender, crumbly texture—don’t rush it!
Step 4: Add Sugar and Dried Fruit
Stir in the granulated sugar and your chosen mix of dried fruit, ensuring everything is evenly scattered. The dried fruit adds pockets of chewy sweetness that make each bite a little surprise.
Step 5: Form the Dough
Beat the egg and milk together in a separate bowl. Gradually add this liquid mixture to your flour and butter mix, stirring gently until a rough dough forms. If the dough feels too dry, add milk a tablespoon at a time until it just comes together—it should remain slightly rough and lumpy.
Step 6: Shape Your Rock Buns
Spoon spoonfuls of dough onto your prepared baking sheet, spacing them about 2 inches apart. Don’t worry if they look irregular or “rocky”—their charming shape is exactly what makes this Rock Buns Recipe so special.
Step 7: Brush with Milk
Lightly brush the tops of the buns with a bit of milk to encourage a lovely golden color and a subtle shine once baked.
Step 8: Bake
Pop your tray in the oven and bake for 15-20 minutes, until the buns are golden brown and feel firm when you gently press them. The aroma filling your kitchen at this point will be absolutely irresistible!
Step 9: Cool and Enjoy
Let the buns cool on a wire rack for a few minutes before tucking in—you can enjoy them warm or at room temperature, either way, they’re delicious.
How to Serve Rock Buns Recipe

Garnishes
These Rock Buns Recipe treats are wonderful on their own, but you can elevate them by adding a slather of butter or clotted cream. For a sweeter touch, a drizzle of honey or a light dusting of powdered sugar makes them look as good as they taste.
Side Dishes
Pair these buns with a warm cup of tea or coffee for a classic teatime experience. They also make a lovely accompaniment to a fruit compote or fresh berries, adding a fresh, juicy contrast to the buttery, crumbly texture.
Creative Ways to Present
Play with presentation by stacking the buns on a rustic wooden board or serving them in a charming basket lined with a tea towel. For a special occasion, arrange the buns around a small dish of clotted cream and jam to create a welcoming share plate that invites everyone to dig in.
Make Ahead and Storage
Storing Leftovers
If you have any buns left after your feast, store them in an airtight container at room temperature for up to three days. This keeps them soft and tasty, ready for a quick snack or breakfast.
Freezing
You can absolutely freeze rock buns to extend their shelf life. Wrap each bun individually in plastic wrap, then place them in a freezer-safe bag or container. They’ll keep well for up to three months and thaw quickly when you want a treat on demand.
Reheating
To enjoy your rock buns fresh from the freezer, simply thaw them at room temperature and warm them briefly in a preheated oven at 350°F (175°C) for about 5-7 minutes. This revives their lovely crumbly texture and warm flavors beautifully.
FAQs
Can I use other dried fruits besides currants or raisins in this Rock Buns Recipe?
Absolutely! Feel free to experiment with dried cherries, cranberries, or chopped apricots for a different flavor twist. Just keep the quantity similar to maintain the dough’s balance.
Is it necessary to add cinnamon?
Not at all. Cinnamon is optional but adds a subtle warmth that complements the sweetness. If you’re not a fan, simply leave it out and enjoy the classic flavor of the buns.
Can I make these buns dairy-free?
Yes, you can substitute the butter with a plant-based margarine and use a dairy-free milk alternative. Keep in mind texture might be slightly different but still delicious.
How do I know when the buns are fully baked?
Look for a golden-brown color on top and a firm feel when gently pressed. If you tap the bottom lightly, it should sound hollow—these are good indicators your rock buns are ready.
Why do the buns have a rough, uneven shape?
The uneven “rocky” shape is a characteristic feature that gives these buns their name. It’s part of their charm and ensures they have a lovely crumbly texture with little pockets of fruit throughout.
Final Thoughts
There’s something so delightfully humble yet satisfying about this Rock Buns Recipe, making it an absolute treasure to have in your baking repertoire. Easy to prepare and utterly delicious, these buns bring a cozy, old-fashioned charm to any table. Don’t hesitate to dive in and bake a batch that will quickly become a favorite for teatime, snacks, or sharing with friends and family.
Print
Rock Buns Recipe
- Prep Time: 15 minutes
- Cook Time: 20 minutes
- Total Time: 35 minutes
- Yield: 12 servings
- Category: Snack
- Method: Baking
- Cuisine: British
Description
These classic Rock Buns are delightful, rustic sweet treats packed with mixed dried fruits and delicately spiced with cinnamon. Perfectly crumbly yet slightly soft, they make a charming teatime snack or breakfast addition with a golden, milk-brushed crust.
Ingredients
Dry Ingredients
- 2 cups all-purpose flour
- 1 teaspoon baking powder
- 1/2 teaspoon salt
- 1/2 teaspoon ground cinnamon (optional)
Wet Ingredients & Add-ins
- 1/2 cup unsalted butter, cold and cubed
- 1/2 cup granulated sugar
- 1/2 cup mixed dried fruit (such as currants, raisins, or sultanas)
- 1 large egg
- 1/4 cup milk (plus a little extra for brushing)
- 1 teaspoon vanilla extract
Instructions
- Preheat the oven: Preheat your oven to 375°F (190°C). Line a baking sheet with parchment paper to prepare for baking.
- Prepare the dry ingredients: In a large bowl, sift together the all-purpose flour, baking powder, salt, and optional ground cinnamon to ensure a light and even mixture.
- Incorporate the butter: Add the cold, cubed unsalted butter to the flour mixture. Use your fingers or a pastry cutter to rub the butter into the flour until the texture resembles coarse breadcrumbs, which helps create a crumbly texture in the buns.
- Add the sugar and dried fruit: Stir the granulated sugar and mixed dried fruit into the buttery flour mixture until evenly distributed, adding sweetness and chewy bursts throughout.
- Make the dough: Beat the egg, milk, and vanilla extract together in a separate bowl. Gradually add this liquid mixture to the dry ingredients, stirring until a rough dough forms. If the dough seems too dry, add milk tablespoon by tablespoon to achieve a slightly sticky but workable consistency.
- Shape the buns: Using spoonfuls, drop the dough onto the prepared baking sheet, spacing each about 2 inches apart. The dough should be irregular and rustic in appearance, typical of traditional rock buns.
- Brush with milk: Lightly brush the tops of each bun with a little additional milk to help them achieve a golden, shiny finish when baked.
- Bake the buns: Place the baking sheet into the preheated oven and bake for 15-20 minutes, or until the buns are golden brown and feel firm to the touch.
- Cool and serve: Remove the buns from the oven and allow them to cool on a wire rack. Serve warm or at room temperature for best flavor and texture.
Notes
- The cinnamon is optional but adds a warm, spicy note that complements the dried fruit beautifully.
- For a richer flavor, you can substitute some or all of the milk with cream or buttermilk.
- Feel free to customize the dried fruit with your favorites such as chopped dates, cranberries, or chopped apricots.
- These buns freeze well; wrap cooled buns tightly and freeze up to 2 months. Thaw at room temperature before serving.
- Brushing the tops with milk ensures a nicely browned crust. For a shinier top, use beaten egg instead.


