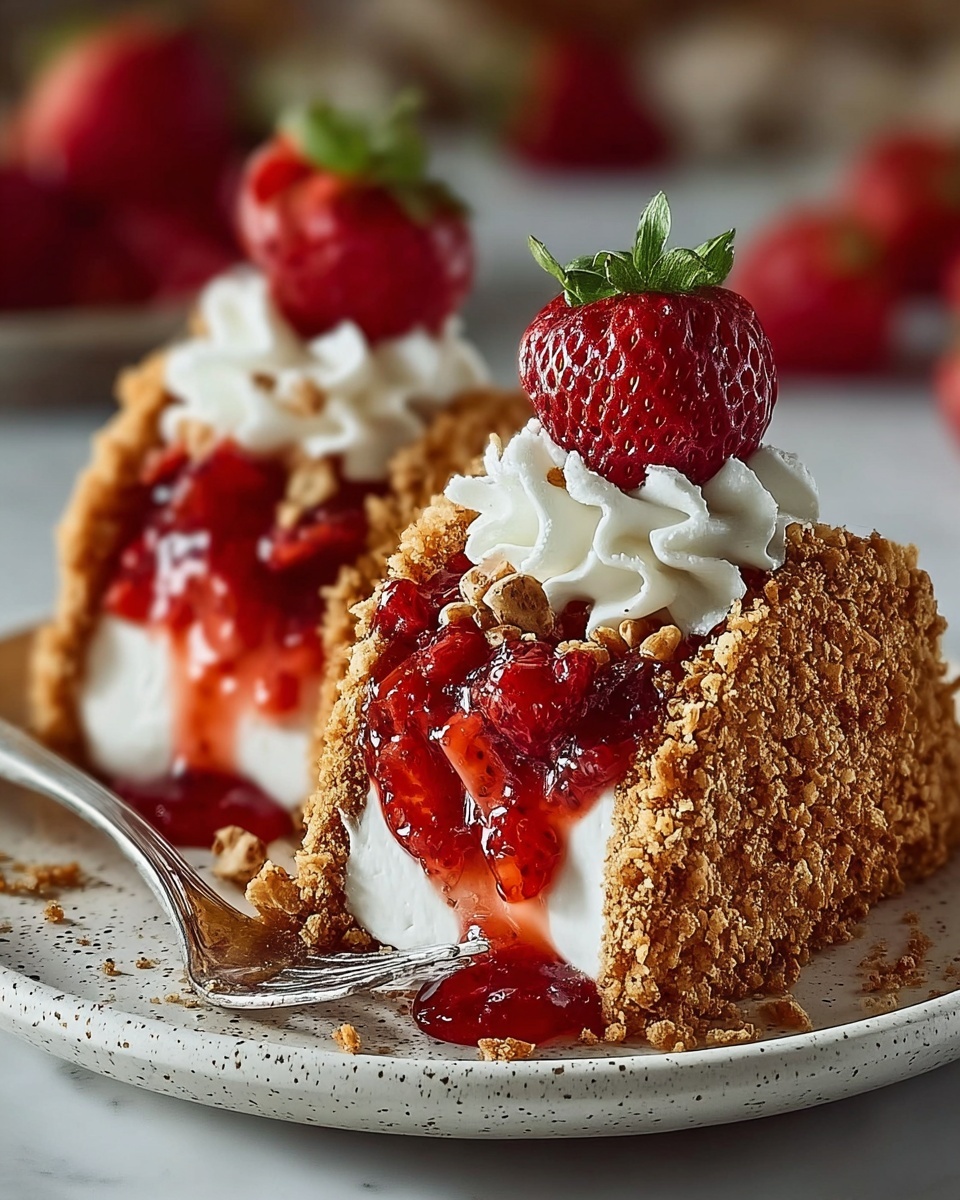
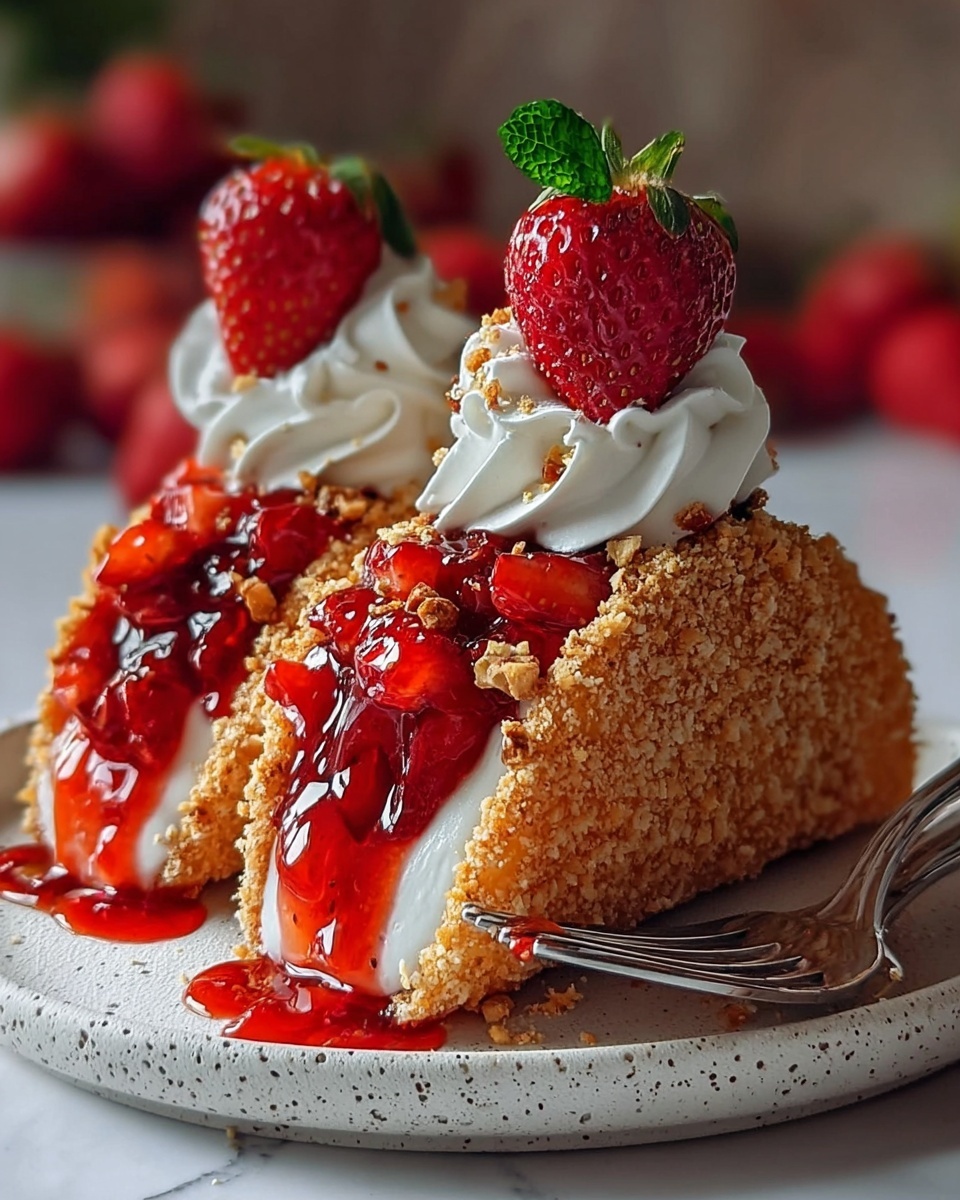
If you are looking for a delightful treat that combines creamy cheesecake, fresh strawberries, and an irresistible crunch, then the Strawberry Crunch Cheesecake Tacos Recipe will absolutely wow your taste buds. This inventive dessert takes the fun of tacos and adds a luscious sweet twist with a smooth cheesecake filling hugged by crispy, sugar-dusted taco shells and coated in a vibrant strawberry crunch. It’s a perfectly refreshing and indulgent summer dessert that also makes for an impressive party showstopper. Trust me, once you try this Strawberry Crunch Cheesecake Tacos Recipe, it will quickly become a favorite to share with friends and family.
Ingredients You’ll Need
Each ingredient in this recipe is simple, yet essential, working together to create that perfect harmony of flavors and textures in the Strawberry Crunch Cheesecake Tacos Recipe. From the rich cream cheese to the fresh strawberries, every component plays a special role in making this dessert truly memorable.
- Cream cheese, 8 ounces, softened: This is the star of the cheesecake filling, providing a smooth and tangy base.
- Granulated sugar: Adds the perfect amount of sweetness for both the filling and the shell coating.
- Vanilla extract, 1 teaspoon: Enhances the flavor with a warm, aromatic note.
- Heavy cream, 1/4 cup: Lightens the filling, making it wonderfully fluffy.
- Golden Oreo cookies, 1 cup, finely crushed: Creates the crunchy, buttery base layer for the strawberry coating.
- Freeze-dried strawberries, 1/4 cup, finely crushed: Packed with intense strawberry flavor and a beautiful pink hue for the crunch coating.
- Melted butter, 1/4 cup plus 2 tablespoons: Used for binding the crunch coating and brushing the tortilla shells to crisp them up.
- Flour tortillas, 6 large: Form the taco shell—golden, crispy, and perfectly sweet when baked.
- Fresh strawberries, 1 cup, sliced: The juicy topping that complements the creamy filling beautifully.
- Lemon juice, 1 tablespoon: Brightens the fresh strawberry topping for a balanced flavor.
How to Make Strawberry Crunch Cheesecake Tacos Recipe
Step 1: Prepare the Crunchy Strawberry Coating
Start by crushing the Golden Oreos until they turn into fine crumbs, using a food processor for speed or a rolling pin if you prefer a hands-on approach. Then crush the freeze-dried strawberries into a powder to infuse the coating with vivid strawberry flavor and color. Combine these two, mix thoroughly, and pour melted butter over the crumbs, stirring until you get a sandy, moistened texture that will stick to the cheesecake filling later on.
Step 2: Make the Creamy Cheesecake Filling
Make sure your cream cheese is soft at room temperature—that’s key for a smooth filling. Beat the cream cheese with sugar until it’s fluffy and well combined. Stir in the vanilla for a lovely aroma, then slowly mix in the heavy cream on low speed until everything is just blended. Pop this mixture in the fridge for at least 30 minutes to set up a bit before assembling.
Step 3: Craft the Taco Shells
Cut circles out of the large flour tortillas using a cookie cutter or knife. Brush each side with melted butter and sprinkle with sugar for a sweet finish. Fold them gently into taco shapes, securing edges with toothpicks if necessary, and bake at 350°F for 8-10 minutes until golden brown and crispy. Let the shells cool completely on a rack to maintain that perfect crunch.
Step 4: Assemble the Strawberry Crunch Cheesecake Tacos Recipe
Once your shells are cooled and cheesecake filling chilled, spoon the creamy filling into each shell gently. Carefully press the filled sides into the strawberry-Oreo crunch mixture, coating the filling in a delightful combination of sweet crunch and fruity flavor. Refrigerate the assembled tacos for at least 15 minutes so they set beautifully before serving.
Step 5: Prepare the Fresh Strawberry Topping
Hull and slice fresh strawberries, then toss them with sugar and lemon juice. Let this mixture sit for at least 15 minutes to draw out the juices and intensify the flavors. Just before serving, spoon this juicy strawberry topping generously over each cheesecake taco for the perfect fresh and zesty finish.
How to Serve Strawberry Crunch Cheesecake Tacos Recipe

Garnishes
A sprinkle of powdered sugar, a few fresh mint leaves, or even a dollop of whipped cream can elevate the look and flavor of your cheesecake tacos. These garnishes add a lovely fresh contrast and make the presentation absolutely irresistible.
Side Dishes
This dessert pairs wonderfully with light, fruity drinks like sparkling water infused with berries or a crisp rosé wine. A small side of mixed fresh berries or a scoop of fruity sorbet can also complement the creamy and crunchy textures beautifully without overwhelming the palate.
Creative Ways to Present
For a festive touch, serve these cheesecake tacos on a colorful platter lined with additional crushed freeze-dried strawberries or gold-dusted edible glitter. You can also arrange them in a row against a backdrop of fresh strawberry slices for a stunning visual impact that will wow your guests.
Make Ahead and Storage
Storing Leftovers
Store leftover Strawberry Crunch Cheesecake Tacos Recipe in an airtight container in the refrigerator. They stay delicious for up to 2 days, but be mindful that the taco shells could lose some crispness over time.
Freezing
While freezing is possible, it is best to freeze the cheesecake filling separately in a covered container without assembling the tacos. This protects the shells from becoming soggy. Thaw the filling overnight in the fridge before assembling for optimal freshness.
Reheating
A quick warm-up in the oven can bring back some crispness to the shells if they’ve softened, but remember to assemble the tacos with the chilled filling afterward. Avoid microwaving as it can melt the cream cheese filling and ruin the texture.
FAQs
Can I use regular Oreos instead of Golden Oreos?
Absolutely! Regular Oreos will add a chocolate twist to the crunch coating, which pairs nicely with the strawberries if you enjoy a bit of chocolate flavor in your dessert.
Is there a dairy-free option for this recipe?
You can substitute cream cheese and heavy cream with dairy-free alternatives like vegan cream cheese and coconut cream. The texture might be slightly different but still deliciously creamy.
How do I keep the taco shells from getting soggy?
Make sure to bake the tortillas until crisp and let them cool completely before filling. Assemble the filling close to serving time, and keep the tacos chilled. Using toothpicks to fasten the shell helps maintain their shape.
Can I prepare the strawberry topping in advance?
Yes, you can prepare the strawberry topping a few hours ahead. Just keep it refrigerated and give it a gentle stir before serving to redistribute the juices.
What’s the best way to crush the freeze-dried strawberries?
A food processor works best for a fine powder, but if you don’t have one, place the freeze-dried strawberries in a resealable bag and crush with a rolling pin. Just be sure to crush thoroughly for an even coating.
Final Thoughts
The Strawberry Crunch Cheesecake Tacos Recipe is one of those fun, creative desserts that bring joy from the first bite to the last crumb. It’s simple enough to make at home, yet impressive enough to serve at gatherings. So don’t wait to try it out—your friends and family will thank you for introducing them to this fresh, crunchy, and dreamy cheesecake taco experience!
Print
Strawberry Crunch Cheesecake Tacos Recipe
- Prep Time: 20 minutes
- Cook Time: 10 minutes
- Total Time: 1 hour
- Yield: 6 servings
- Category: Dessert
- Method: Baking
- Cuisine: American
Description
Strawberry Crunch Cheesecake Tacos are a delightful and easy-to-make dessert featuring creamy cheesecake filling inside crispy sugar-coated flour tortilla shells, finished with a crunchy strawberry and Oreo coating and a fresh, sweet strawberry topping.
Ingredients
Cheesecake Filling
- 8 ounces cream cheese, softened
- 1/2 cup granulated sugar
- 1 teaspoon vanilla extract
- 1/4 cup heavy cream
Strawberry Crunch Coating
- 1 cup Golden Oreo cookies, finely crushed
- 1/4 cup freeze-dried strawberries, finely crushed
- 1/4 cup melted butter
Taco Shells
- 6 large flour tortillas
- 2 tablespoons melted butter, for brushing
- 2 tablespoons granulated sugar, for sprinkling
Strawberry Topping
- 1 cup fresh strawberries, sliced
- 2 tablespoons granulated sugar
- 1 tablespoon lemon juice
Instructions
- Crush Golden Oreos: In a food processor, pulse the Golden Oreos until finely crushed into crumbs. Alternatively, place cookies in a resealable bag and crush with a rolling pin until no large chunks remain.
- Crush Freeze-Dried Strawberries: Using a food processor or rolling pin in a resealable bag, crush freeze-dried strawberries into a fine powder.
- Mix Crunch Coating: In a medium bowl, combine the crushed Oreo crumbs and crushed freeze-dried strawberries for an even blend of color and flavor.
- Add Butter to Coating: Pour melted butter over the crumb mixture and stir until all crumbs are evenly moistened, resembling wet sand. Set aside.
- Soften Cream Cheese: Ensure cream cheese is softened to room temperature for smooth mixing.
- Prepare Cheesecake Filling: Beat the cream cheese with an electric mixer until smooth, gradually add granulated sugar and continue beating until light and fluffy.
- Add Vanilla: Stir in vanilla extract until fully incorporated.
- Incorporate Heavy Cream: Gradually add heavy cream at low mixer speed and mix until just combined.
- Chill Filling: Cover with plastic wrap and refrigerate the cheesecake filling for at least 30 minutes to firm up.
- Cut Tortillas: Use a large cookie cutter (6-8 inches) or knife to cut circles from flour tortillas.
- Butter and Sugar Tortillas: Brush both sides of each tortilla circle with melted butter, then sprinkle evenly with granulated sugar.
- Shape Taco Shells: Fold each tortilla circle in half to form a taco shell shape, securing edges with toothpicks if necessary.
- Bake Shells: Preheat oven to 350°F (175°C). Place taco shells on parchment-lined baking sheet and bake for 8-10 minutes until golden and crispy.
- Cool Shells: Remove from oven and cool completely on a wire rack.
- Fill Tacos: Spoon chilled cheesecake filling into each cooled taco shell.
- Coat with Strawberry Crunch: Press the filled shells gently into the strawberry crunch coating, covering the cheesecake filling completely.
- Chill Assembled Tacos: Place tacos on a plate or tray and refrigerate for at least 15 minutes.
- Prepare Strawberry Topping: Hull and slice fresh strawberries. In a bowl, combine sliced strawberries, granulated sugar, and lemon juice, tossing gently.
- Let Strawberry Mixture Marinate: Allow strawberry topping to sit at least 15 minutes to meld flavors.
- Serve: Spoon the strawberry topping over the cheesecake tacos just before serving for a fresh and vibrant finish.
Notes
- Ensure cream cheese is fully softened for smooth cheesecake filling.
- If you don’t have a food processor, use a rolling pin and resealable bags to crush cookies and freeze-dried strawberries.
- To maintain taco shape while baking, secure edges of folded tortillas with toothpicks.
- Freeze-dried strawberries add concentrated flavor, but can be replaced with finely chopped freeze-dried raspberries or strawberries if unavailable.
- Store assembled tacos in the refrigerator and consume within 24 hours for best freshness.
- Use fresh ripe strawberries for the topping to balance the creamy cheesecake and crunchy shell.
