
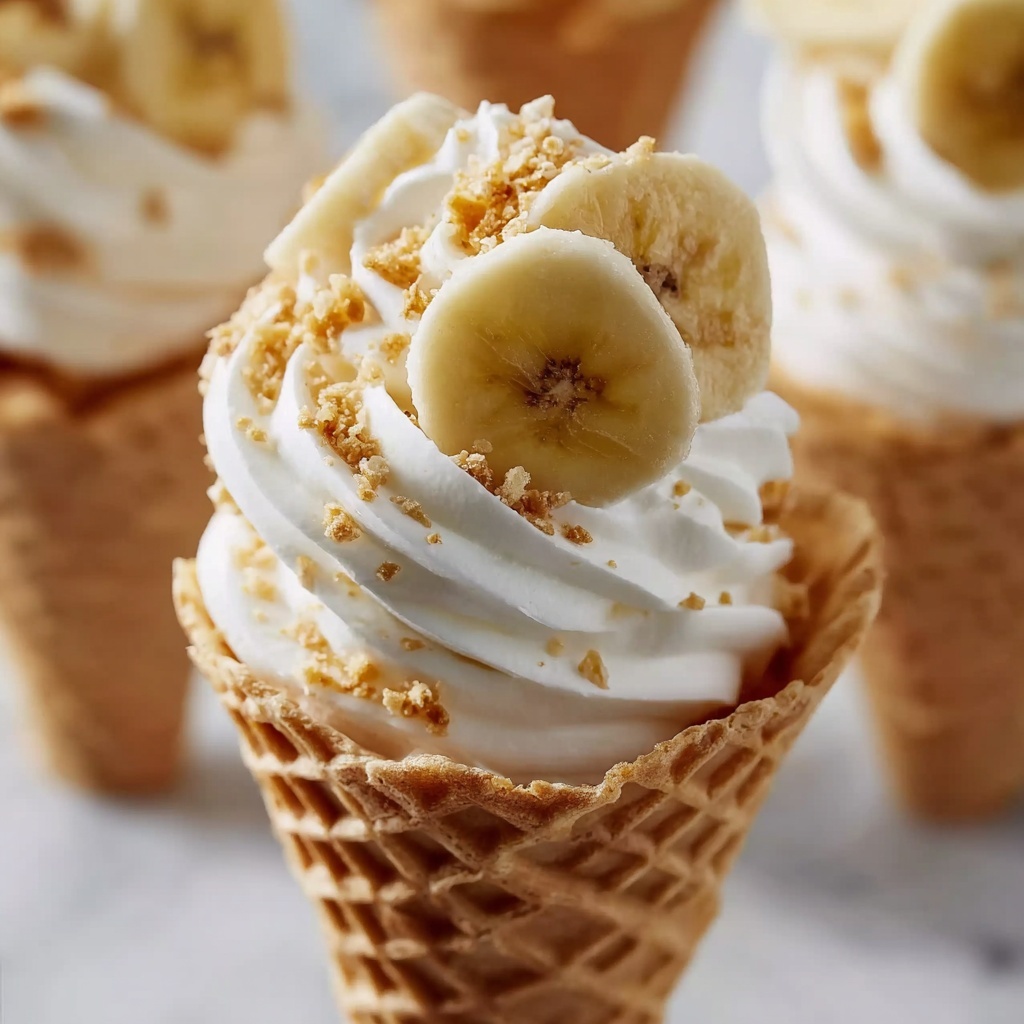
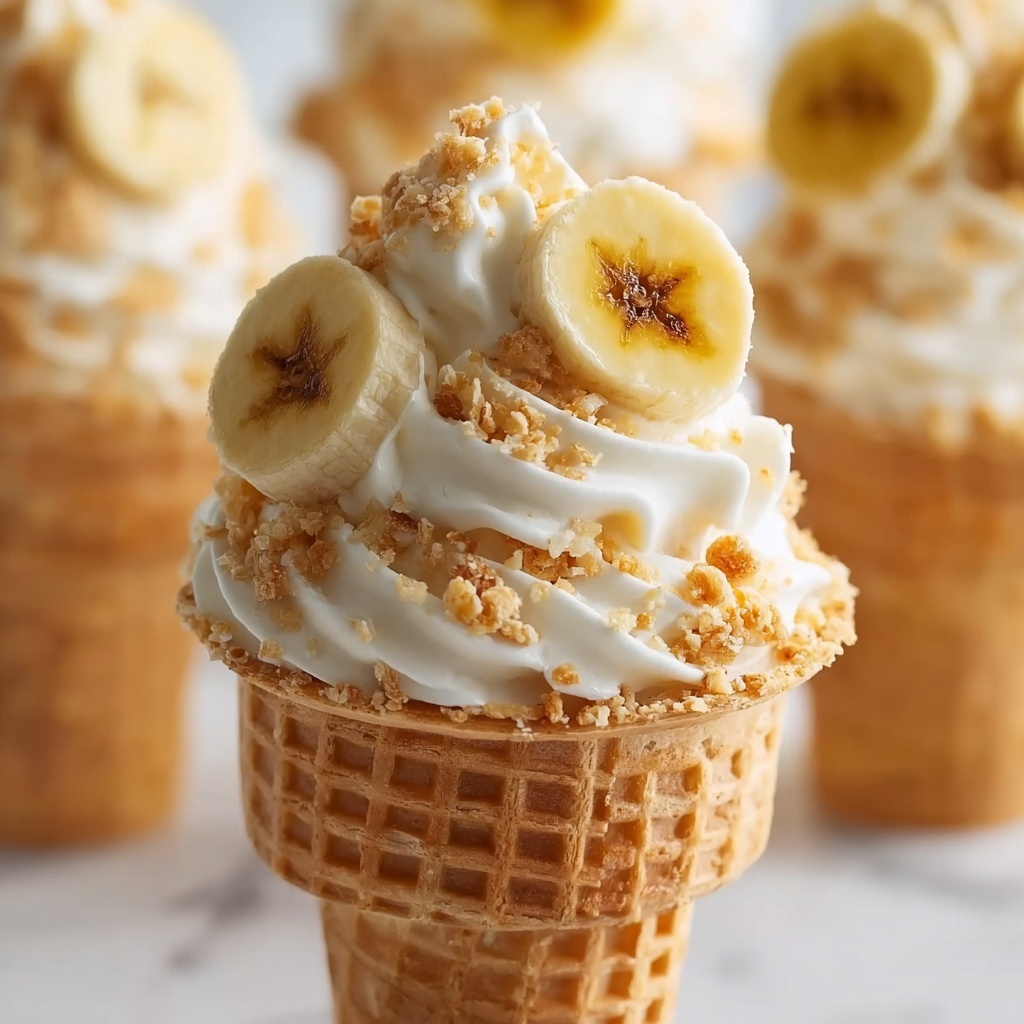
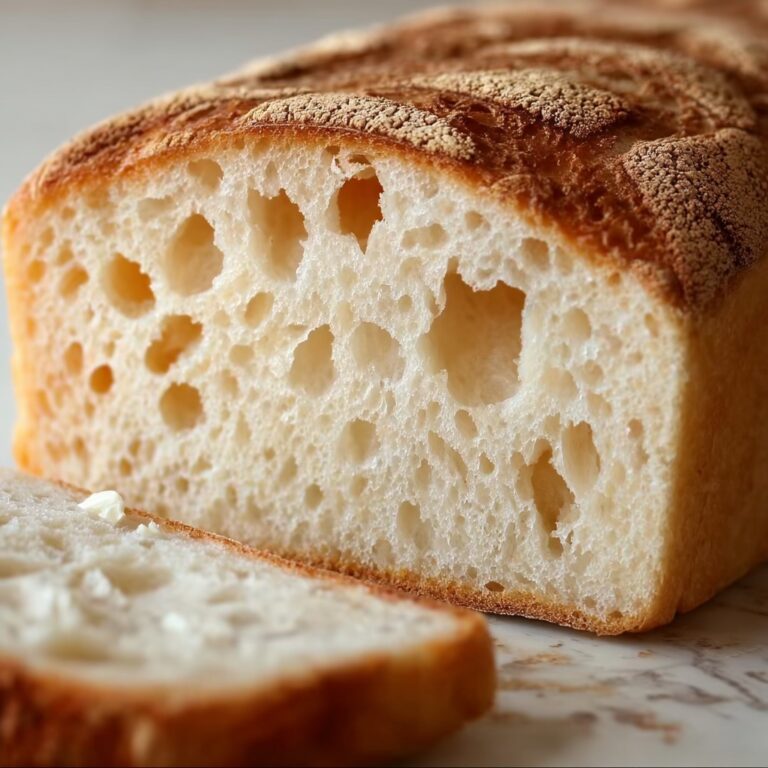
If you adore creamy desserts with a playful twist, you are going to fall head over heels for this Banana Pudding Cheesecake Cones Recipe. This delightful treat combines the nostalgic flavors of banana pudding with rich, tangy cheesecake filling, all cleverly layered inside crunchy waffle cones. Each bite delivers a perfect balance of smooth, fluffy, fruity, and crunchy textures that will have you reaching for another without hesitation. Whether you’re hosting a summer party or simply craving something sweet and fun, these cones are guaranteed to impress and satisfy.
Ingredients You’ll Need
The beauty of this Banana Pudding Cheesecake Cones Recipe is in its simplicity. Each ingredient is thoughtfully chosen to create that luscious, creamy texture and vibrant banana flavor, plus a satisfying crunch from the cones and wafers. Let’s break down how these essentials come together to make magic.
- Waffle cones: These provide the perfect crispy, edible cup that holds all the delicious layers together.
- Cream cheese (8 oz, softened): Adds richness and a slight tang that balances the sweetness beautifully.
- Powdered sugar (1 cup): Sweetens the cream cheese mixture smoothly without any graininess.
- Instant banana pudding mix (3.4 oz): Brings that authentic banana flavor and creamy consistency effortlessly.
- Cold milk (2 cups): Essential for mixing with the pudding to get the perfect silky texture.
- Whipped topping (1 1/2 cups): Lightens the cheesecake filling to a fluffy, dreamy consistency.
- Bananas (4, sliced): Fresh slices add natural sweetness and freshness in every bite.
- Crushed vanilla wafers: A crunchy topping that complements the soft layers and adds nostalgic charm.
How to Make Banana Pudding Cheesecake Cones Recipe
Step 1: Prepare the Banana Pudding
Start by whisking the instant banana pudding mix with cold milk until it thickens, about 2 to 3 minutes. This quick step is what brings that classic banana pudding flavor and creamy base to the cones. Once thickened, pop it into the fridge to chill—this helps everything hold its shape later on.
Step 2: Make the Cheesecake Filling
Now, in a separate bowl, beat together the softened cream cheese and powdered sugar until completely smooth and luscious. This creates the rich cheesecake flavor that’s at the heart of the cones. Next, fold in the whipped topping gently until the mixture becomes light and fluffy, almost cloud-like in texture.
Step 3: Layer Your Cones
Grab a piping bag or a sturdy zip-top bag with a small corner cut off. Pipe a spoonful of cheesecake filling into the bottom of each waffle cone, creating a sturdy base. Follow this with a spoonful of the chilled banana pudding. Keep layering cheesecake and pudding until the cones are nearly full, making sure to leave room at the top for banana slices and crunchy wafers.
Step 4: Add the Toppings
Top each cone with fresh banana slices and sprinkle crushed vanilla wafers generously on top for that perfect crunch. If you want to take it up a notch, drizzle a little caramel sauce over the cones for an extra touch of decadence.
Step 5: Chill Before Serving
Place the filled cones into the fridge for about 15 minutes to let everything set nicely and serve cold. This final chill adds that refreshing creaminess that makes these cones irresistible.
How to Serve Banana Pudding Cheesecake Cones Recipe
Garnishes
For garnishes, fresh banana slices and crushed vanilla wafers are classics here, but consider adding mint leaves or a light sprinkle of cinnamon for an unexpected twist. Serving with a drizzle of homemade caramel or chocolate sauce will make your guests feel like they’re indulging in something truly special.
Side Dishes
These banana pudding cheesecake cones are sweet and filling, so pairing them with something light like a crisp fruit salad or a tangy citrus sorbet will balance the palate beautifully. For a cozy gathering, a cup of strong coffee or black tea complements the creamy sweetness perfectly.
Creative Ways to Present
If you want to wow your friends, serve these cones upright in a decorative cone holder or in a glass filled with crushed ice to keep them chilled longer. You can also create a mini dessert bar where guests assemble their own cones from bowls of pudding, cheesecake filling, banana slices, and toppings. It’s interactive and fun!
Make Ahead and Storage
Storing Leftovers
If you happen to have any leftovers (which would be rare), you can store the filled cones in an airtight container in the fridge for up to 2 days. Keep in mind the waffle cones may lose some crunchiness over time, but the flavors remain delightful.
Freezing
While freezing isn’t ideal because the texture of bananas and the whipped cheesecake filling can change, you can freeze the cheesecake and pudding mixtures separately in airtight containers for up to a month. Thaw and assemble just before serving to maintain freshness and best texture.
Reheating
This dessert is meant to be enjoyed cold, so reheating is not recommended. Instead, allow the cones to sit at room temperature for 5-10 minutes if they’ve been chilled too long, and enjoy the flavors as they soften slightly for an even richer mouthfeel.
FAQs
Can I use fresh homemade banana pudding instead of instant mix?
Absolutely! Homemade banana pudding can add a wonderful fresh taste. Just ensure it’s thick enough to maintain the layers in the cones without becoming soggy.
Are there any alternatives to whipped topping?
You can use freshly whipped cream if you prefer a less processed option—it adds a lovely lightness to the cheesecake filling but requires immediate use to prevent deflation.
Can these cones be made vegan or dairy-free?
With some adjustments, like using dairy-free cream cheese and non-dairy milk, along with vegan pudding mix, you can definitely create a similar dessert that caters to dietary needs.
How long should I chill the banana pudding before layering?
Chilling the pudding for at least 30 minutes gives it a firmer texture that holds up well in the cones, making layering much easier and neater.
What’s the best way to prevent the cones from getting soggy?
Start by piping cheesecake filling at the bottom of the cone as a barrier before adding pudding. Also, assemble the cones just before serving to keep the waffle crisp and delicious.
Final Thoughts
If you’re looking for a dessert that’s as fun to make as it is to eat, this Banana Pudding Cheesecake Cones Recipe is a must-try. Bursting with banana goodness, creamy cheesecake layers, and crispy waffle cones, it’s a guaranteed crowd-pleaser. I can’t wait for you to share these with your loved ones and see their smiles light up after the first bite!
Print
Banana Pudding Cheesecake Cones Recipe
- Prep Time: 20 minutes
- Cook Time: 0 minutes
- Total Time: 20 minutes
- Yield: 8 servings
- Category: Dessert
- Method: No-Cook
- Cuisine: American
Description
Enjoy a delightful twist on classic desserts with these Banana Pudding Cheesecake Cones. Combining creamy cheesecake, smooth banana pudding, fresh bananas, and crunchy vanilla wafer toppings, these handheld treats are perfect for any occasion. Easy to assemble and no baking required, they offer a refreshing, creamy dessert experience with a fun presentation.
Ingredients
Waffle Cones
- 8 waffle cones
Cheesecake Mixture
- 1 (8 oz) package cream cheese, softened
- 1 cup powdered sugar
- 1 1/2 cups whipped topping
Banana Pudding
- 1 (3.4 oz) box instant banana pudding mix
- 2 cups cold milk
Garnish
- 4 bananas, sliced
- Crushed vanilla wafers for topping
- Optional: caramel sauce for drizzling
Instructions
- Prepare Banana Pudding: In a mixing bowl, whisk together the instant banana pudding mix and cold milk for about 2-3 minutes until thickened. Place it in the fridge to chill while you prepare the rest.
- Make Cheesecake Mixture: In another bowl, beat the softened cream cheese with powdered sugar until smooth and creamy. Gently fold in the whipped topping until fully incorporated and fluffy.
- Layer the Cones: Using a piping bag or a zip-top bag with a corner cut, pipe the cheesecake mixture into the bottom of each waffle cone. Then add a spoonful of the chilled banana pudding on top. Repeat the layers until the cone is full, leaving space to top with banana slices.
- Add Garnishes: Top each cone with banana slices and a sprinkle of crushed vanilla wafers for texture and crunch. Optionally, drizzle caramel sauce over the top for added sweetness.
- Chill Before Serving: Place the filled cones in the fridge for a quick chill to set and enhance the creamy texture before serving.
Notes
- You can substitute the whipped topping with homemade whipped cream if preferred for a less processed option.
- For an extra touch, adding caramel or chocolate drizzle enhances flavor and presentation.
- Make these cones just before serving to preserve the crispness of the waffle cones.
- Store leftovers covered in the fridge for up to 1 day; the cones may soften over time.
- Ensure the cream cheese is fully softened to blend smoothly without lumps.


