
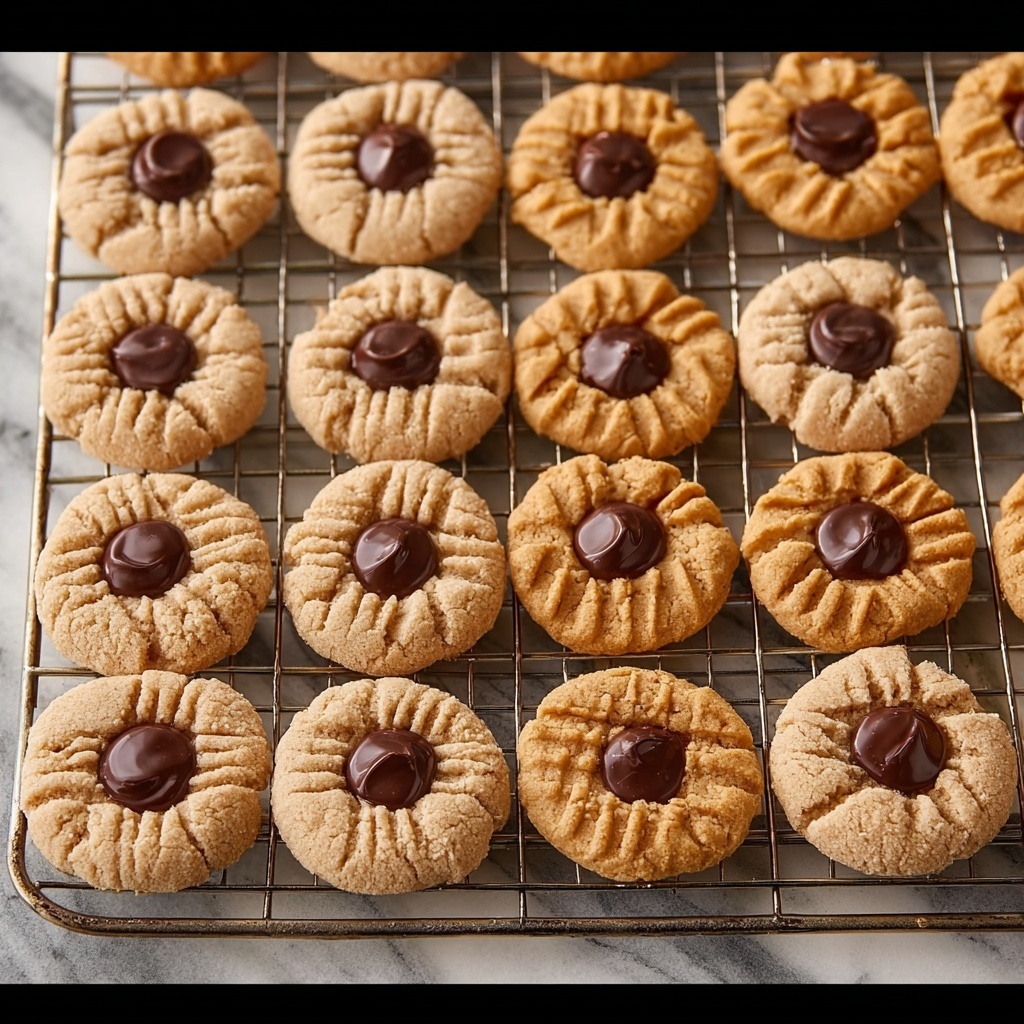
If you’re searching for a delightful treat that combines effortless preparation with irresistible flavor, this Bisquick Peanut Butter Cookies Recipe is exactly what you need. These cookies come together quickly with pantry staples and deliver a tender, peanut buttery bite every time. Whether you prefer classic crisscross-topped cookies dusted with sugar or the charming Peanut Butter Blossom version crowned with a Hershey Kiss, this recipe will become your new favorite go-to for sweet, nostalgic satisfaction.
Ingredients You’ll Need
This recipe keeps things wonderfully simple but relies on each ingredient playing an essential role in creating the perfect cookie. From the creamy peanut butter to the magic of Bisquick, every element adds to the final texture and flavor in a unique way.
- Sweetened condensed milk: Adds moisture and sweetness, binding everything together beautifully.
- Peanut butter: The star ingredient that infuses rich, nutty flavor and helps with chewiness.
- Bisquick: Provides the perfect structure and lightness for these soft cookies.
- Vanilla extract: Enhances the overall flavor with a subtle warmth and depth.
- Sugar: Used for rolling, it adds a sweet crunch and pretty finish to the cookie surface.
- Hershey Kisses (optional): Perfect for turning these treats into classic Peanut Butter Blossoms with a chocolatey touch.
How to Make Bisquick Peanut Butter Cookies Recipe
Step 1: Prepare Your Workspace and Oven
Start by preheating your oven to 375ºF and lining a baking sheet with parchment paper. This helps ensure your cookies bake evenly and won’t stick, making cleanup a breeze.
Step 2: Combine the Wet Ingredients
In a mixing bowl, stir the sweetened condensed milk and peanut butter together until the mixture is silky smooth. This combination is where a lot of the cookie’s moisture and flavor comes from, so take your time for a creamy blend.
Step 3: Add Dry Ingredients
Next, fold in the Bisquick and vanilla extract. The Bisquick is your shortcut to perfectly tender cookies without the fuss of measuring individual leavening agents, flour, or salt.
Step 4: Shape and Sugar-Coat the Dough
Scoop out the dough by tablespoonfuls and roll each portion into a ball. Then, roll the balls in sugar for a little sparkle and added sweetness on the outside.
Step 5: Create the Signature Cookie Pattern
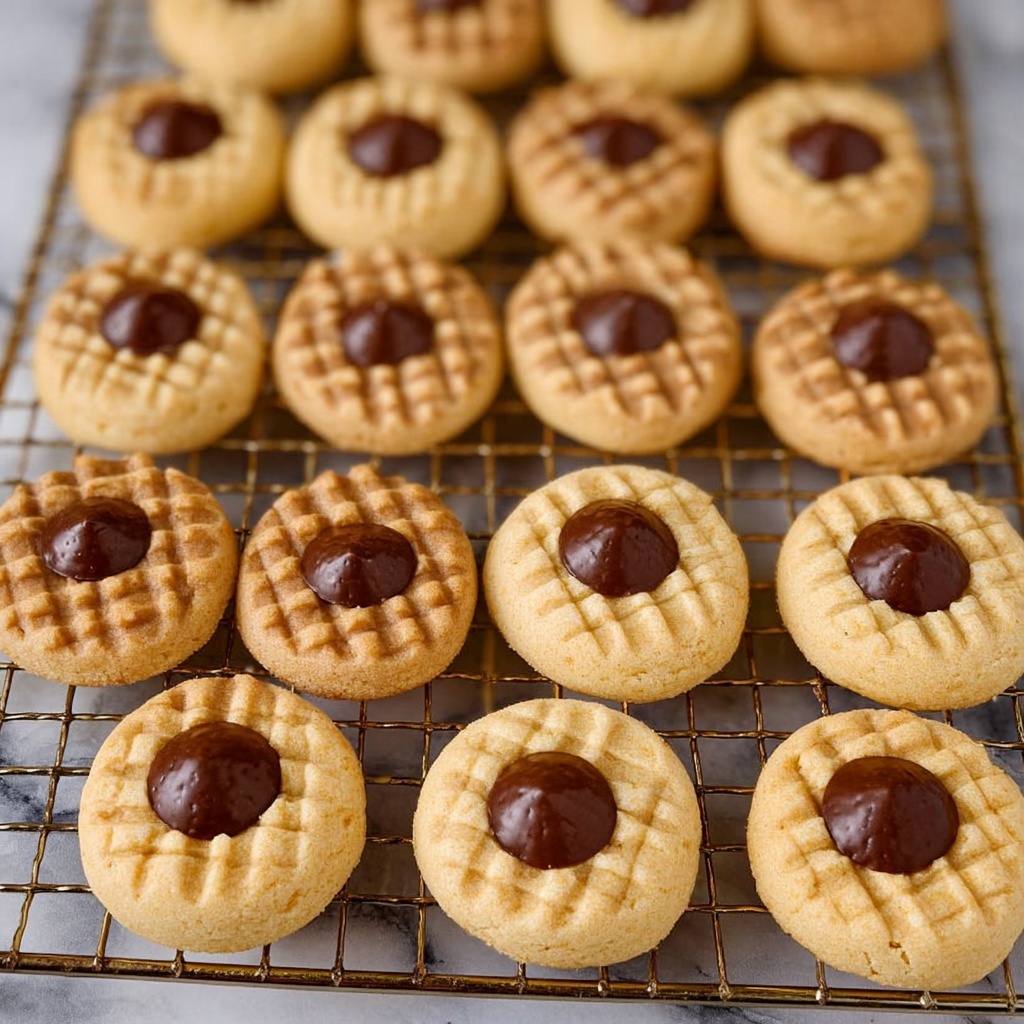
Press down each ball with a fork in a crisscross pattern. For best results, dip your fork in sugar first to prevent sticking. This small step makes a huge difference in achieving those classic peanut butter cookie aesthetics.
Step 6: Bake and Optional Hershey Kiss Addition
Bake the cookies for 8 to 10 minutes until the edges are just golden. If you want to make Peanut Butter Blossoms, don’t flatten the dough balls before baking. Instead, bake as is, then immediately press an unwrapped Hershey Kiss into the center of each cookie right after they come out of the oven.
Step 7: Cool and Enjoy
Transfer the cookies from the baking sheet to a wire rack to cool completely. This prevents them from becoming soggy and helps them set to that perfect texture we all love.
How to Serve Bisquick Peanut Butter Cookies Recipe
Garnishes
A simple dusting of powdered sugar or a light drizzle of melted chocolate can add an elegant touch to your cookies. For Peanut Butter Blossoms, the Hershey Kiss itself acts as a beautiful, classic garnish that everyone recognizes and adores.
Side Dishes
These cookies pair wonderfully with a glass of cold milk, creamy vanilla ice cream, or even a hot cup of your favorite coffee or tea. The combination is comforting and makes the treat feel extra special whether it’s a casual snack or a dessert.
Creative Ways to Present
Turn these cookies into a festive gift by stacking them in a mason jar tied with a ribbon. Or arrange them on a pretty platter sprinkled with chopped peanuts or mini chocolate chips for a party spread. Their buttery color and inviting shape make them a natural crowd-pleaser wherever they go.
Make Ahead and Storage
Storing Leftovers
Place cooled cookies in an airtight container at room temperature, and they’ll stay fresh and delicious for up to a week. Adding a slice of bread to the container can help keep them soft and chewy longer.
Freezing
You can freeze baked cookies by layering them between parchment sheets inside a freezer-safe container or bag. They’ll maintain their flavor and texture for about 2 to 3 months. Thaw at room temperature before serving for best results.
Reheating
If you like your cookies warm, pop them in the microwave for 10 to 15 seconds or heat them in a low oven for a few minutes. This gently revives their soft texture and melts any chocolate accents perfectly.
FAQs
Can I use crunchy peanut butter in this Bisquick Peanut Butter Cookies Recipe?
Absolutely! Using crunchy peanut butter will give you cookies with a little added texture from the peanut bits, which some people love for an extra nutty punch.
Do I have to use Bisquick, or can I substitute with regular flour?
Bisquick is recommended because it contains leavening agents and salt that help create the perfect cookie texture with less fuss. If you use regular flour, you may need to add baking soda or baking powder and salt separately for best results.
What’s the secret to getting the perfect crisscross pattern on these cookies?
Dipping your fork in sugar before pressing it into the cookie dough helps prevent sticking and creates that signature pattern with a lovely sugary finish.
Can I make these cookies vegan or dairy-free?
This recipe relies on sweetened condensed milk and peanut butter, so for a vegan or dairy-free version, you’d need to substitute with plant-based sweetened condensed milk and a vegan-friendly peanut butter brand. Keep in mind the texture may be slightly different but still tasty.
How do I avoid the Hershey Kiss melting too much on Peanut Butter Blossoms?
Press the Hershey Kiss onto the cookie right as it comes out of the oven, but don’t leave the cookies in the oven once the kisses are added. This way, they’ll soften slightly but hold their shape perfectly.
Final Thoughts
This Bisquick Peanut Butter Cookies Recipe is a shining example of how simple ingredients and straightforward steps can deliver extraordinary comfort and joy. Whether you’re baking for a last-minute treat or a holiday gathering, these cookies never fail to impress with their rich flavor and tender texture. I can’t wait for you to try it and make it your own cherished recipe too!
Print
Bisquick Peanut Butter Cookies Recipe
- Prep Time: 5 minutes
- Cook Time: 8 minutes
- Total Time: 13 minutes
- Yield: 3.3 dozen (approximately 40 cookies)
- Category: Dessert
- Method: Baking
- Cuisine: American
Description
These Bisquick Peanut Butter Cookies are quick to prepare with just a few simple ingredients, making them perfect for a sweet treat anytime. Soft, chewy, and bursting with rich peanut butter flavor, they can be baked as classic cookies or transformed into festive Peanut Butter Blossoms by adding Hershey Kisses.
Ingredients
Cookie Dough
- 1 (14-oz) can sweetened condensed milk
- ¾ cup peanut butter
- 2 cups Bisquick
- 1 tsp vanilla extract
- Sugar, for rolling
Topping (Optional)
- 36 unwrapped Hershey Kisses
Instructions
- Preheat Oven: Preheat your oven to 375ºF (190ºC) and line a baking sheet with parchment paper to prevent sticking and ensure even baking.
- Mix Wet Ingredients: In a mixing bowl, stir together the sweetened condensed milk and peanut butter until the mixture is smooth and well combined.
- Add Dry Ingredients: Stir in the Bisquick and vanilla extract until a cohesive dough forms.
- Form Dough Balls: Scoop the dough into 1 tablespoon-sized balls. Roll each ball gently in sugar to coat and place them spaced on the prepared baking sheet.
- Shape Cookies: For standard peanut butter cookies, flatten each ball using a fork pressed in a crisscross pattern. To avoid sticking, dip the fork into sugar before pressing.
- Bake Cookies: Bake the cookies for 8 to 10 minutes until they are set and lightly golden around the edges.
- For Peanut Butter Blossoms: If you prefer Peanut Butter Blossoms, do not flatten the dough balls before baking. After baking, immediately press an unwrapped Hershey Kiss onto the center of each cookie while still warm.
- Cool Cookies: Carefully transfer the cookies from the baking sheet to a wire rack to cool completely before serving.
Notes
- Rolling the fork in sugar before pressing helps prevent it from sticking to the dough.
- The cookies are best enjoyed fresh but can be stored in an airtight container at room temperature for up to 5 days.
- For a peanut butter alternative, natural peanut butter can be used, but the texture of the cookies may be slightly different.
- Optional Hershey Kisses add a classic touch, turning these into festive Peanut Butter Blossoms.


