
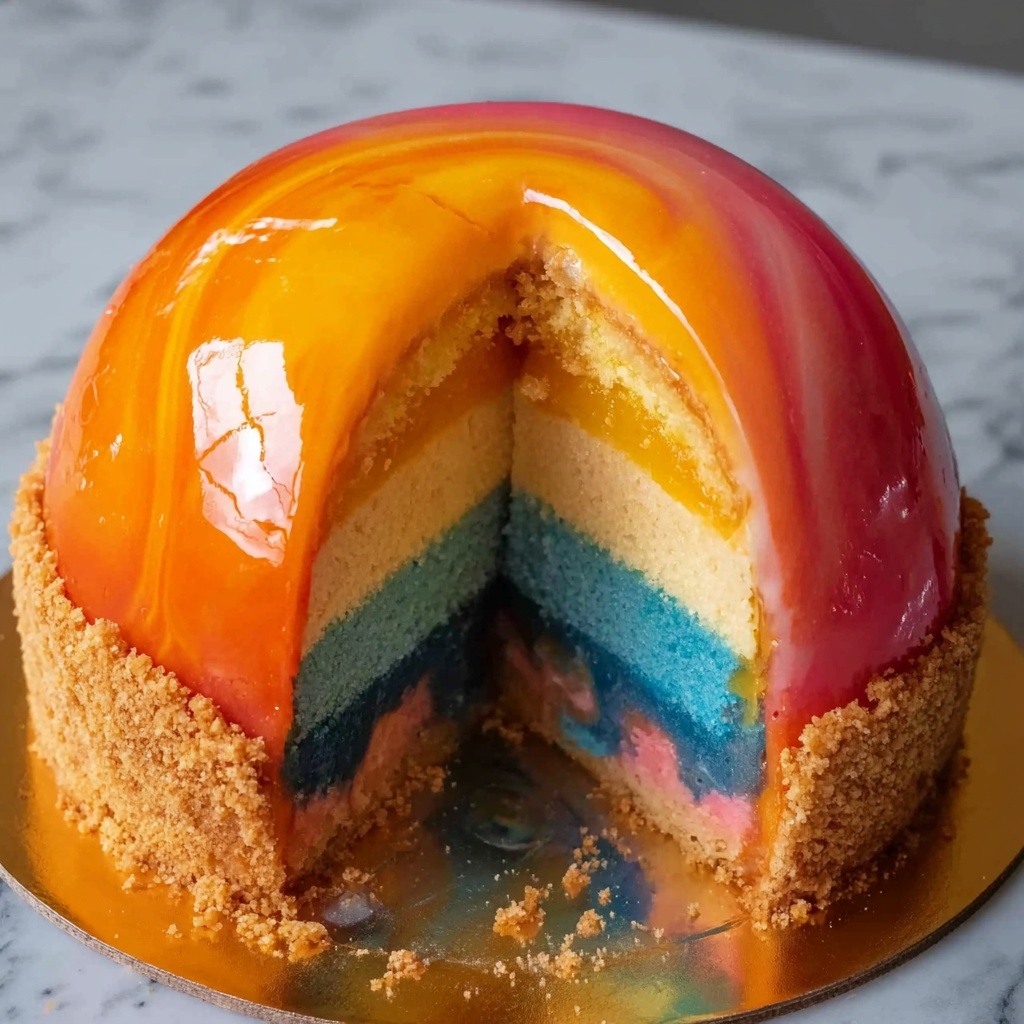
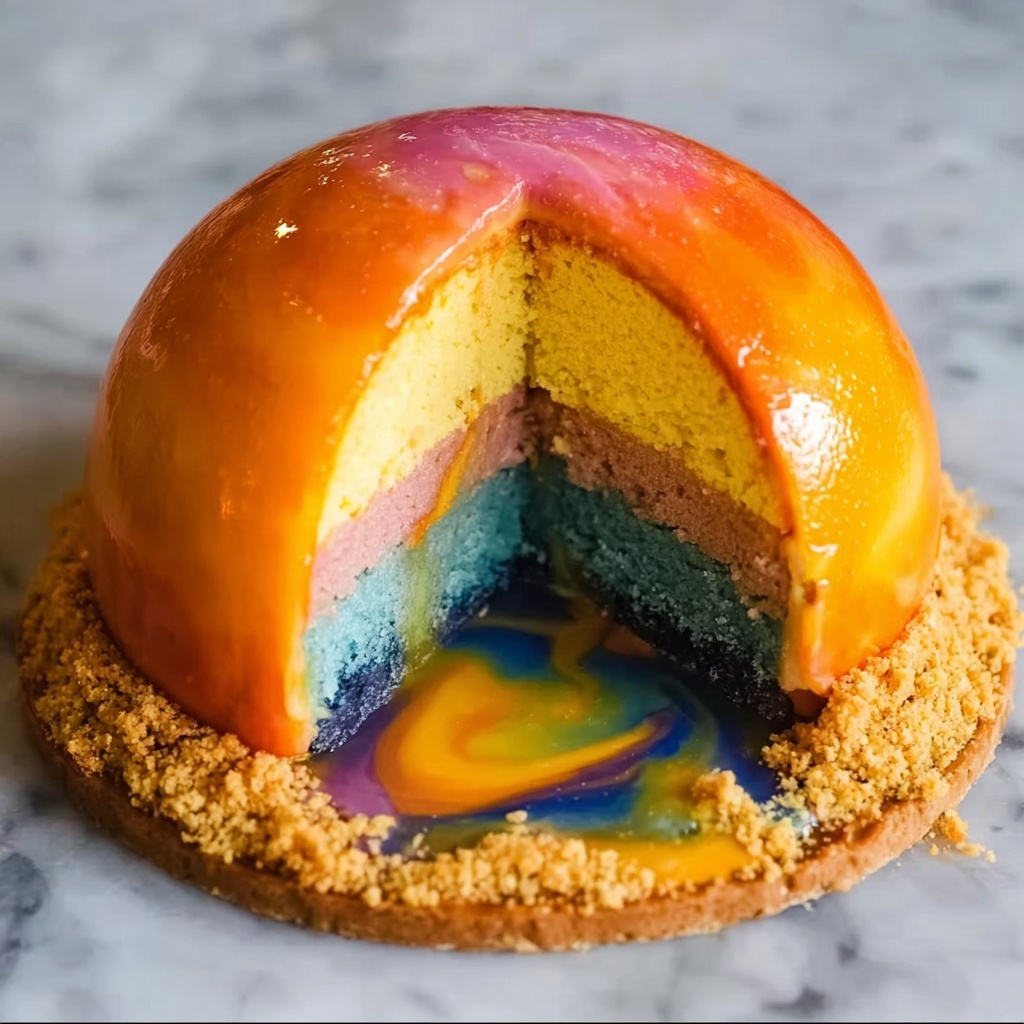
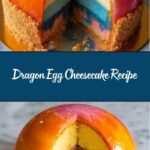
If you have a fondness for desserts that bring a touch of fantasy right to your table, the Dragon Egg Cheesecake Recipe is going to become your new obsession. This enchanting cheesecake dazzles with its marbled swirls of vibrant purples, blues, and teals, resembling mystical dragon eggs, while delivering an indulgent creamy texture and rich flavor that will captivate everyone lucky enough to taste it. The combination of velvety white chocolate, luscious cream cheese, and a chocolate cookie crust creates an experience that’s as magical as it is delicious. Once you try this Dragon Egg Cheesecake Recipe, it will be hard not to share this treasure with friends and family again and again.
Ingredients You’ll Need
These ingredients are straightforward yet essential in crafting the perfect balance of taste, texture, and that eye-catching color contrast which defines the Dragon Egg Cheesecake Recipe. Each element plays a key role, from the crunch of the chocolate cookie crumb crust to the silky, colorful cheesecake filling that’s bursting with flavor.
- Chocolate sandwich cookie crumbs: The foundation of the crust providing rich chocolate flavor and satisfying crunch.
- Unsalted butter, melted: Binds the crust together and adds a buttery richness.
- Cream cheese, softened: The creamy, tangy star of the filling that gives cheesecake its signature smoothness.
- Granulated sugar: Sweetens the cheesecake perfectly without overpowering the other flavors.
- Large eggs, room temperature: Help set the cheesecake giving it structure and a tender texture.
- Vanilla extract: Enhances the depth of flavor in the creamy filling.
- Sour cream: Adds subtle tang and keeps the cheesecake velvety soft.
- Heavy cream: Lightens the texture and adds richness and creaminess.
- White chocolate, melted and slightly cooled: Infuses decadent sweetness and smooth texture into the batter.
- Gel food coloring in purple, blue, and teal: Creates the magical, vibrant colors evocative of mythical dragon eggs without thinning the batter.
- White chocolate or candy melts for decorative drizzle: For an elegant finishing touch and delicate texture contrast on top.
- Edible gold dust (optional): Adds a shimmering, regal sparkle that makes this cheesecake truly feel like treasure.
How to Make Dragon Egg Cheesecake Recipe
Step 1: Prepare the Crust
Start by preheating your oven to 325 degrees Fahrenheit and greasing a 9-inch springform pan. Wrapping the pan’s outside in foil is crucial since we will create a water bath later to ensure the cheesecake bakes evenly and stays extra moist. Mix the chocolate cookie crumbs with the melted butter until fully combined, then press this mixture firmly into the bottom of your pan, forming a sturdy base for your cheesecake.
Step 2: Bake the Crust
Bake the crust for 8 minutes to set it slightly, which prevents it from becoming soggy once the filling is added. After baking, set the crust aside to cool while you prepare the luscious, colorful filling.
Step 3: Make the Cheesecake Batter
In a large bowl, beat together the cream cheese and sugar until the mixture is smooth and creamy with no lumps. Add eggs one at a time, mixing only until just combined after each addition to avoid incorporating too much air, which can cause cracks. Then stir in the vanilla extract, sour cream, and heavy cream until the batter is silky smooth and cohesive.
Step 4: Add the White Chocolate and Divide Batter
Fold in the melted white chocolate gently to keep the batter rich and creamy, imparting a luxurious flavor and texture. Divide the batter evenly into three separate bowls, which will allow you to tint each portion with different gel food colorings to mimic the stunning hues of mythical dragon eggs.
Step 5: Color and Swirl the Batter
Add gel food coloring in purple, blue, and teal to each bowl, stirring until the colors are bold and vibrant. Spoon these colored batters alternately into your crust, layering them to build up the multicolored effect. Use a knife to gently swirl the layers into a marbled pattern, which gives the cheesecake its distinctive Dragon Egg Cheesecake Recipe appearance.
Step 6: Bake in a Water Bath
Place the springform pan inside a larger roasting pan and carefully pour hot water halfway up the sides to create a water bath. This technique helps regulate temperature, ensuring a moist and silky cheesecake. Bake for 55 to 65 minutes, until the center is set but still slightly jiggly when you gently shake the pan.
Step 7: Cool and Chill
Turn off the oven and crack the door open, letting your cheesecake cool gradually in the oven for one hour. This slow cooling step helps prevent cracks. Afterward, remove the cheesecake from the oven and place it in the refrigerator for at least 4 hours or overnight to allow it to fully set and develop its full flavor.
Step 8: Decorate and Serve
Once chilled, drizzle melted white chocolate over the surface in an intricate web-like pattern to enhance the dragon egg illusion. For an extra magical touch, lightly brush the top with edible gold dust to create a shimmering finish worthy of a fantasy feast. Slice carefully and serve chilled to enjoy every luscious bite.
How to Serve Dragon Egg Cheesecake Recipe
Garnishes
Garnishing this cheesecake is your chance to get creative and elevate its presentation. A drizzle of melted white chocolate adds a delicate texture contrast and visual appeal. Edible gold dust sprinkled on top gives a regal shimmer reminiscent of treasure hoards in fantasy tales. Fresh berries or mint leaves can add a refreshing pop of color and brightness that complements the richness of the cheesecake beautifully.
Side Dishes
This Dragon Egg Cheesecake Recipe pairs wonderfully with a variety of side accompaniments. Serve alongside a scoop of tart berry sorbet for a contrast in flavor and temperature, or a cup of rich, dark coffee to balance the sweetness. A fresh fruit salad with citrus notes can also brighten the palate, making your dessert experience even more memorable.
Creative Ways to Present
For a dramatic presentation, consider shaping your cheesecake into an oval or egg shape using a smaller pan, truly embodying the “dragon egg” theme. Surround the edges with textured chocolate shards or candy pieces to mimic the cracked shell of a mythical egg. Display on a decorative platter dusted lightly with edible glitter or gold leaf to make your dessert the centerpiece of any fantasy-inspired gathering.
Make Ahead and Storage
Storing Leftovers
Store any leftover cheesecake tightly covered in plastic wrap or in an airtight container in the refrigerator. This will keep it fresh and prevent it from absorbing any other fridge odors while maintaining that luscious texture and flavor for up to 4 days—perfect for indulging again without a fuss.
Freezing
You can freeze the Dragon Egg Cheesecake Recipe for longer storage. Wrap the cheesecake tightly in plastic wrap, then a layer of aluminum foil to prevent freezer burn. Freeze for up to 2 months. When ready to enjoy, thaw overnight in the refrigerator to keep the creamy texture intact and ready to serve.
Reheating
Cheesecake is best enjoyed chilled, so reheating is generally unnecessary. However, if you prefer the flavors to be slightly more pronounced at room temperature, remove it from the fridge 30 minutes before serving to let it soften gently without losing its structure or richness.
FAQs
Can I use regular food coloring instead of gel for the Dragon Egg Cheesecake Recipe?
While regular food coloring can work, gel food coloring is recommended because it provides more vibrant hues without altering the batter’s consistency. Regular liquid colors may thin the batter, impacting the final texture and marbled effect.
How do I prevent cracks on my cheesecake surface?
To minimize cracks, avoid overmixing your batter and bake the cheesecake in a water bath to maintain even heat. Also, let the cheesecake cool gradually by turning off the oven and cracking the door before refrigerating; this helps the cheesecake settle gently.
Can I make this cheesecake dairy-free or vegan?
This Dragon Egg Cheesecake Recipe relies on dairy for its creamy texture and flavor, but you could experiment with dairy-free cream cheese and cream substitutes. Keep in mind that texture and taste may differ and require some trial and error to perfect.
What is the best way to achieve the marbled dragon egg look?
Divide the batter into separate bowls tinted with gel colors, then spoon the layers alternately into the crust. Use a knife to gently swirl the colors together, creating a smooth but distinct marbled pattern that mimics the look of dragon eggs.
Can I add flavor variations to this recipe?
Absolutely! Try adding a hint of orange zest or a splash of almond extract to the batter for a unique twist. Just be careful not to overpower the delicate white chocolate and cream cheese flavors that form the heart of this cheesecake.
Final Thoughts
Bringing the Dragon Egg Cheesecake Recipe to your kitchen is like inviting a little magic to your dessert table. Its bold colors, luscious texture, and irresistible flavor make it a true showstopper that’s perfect for celebrations or simply to satisfy your sweet cravings. I wholeheartedly encourage you to give this recipe a try—once you do, it’s sure to become a beloved favorite that you’ll reach for time and time again.
Print
Dragon Egg Cheesecake Recipe
- Prep Time: 25 minutes
- Cook Time: 1 hour
- Total Time: 5 hours 25 minutes
- Yield: 12 servings
- Category: Dessert
- Method: Baking
- Cuisine: American
- Diet: Vegetarian
Description
Dragon Egg Cheesecake is a visually stunning dessert featuring a marbled, colorful cheesecake inspired by mythical dragon eggs. With a rich chocolate cookie crust and creamy white chocolate-infused filling tinted in bold purple, blue, and teal hues, this cheesecake is perfect for fantasy-themed parties or special occasions. The cheesecake is baked in a water bath for a smooth texture and finished with a decorative white chocolate drizzle and optional edible gold dust for a magical touch.
Ingredients
Crust
- 2 cups chocolate sandwich cookie crumbs
- 5 tablespoons unsalted butter, melted
Filling
- 24 ounces cream cheese, softened
- 1 cup granulated sugar
- 3 large eggs, room temperature
- 1 teaspoon vanilla extract
- 1/2 cup sour cream
- 1/2 cup heavy cream
- 8 ounces white chocolate, melted and slightly cooled
- Gel food coloring in purple, blue, and teal
Topping
- 1/2 cup white chocolate or candy melts for decorative drizzle
- Edible gold dust (optional)
Instructions
- Prepare the Oven and Pan: Preheat your oven to 325°F (163°C). Grease a 9-inch springform pan and wrap the outside with foil to prevent water from seeping in during the water bath baking.
- Make the Crust: In a bowl, combine the chocolate cookie crumbs with the melted butter, mixing until evenly coated. Press this crumb mixture firmly into the bottom of the prepared pan to form the crust. Bake in the oven for 8 minutes, then set aside to cool slightly.
- Make the Cheesecake Batter: In a large bowl, beat the softened cream cheese and sugar until smooth and creamy. Add the eggs one at a time, mixing just until combined after each addition to avoid overmixing. Stir in vanilla extract, sour cream, and heavy cream until well blended. Fold in the melted white chocolate, ensuring the batter is smooth and homogenous.
- Color the Batter: Divide the cheesecake batter evenly into three separate bowls. Tint each portion with a different gel food coloring color — purple, blue, and teal — to create vibrant dragon-inspired hues.
- Create the Marbled Effect: Spoon the colored batters alternately into the cooled crust, layering the colors carefully. Use a knife to gently swirl the batter, creating a beautiful marbled pattern reminiscent of dragon eggs.
- Prepare the Water Bath and Bake: Place the springform pan inside a larger roasting pan. Pour hot water into the roasting pan, reaching halfway up the sides of the springform pan to form a water bath. Bake the cheesecake for 55 to 65 minutes, or until the center is set but still slightly jiggly to the touch.
- Cool the Cheesecake: Turn off the oven and crack the door open. Let the cheesecake cool inside the oven for 1 hour to prevent cracks. Then carefully remove it and refrigerate for at least 4 hours or preferably overnight to fully set.
- Decorate and Serve: Once chilled, melt the white chocolate or candy melts and drizzle over the top of the cheesecake in a web-like pattern. Optionally, lightly brush the top with edible gold dust for a shimmering, magical finish. Slice and serve chilled for best texture and flavor.
Notes
- Avoid overmixing the batter to prevent cracks in the cheesecake surface.
- Gel food coloring provides bold, vibrant colors without thinning the batter.
- For a more dramatic dragon egg shape, use a smaller oval pan and decorate sides with textured chocolate pieces.