
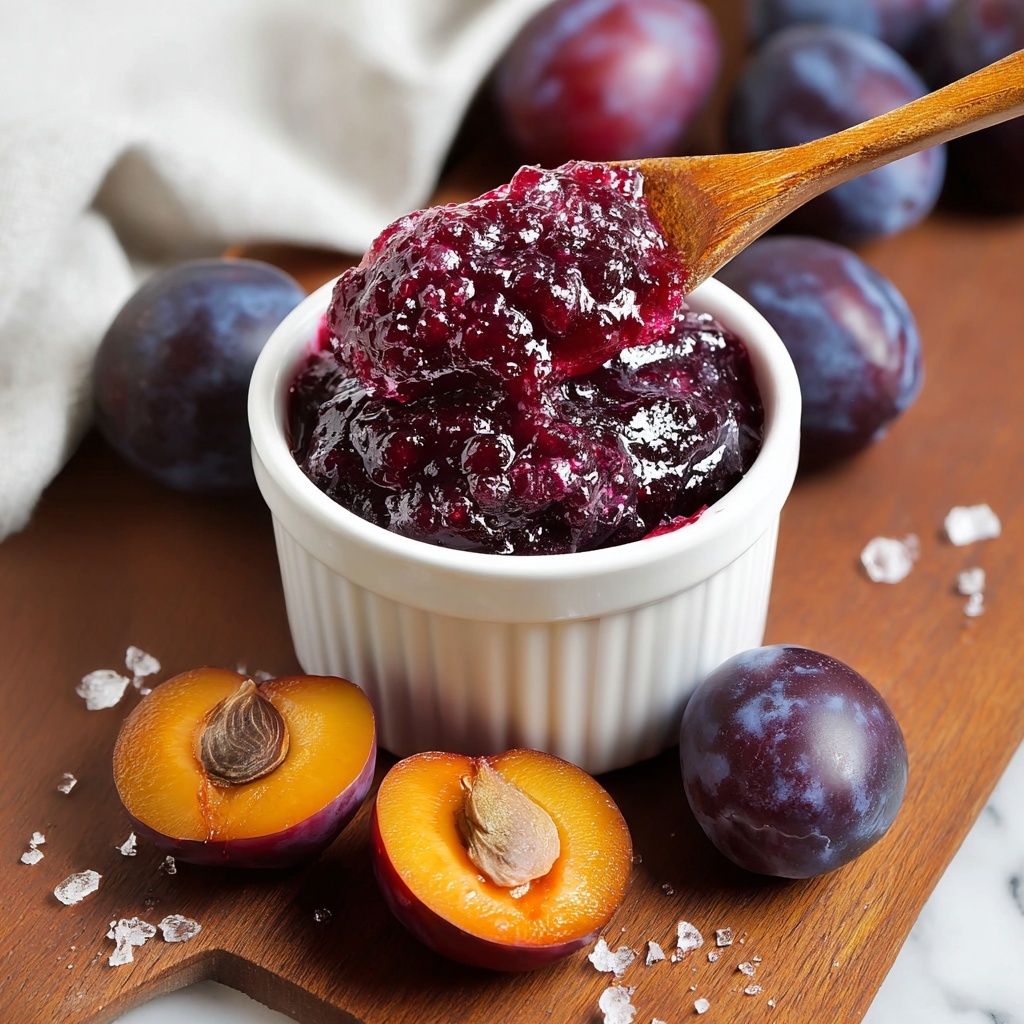
If you have a bounty of fresh plums or simply love the sweet-tart flavor of stone fruit, this Easy Plum Jam Recipe is a fantastic way to capture those gorgeous, vibrant flavors all year round. It’s a straightforward, joyful cooking experience that turns a handful of simple ingredients into a rich, luscious jam worthy of toast, yogurt, or even baking. The natural sweetness of plums balanced with a hint of lemon juice and a whisper of cinnamon creates a delightful spread that feels homemade and absolutely special.
Ingredients You’ll Need
Gathering your ingredients is the first step toward this delightful creation. Each component plays a crucial role in building the jam’s perfect balance of flavor, sweetness, and texture without any fuss.
- Fresh plums: The star of the show, ripe and juicy plums bring natural sweetness and beautiful color.
- Granulated sugar: Essential for sweetness and helps the jam set properly during cooking.
- Lemon juice: Adds brightness and acidity to balance the sweetness and helps with the jam’s preservation.
- Ground cinnamon (optional): A subtle spice that enhances warmth and depth without overpowering the fruity freshness.
How to Make Easy Plum Jam Recipe
Step 1: Prepare the Plums
Start by washing your fresh plums thoroughly, then pit and chop them into small pieces. This prep work is simple but essential—it makes sure your jam will cook evenly and develop the right texture.
Step 2: Combine Ingredients
In a large saucepan, mix the chopped plums, granulated sugar, and lemon juice. Letting this mixture sit for 15 minutes allows the fruit to release its juices and the sugar to begin dissolving, setting the stage for the perfect jam consistency.
Step 3: Cook the Jam
Bring the plum-sugar mixture to a boil over medium heat, stirring frequently so nothing sticks to the pan. Then reduce the heat to a gentle simmer for 25 to 30 minutes, stirring occasionally. If you prefer a smoother jam, feel free to mash it with a potato masher or blend briefly during cooking.
Step 4: Test Consistency
Use the classic wrinkle test to check if your jam is ready: Spoon a small amount onto a chilled plate, wait a minute, then push it with your finger. If the jam wrinkles and holds its shape, it’s perfectly set. If not, continue simmering and test again a few minutes later.
Step 5: Cool and Store
Remove the pan from the heat and allow the jam to cool slightly before transferring it into sterilized jars. Seal them tightly, then let the jars cool completely at room temperature before moving them to the refrigerator. This step ensures safety and maintains that fresh, vibrant flavor you worked so hard to create.
How to Serve Easy Plum Jam Recipe
Garnishes
Simple garnishes like a sprinkle of finely chopped fresh mint or a light dusting of cinnamon can add a fresh visual pop and an extra hint of flavor that pairs beautifully with the jam’s natural sweetness.
Side Dishes
Easy plum jam makes a fantastic companion for buttered toast, flaky croissants, or as a topping for creamy yogurt or cottage cheese. It also shines beside cheeses like brie or goat cheese, creating a lovely contrast that’s perfect for brunch or snacking.
Creative Ways to Present
Try swirling the jam into cheesecake batter before baking or glazing roasted meats for an unexpected fruity twist. You can also dollop it on pancakes, waffles, or ice cream to bring a homemade touch bursting with flavor.
Make Ahead and Storage
Storing Leftovers
Once sealed and refrigerated, your plum jam will keep fresh for up to three weeks. Always use a clean spoon to avoid contamination and to make sure every jarful tastes as vibrant as the first.
Freezing
If you want to keep your Easy Plum Jam Recipe longer, it freezes beautifully. Use airtight containers or freezer-safe jars, leaving some room for expansion, and thaw it slowly in the fridge when you’re ready to enjoy it again.
Reheating
When you want to enjoy your jam warm, gently reheat it in a small saucepan over low heat. Stir frequently and add a splash of water if it thickens too much, bringing the luscious texture back to life for spreading or drizzling.
FAQs
Can I use frozen plums for this jam?
Yes, frozen plums can be used if fresh ones aren’t available, but be sure to thaw and drain them well to avoid excess water affecting the jam’s set.
Is it necessary to add lemon juice?
Lemon juice adds acidity which balances sweetness and helps the jam set properly, so it’s highly recommended even if you like a sweeter flavor.
How long does the jam take to set?
Typically, cooking for about 25-30 minutes is enough, but the wrinkle test is the best way to ensure your jam has the perfect consistency.
Can I skip the cinnamon?
Absolutely! The cinnamon is optional and meant to add subtle warmth, but the jam will still be delicious without it.
What’s the best way to sterilize jars?
Boil your jars and lids in water for 10 minutes before filling them with hot jam, then seal immediately to create a proper vacuum seal and keep your jam fresh.
Final Thoughts
Honestly, there’s something so rewarding about making your own jam, and this Easy Plum Jam Recipe is the perfect gateway. It’s simple enough to feel like second nature, but the flavor delivers a big impact that makes it a favorite in my kitchen. Give it a try—you’ll love the bright, fresh taste of homemade plum jam spread generously on everything from morning toast to an elegant cheese board.
Print
Easy Plum Jam Recipe
- Prep Time: 15 minutes
- Cook Time: 30 minutes
- Total Time: 45 minutes
- Yield: 3 servings (approximately 1.5 cups jam)
- Category: Condiment
- Method: Stovetop
- Cuisine: American
Description
This easy plum jam recipe is a delightful way to preserve the sweet and tangy flavor of fresh plums. With just a few simple ingredients and minimal cooking, you can create a homemade jam that’s perfect for spreading on toast, dolloping on yogurt, or gifting to friends and family.
Ingredients
Jam Ingredients
- 2 pounds fresh plums, pitted and chopped
- 1 1/2 cups granulated sugar
- 1 tablespoon lemon juice
- 1/4 teaspoon ground cinnamon (optional)
Instructions
- Prepare the Plums: Wash the plums thoroughly, then pit and chop them into small pieces to ensure even cooking and texture in the jam.
- Combine Ingredients: In a large saucepan, mix the chopped plums with granulated sugar and lemon juice. Let the mixture sit for 15 minutes to macerate, which helps release the natural juices and dissolve the sugar.
- Cook the Jam: Place the saucepan over medium heat and bring the mixture to a boil, stirring frequently to prevent sticking. Once boiling, reduce the heat and let it simmer for 25-30 minutes, stirring occasionally. For a smoother jam, mash the fruit with a spoon or blend slightly with an immersion blender during cooking.
- Test Consistency: Perform the wrinkle test by spooning a small amount of jam onto a chilled plate. Let it cool for a minute then push the jam with your finger; if it wrinkles and does not flood back, the jam has set. If not, continue cooking for a few more minutes and test again.
- Cool and Store: Remove the jam from heat and allow it to cool slightly. Transfer the jam into sterilized jars, seal tightly, and let the jars cool completely before refrigerating to set and preserve freshness.
Notes
- You can omit the cinnamon for a classic plum jam flavor or add it to complement the fruit’s natural taste.
- Ensure jars are properly sterilized before storing to prevent spoilage.
- This jam can be stored in the refrigerator for up to 3 weeks or frozen for longer storage.
- Use fully ripe, but firm plums for the best flavor and texture.


