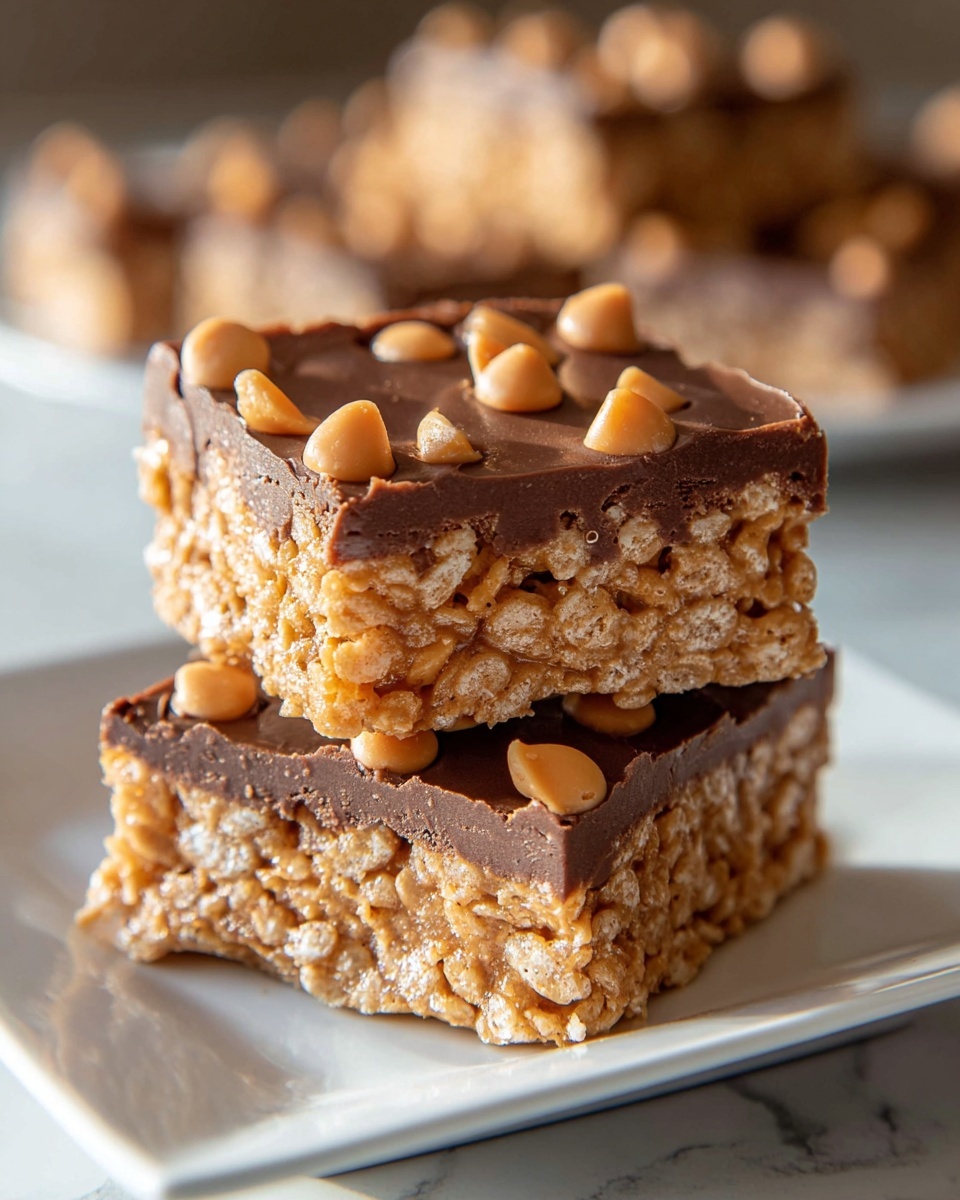
If you have a craving for something sweet, crispy, and irresistibly chocolaty, this Homemade Crunch Bars Recipe is just what you need to satisfy your snack attack. These bars combine the nostalgic crunch of rice cereal with the smooth richness of melted chocolate and marshmallows, creating a treat that’s both simple to make and delightfully addictive. Whether you’re whipping them up for a family get-together or a quick dessert fix, these bars hit that perfect balance of chewy and crunchy, making every bite a little moment of joy.
Ingredients You’ll Need
Gathering the right ingredients is half the joy of making these bars. Each simple component plays a crucial role in building layers of flavor, texture, and that flawless chocolatey finish that makes the Homemade Crunch Bars Recipe so memorable.
- Rice cereal: The crunchy star of the show providing light, airy crispness to the bars.
- Chocolate chips (semi-sweet or dark): They bring a rich, luscious chocolate flavor that melts smoothly into the mixture.
- Unsalted butter: Adds creaminess and helps the chocolate melt evenly.
- Mini marshmallows: These create a gooey, chewy texture that perfectly contrasts with the crisp cereal.
- Optional toppings (nuts or sprinkles): They add an extra layer of texture or a pop of color to personalize your bars.
How to Make Homemade Crunch Bars Recipe
Step 1: Prepare Your Baking Dish
Begin by greasing an 8×8-inch baking dish with butter or cooking spray. This step is important to ensure your bars slide out easily once they’re set and ready to be cut, without breaking apart.
Step 2: Melt Butter and Chocolate
On low heat, melt the butter together with the chocolate chips in a medium saucepan. Stir gently until you achieve a smooth, glossy mixture—this is the luscious base that ties all the flavors and textures together.
Step 3: Combine with Mini Marshmallows
Add the mini marshmallows to your chocolate and butter mixture, stirring continuously until they melt completely. This gooey, sticky texture is what holds your bars together while adding that familiar, comforting chewiness.
Step 4: Add Rice Cereal
Gently fold in the rice cereal, making sure every piece is coated evenly. The goal is to keep the cereal crisp without crushing it, so take care to mix delicately for the perfect crunch.
Step 5: Press Mixture into Pan
Pour the mixture into your prepared baking dish and firmly press it down to create an even, compact layer. This helps the bars set nicely and makes slicing easier.
Step 6: Add Optional Toppings
Before the bars cool completely, sprinkle your chosen toppings like nuts or festive sprinkles over the surface. This adds a personal touch and a bit of extra flavor or color to brighten up the bars.
Step 7: Refrigerate and Slice
Place the dish in the refrigerator for about 30 minutes to set firmly. Once chilled, slice into 16 squares and get ready to enjoy the satisfying crunch and gooey chocolate goodness!
How to Serve Homemade Crunch Bars Recipe
Garnishes
Simple garnishes can elevate these bars from casual snack to party treat. Try dusting the tops lightly with cocoa powder or a drizzle of melted white chocolate for a visually appealing contrast. A sprinkle of sea salt also complements the sweetness beautifully.
Side Dishes
Pair your Homemade Crunch Bars Recipe with a cold glass of milk or a scoop of vanilla ice cream for an indulgent dessert experience. They’re also perfect alongside a warm cup of coffee or tea to satisfy your mid-afternoon sweet tooth.
Creative Ways to Present
Thinking beyond the classic square? Cut the bars into fun shapes using cookie cutters for festive occasions or assemble them as layered parfaits with whipped cream and fresh berries. Wrapping individual bars in parchment paper ribbons also makes for delightful grab-and-go gifts or lunchbox treats.
Make Ahead and Storage
Storing Leftovers
If you manage to have any bars left (which can be a challenge), store them in an airtight container at room temperature for up to three days. This keeps them fresh and crunchy without getting too soft or sticky.
Freezing
For longer storage, freeze the bars individually wrapped or stacked between parchment paper in a sealed container. They freeze well for up to a month and thaw quickly at room temperature when you’re ready for a sweet pick-me-up.
Reheating
These bars are best enjoyed as is, but if you want that warm, melty sensation, pop them in the microwave for 10 to 15 seconds. Just be careful not to overheat, or they may become too gooey and lose their delightful crunch.
FAQs
Can I use a different type of cereal?
Absolutely! While rice cereal is classic for its light crunch, you can experiment with puffed wheat or cornflakes for different textures, just be mindful that it might change the final crunchiness or flavor slightly.
What kinds of chocolate chips work best?
Semi-sweet or dark chocolate chips provide a rich balance to the sweetness of marshmallows, but feel free to try milk chocolate or even white chocolate chips for a different flavor profile. Just adjust sweetness accordingly.
Are there any allergy-friendly adaptations?
You can substitute the butter for a dairy-free alternative and choose allergy-safe cereal options. Make sure the chocolate chips and marshmallows you select are free of allergens as well.
Can I add other mix-ins to the bars?
Yes! Chopped nuts, shredded coconut, or even dried fruit can be folded in with the cereal for added texture and flavor. Just add them in step 4 when mixing everything together.
How long do these bars stay fresh?
Stored properly in an airtight container, these bars stay fresh and delicious for about three to four days at room temperature, making them a perfect overnight treat or snack to prep ahead.
Final Thoughts
Every time I make this Homemade Crunch Bars Recipe, I’m reminded how such simple ingredients can come together to create something truly special. Fun to make, easy to share, and absolutely delicious, these bars are sure to become your go-to sweet snack anytime you want a quick, satisfying treat. Don’t wait—grab your ingredients and whip up a batch today!
Print
Homemade Crunch Bars Recipe
- Prep Time: 10 minutes
- Cook Time: 10 minutes
- Total Time: 40 minutes
- Yield: 16 servings
- Category: Dessert
- Method: Stovetop
- Cuisine: American
Description
Homemade Crunch Bars are an easy and delicious treat combining crispy rice cereal, melted chocolate, marshmallows, and buttery goodness. Perfect for a quick dessert or snack, these bars are delightfully chewy with a satisfying crunch and can be customized with optional toppings like nuts or sprinkles.
Ingredients
Main Ingredients
- 3 cups rice cereal
- 1 cup semi-sweet or dark chocolate chips
- 4 tablespoons unsalted butter
- 2 cups mini marshmallows
Optional Toppings
- Nuts (e.g., chopped almonds, walnuts, or pecans)
- Sprinkles
Instructions
- Prepare the Baking Dish: Grease an 8×8-inch baking dish thoroughly using butter or cooking spray to prevent sticking.
- Melt Butter and Chocolate: In a medium saucepan over low heat, gently melt the unsalted butter along with the chocolate chips, stirring continuously until the mixture is smooth and fully combined.
- Add Marshmallows: Stir in the mini marshmallows gradually, continuing to cook on low heat until the marshmallows are completely melted and incorporated into the chocolate and butter mixture.
- Mix in Rice Cereal: Remove the saucepan from heat and gently fold the rice cereal into the melted chocolate mixture, ensuring that all the cereal is evenly coated.
- Transfer and Shape: Pour the mixture into the prepared baking dish and press down firmly with a spatula or clean hands to create an even, compact layer.
- Add Optional Toppings: Before the mixture cools completely, sprinkle your choice of optional toppings such as nuts or sprinkles on top to add texture and flavor.
- Chill and Set: Place the baking dish in the refrigerator and chill for about 30 minutes until the bars are set firmly. Once set, slice into 16 squares and serve.
Notes
- Use low heat when melting the butter, chocolate, and marshmallows to prevent burning or seizing.
- Pressing the mixture firmly into the pan ensures the bars hold together well after cooling.
- Customize the bars by adding peanut butter to the melted mixture for a nutty flavor.
- Store leftover bars in an airtight container at room temperature for up to 3 days or refrigerate for longer freshness.
- For a gluten-free option, ensure the rice cereal is labeled gluten-free.


