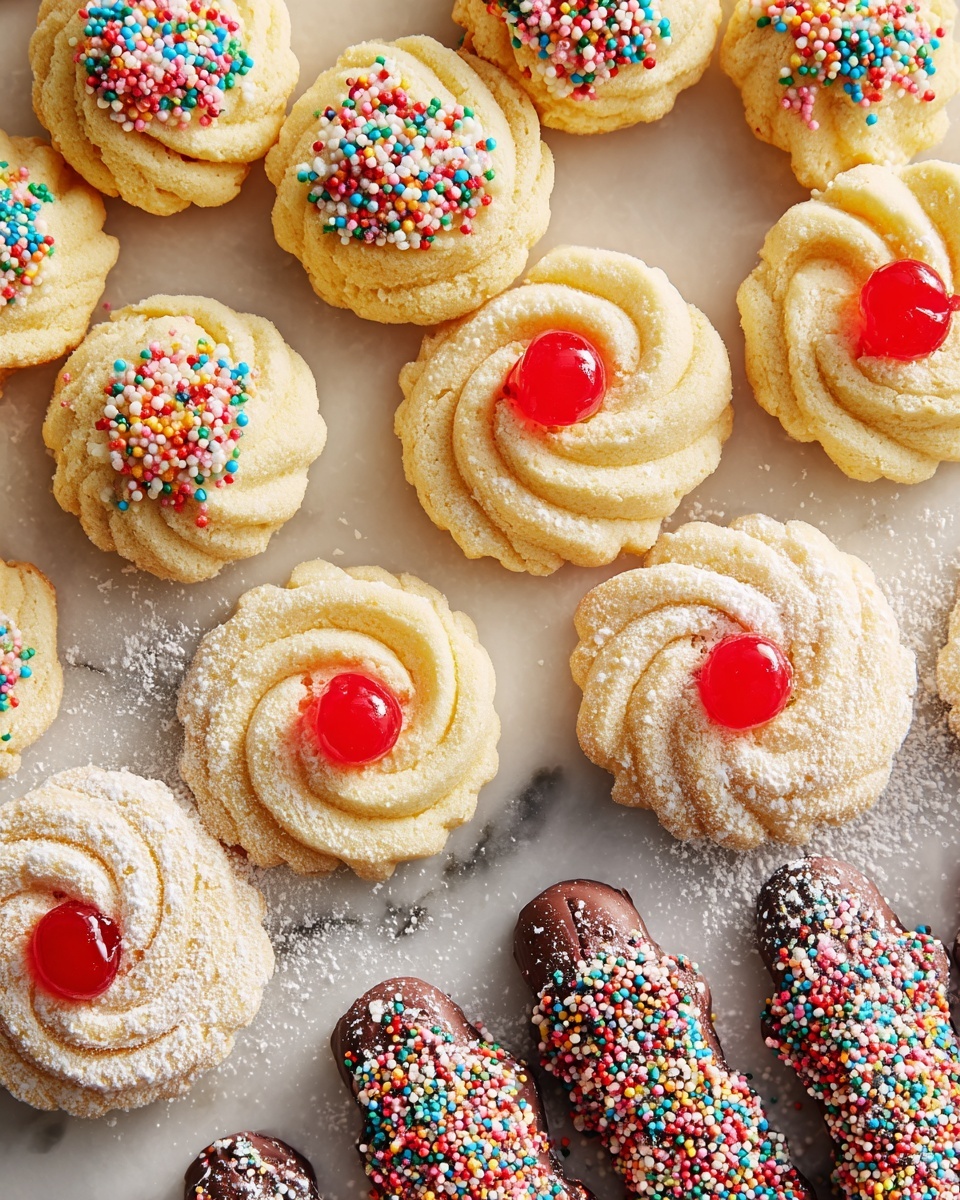
If you’re on the lookout for a buttery, melt-in-your-mouth treat that feels like a warm hug from an Italian kitchen, then I have just the thing for you. This Italian Butter Cookies Recipe is everything you want in a cookie: delicate yet satisfying, crisp on the outside with a tender crumb inside. It’s a classic cookie that’s as perfect with your afternoon coffee as it is on holiday cookie trays. Simple ingredients come together in the most charming way to create something truly special. You’re going to love how these cookies bring a slice of Italy right to your home.
Ingredients You’ll Need
One of the best things about this Italian Butter Cookies Recipe is how straightforward the ingredients are. Each item plays an essential role in the cookie’s structure and flavor, ensuring that every bite is pure buttery bliss without any fuss.
- Unsalted butter: Using unsalted butter lets you control the salt level and gives the cookies a rich, creamy texture.
- Confectioners sugar: This fine sugar dissolves easily, lending a delicate sweetness and smooth texture to the dough.
- Large egg yolks: They add richness and help bind the dough together beautifully.
- Vanilla extract: Just a touch elevates the flavor, adding warmth and depth.
- All-purpose flour: The foundation of the cookie, providing the perfect balance of chew and crispness.
- Baking powder: A little lift to keep the cookies light without being cakey.
- Fine sea salt: Enhances the sweetness and rounds out all the flavors perfectly.
- Optional – Melted chocolate: For a decadent finishing touch that complements the buttery cookie.
- Optional – Coconut oil or shortening: Helps achieve a glossy chocolate coating if dipping.
- Optional – Sprinkles: Adds fun color and texture for festive occasions.
How to Make Italian Butter Cookies Recipe
Step 1: Prep Your Oven and Baking Sheet
First things first, preheat your oven to 350°F (175°C) and line a baking sheet with parchment paper. This simple step ensures your cookies bake evenly and won’t stick, making cleanup a breeze.
Step 2: Beat the Butter and Sugar
Start by beating the unsalted butter until it’s light and fluffy. This aeration is key to getting a tender crumb. Gradually add the sifted confectioners sugar and continue mixing until the texture is smooth and silky—this is where the magic begins!
Step 3: Add Egg Yolks and Vanilla
Add the large egg yolks to the butter and sugar mixture one at a time, blending well after each addition. Then pour in the vanilla extract for that rich, cozy flavor that makes these cookies unforgettable.
Step 4: Combine Dry Ingredients
In a separate bowl, sift together the all-purpose flour, baking powder, and fine sea salt. This step prevents clumps and ensures your ingredients mix evenly, which is essential for consistent cookies.
Step 5: Mix Wet and Dry Ingredients
Gently fold the dry ingredients into the wet mixture just until combined. Overmixing can make the cookies tough, so stop when the dough looks uniform. The consistency should be soft enough to pipe but firm enough to hold its shape.
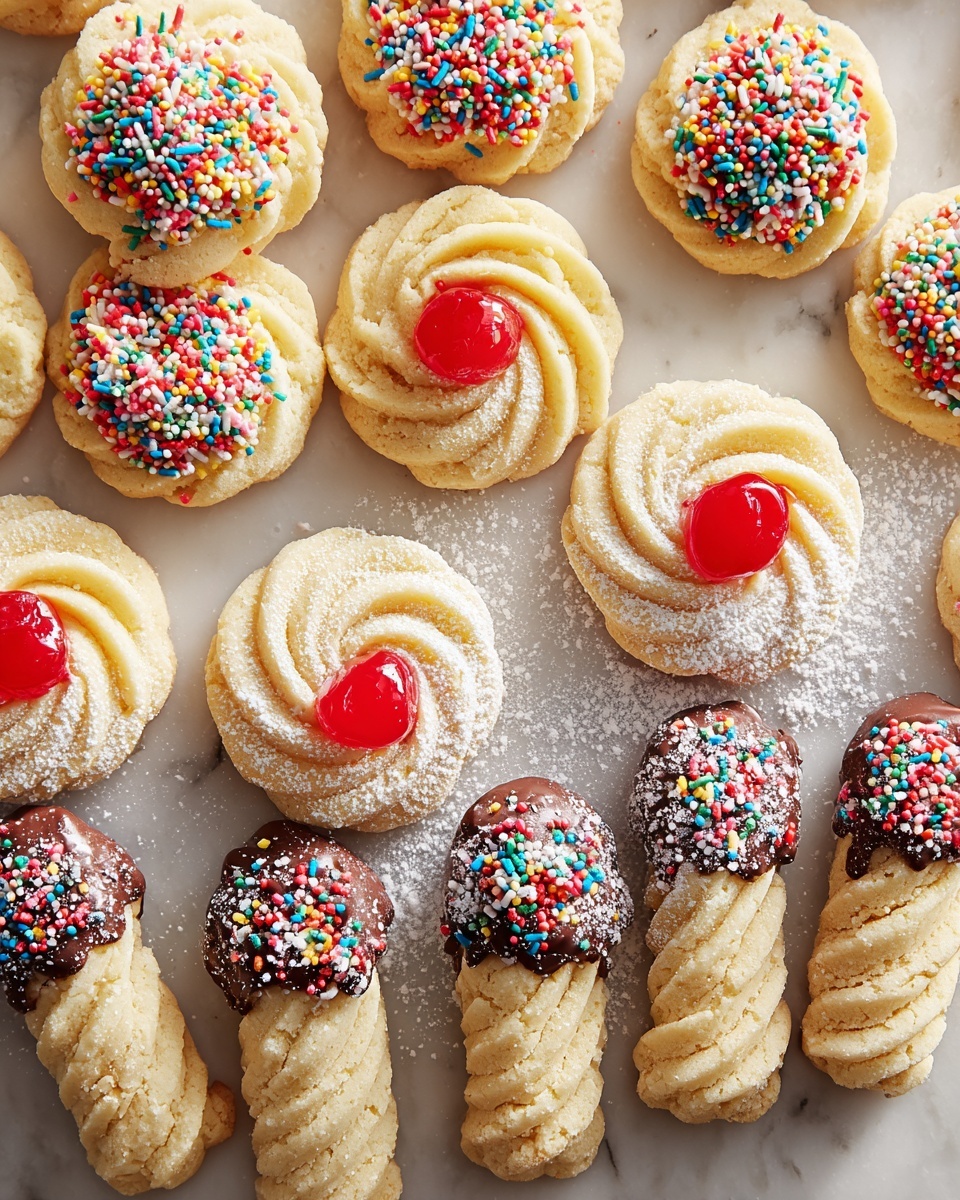
Step 6: Pipe the Cookies
Spoon the dough into a piping bag fitted with a large open star tip. Pipe 2-inch sections onto your prepared baking sheet, spacing them apart to leave room for a little spread.
Step 7: Bake Until Lightly Golden
Bake your cookies for 13 to 15 minutes. You want a delicate golden hue that signals crisp edges and a tender middle. The scent wafting through your kitchen will be irresistible.
Step 8: Cool and Decorate
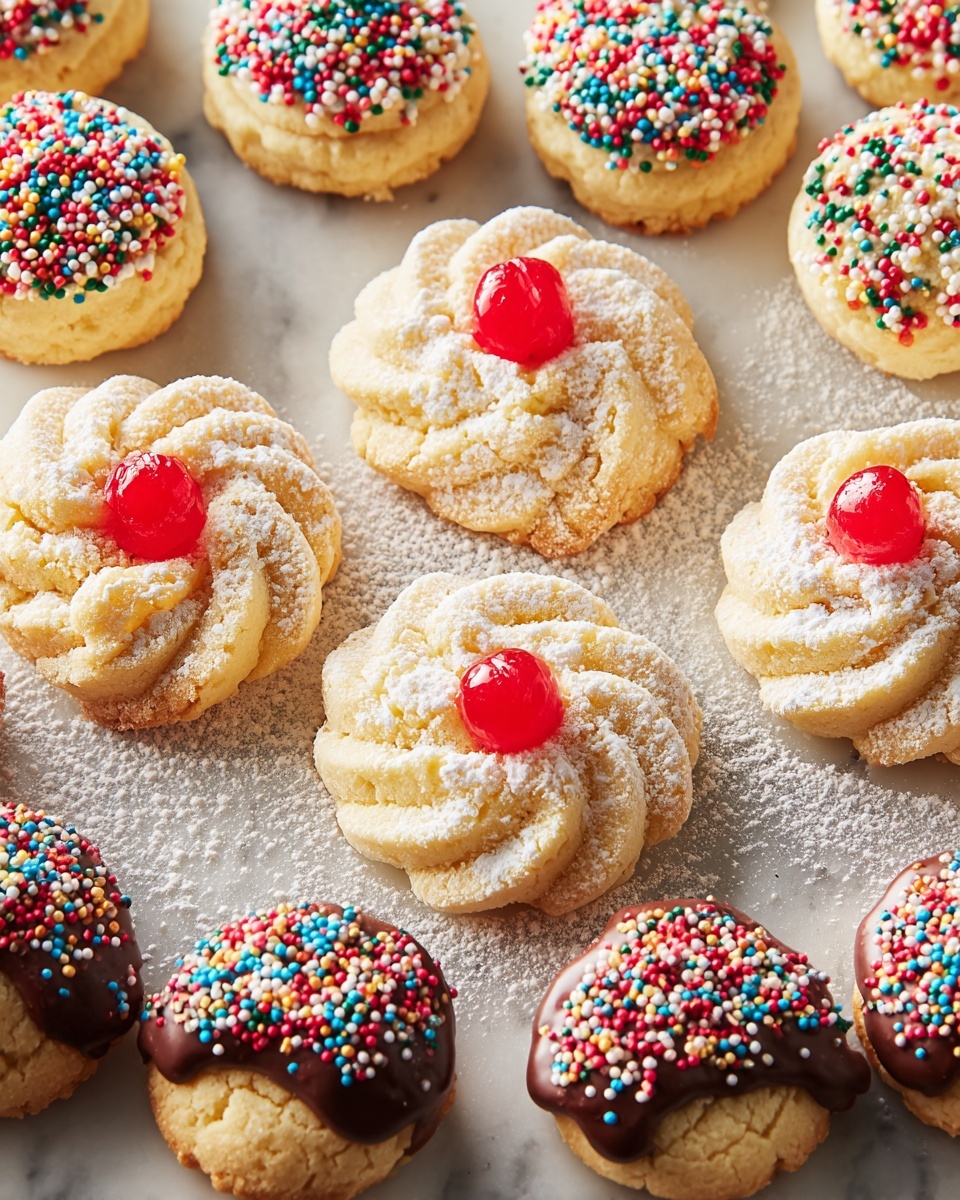
Let the cookies cool on the baking sheet for 5 minutes, then transfer them to a wire rack. If you’re feeling indulgent, dip them in melted chocolate and add sprinkles before the chocolate hardens for an extra festive touch.
How to Serve Italian Butter Cookies Recipe
Garnishes
A light dusting of powdered sugar adds a simple elegance to these cookies, but dipping them in melted chocolate or drizzling with a bit of white chocolate makes for a show-stopping treat. Sprinkles add a fun pop of personality whether it’s a casual get-together or a special holiday celebration.
Side Dishes
These cookies pair beautifully with a steaming cup of espresso or a glass of sweet dessert wine. They also accompany tea perfectly during afternoon gatherings. If you want to create a full dessert plate, consider serving with fresh berries or a dollop of mascarpone cheese for an authentic Italian flair.
Creative Ways to Present
Arrange your Italian Butter Cookies on a decorative platter with sprigs of fresh rosemary or edible flowers to make your dessert table pop with color. You can also sandwich a bit of jam or chocolate ganache between two cookies to create delightful cookie sandwiches that will amaze friends and family alike.
Make Ahead and Storage
Storing Leftovers
Keep your leftovers fresh by storing them in an airtight container at room temperature. They’ll stay delicious for up to a week, maintaining their tender, buttery texture without drying out.
Freezing
If you want to make these ahead of time, the cookies freeze beautifully. Just place them in a single layer on a baking sheet, freeze until solid, then transfer to a freezer-safe bag or container. When you’re ready for a treat, thaw them at room temperature.
Reheating
To bring out that just-baked warmth, briefly warm the cookies in a preheated oven at 300°F (150°C) for 5 minutes. This will revive their crispness without drying them out, making each bite as delightful as the first time.
FAQs
Can I use salted butter for this Italian Butter Cookies Recipe?
While you can use salted butter, it’s best to use unsalted to control the salt content accurately. Salted butter may alter the balance of flavors, so adjust any added salt accordingly.
Are these cookies suitable for freezing after baking?
Yes! Italian Butter Cookies freeze really well. Freeze them in a single layer first to avoid sticking, then store in an airtight container or bag for up to three months.
Can I substitute almond flour or gluten-free flour?
This recipe relies on all-purpose flour for structure and texture, so substituting with almond or gluten-free flour may change the consistency. If you want to experiment, try blending gluten-free flour while adding binder agents, but expect a different texture.
Is it necessary to pipe the dough with a star tip?
Piping with a star tip gives those classic ridges and beautifully shaped cookies, but you can absolutely drop spoonfuls of dough if you don’t have a piping bag. The texture and flavor will remain just as wonderful.
Can I add flavor variants to the Italian Butter Cookies Recipe?
Definitely! Add lemon zest, anise extract, or a hint of cinnamon to the dough to personalize your cookies. Just a splash or a teaspoon can take these cookies in delightful new directions.
Final Thoughts
There is something truly heartwarming about making and sharing this Italian Butter Cookies Recipe. Its simplicity is its charm, and once you try it, you’ll find yourself reaching for these buttery little bites again and again. Whether shared with loved ones or enjoyed as a personal treat, these cookies bring joy with every crumb. So grab your ingredients, roll up your sleeves, and create something deliciously Italian in your own kitchen today!
Print
Italian Butter Cookies Recipe
- Prep Time: 20 minutes
- Cook Time: 15 minutes
- Total Time: 35 minutes
- Yield: 24 servings
- Category: Cookies
- Method: Baking
- Cuisine: Italian
- Diet: Vegetarian
Description
These Italian Butter Cookies are classic, buttery treats with a delicate texture and a slightly crisp edge. Perfect for teatime or festive occasions, they are simple to make and can be decorated with chocolate and sprinkles for added flair.
Ingredients
Cookie Dough
- 1 cup unsalted butter, softened
- 1 cup confectioners’ sugar, sifted
- 4 large egg yolks
- 1 teaspoon vanilla extract
- 2 1/4 cups all-purpose flour
- 1/2 teaspoon baking powder
- 1/4 teaspoon fine sea salt
Optional Decorations
- Melted chocolate (for dipping)
- Coconut oil or shortening (to thin melted chocolate, if needed)
- Sprinkles
Instructions
- Preheat Oven: Preheat your oven to 350°F (175°C) and line a baking sheet with parchment paper to prevent sticking and ensure even baking.
- Prepare Butter and Sugar: Beat the unsalted butter until it becomes light and fluffy, signifying proper aeration. Gradually add the sifted confectioners’ sugar and mix thoroughly until the mixture is smooth and creamy.
- Add Egg Yolks and Vanilla: Incorporate the egg yolks one at a time, mixing well after each addition. Then blend in the vanilla extract to infuse the dough with a fragrant aroma.
- Combine Dry Ingredients: In a separate bowl, sift together the all-purpose flour, baking powder, and fine sea salt. Gradually add this dry mixture to the wet ingredients, mixing just until combined to maintain a tender texture.
- Pipe the Dough: Transfer the dough into a piping bag fitted with a large open star tip. Pipe out the dough onto the prepared baking sheet in sections about 2 inches apart to allow room for spreading.
- Bake the Cookies: Place the baking sheet in the preheated oven and bake the cookies for 13 to 15 minutes, or until the edges are lightly golden and the cookies have set.
- Cool the Cookies: Allow the cookies to cool on the baking sheet for 5 minutes before transferring them to a wire rack to cool completely.
- Optional Decoration: Once cooled, dip the cookies into melted chocolate (optionally thinned with a small amount of coconut oil or shortening) and decorate with sprinkles. Allow the chocolate to harden before serving.
Notes
- Make sure not to overmix the dough after adding flour to maintain a tender texture.
- Using a piping bag with a star tip creates the signature ridged design on the cookies.
- If melting chocolate for dipping, adding a small amount of coconut oil or shortening helps achieve a smoother consistency.
- Store cookies in an airtight container to keep them fresh for up to a week.
- These cookies can be frozen before or after baking to extend shelf life.
