
If you are looking for a festive and refreshing dessert that will wow your guests and delight your taste buds, this Peppermint Ice Cream Cake Recipe is an absolute must-try. Combining the rich chocolatey crunch of a cookie crust with the cool, minty sweetness of peppermint ice cream and the light fluffiness of homemade whipped cream, this cake is a celebration of textures and flavors. It’s quick to assemble, requires no baking, and perfect for any occasion where you want to bring that magical holiday spirit to your table, or simply indulge in a refreshing treat anytime.
Ingredients You’ll Need
The ingredients for this recipe are wonderfully simple but play a vital role in creating the perfect balance of taste, texture, and appearance. Each component, from the chocolate cookie crumbs to the crushed peppermint candies, adds a layer of flavor and crunch that makes this ice cream cake truly special.
- 2 cups chocolate cookie crumbs (e.g., Oreos, without the filling): These create the crunchy, chocolatey base that holds everything together.
- 6 tbsp unsalted butter, melted: Helps bind the cookie crumbs into a firm crust that stays crisp.
- 1 ½ quarts peppermint ice cream, slightly softened: The star of the show providing that refreshing peppermint flavor and creamy texture.
- ½ cup crushed peppermint candies or candy canes: Adds a delightful crunch and festive flair within the ice cream layer.
- 2 cups heavy whipping cream: Makes the topping luxuriously fluffy and light.
- 3 tbsp powdered sugar: Sweetens the whipped cream just enough without overpowering the mint.
- ½ tsp vanilla extract: Adds subtle depth to the whipped cream topping.
- Extra crushed candy canes or peppermint candies: For decorating and adding a charming finishing touch.
- Chocolate shavings or mini chocolate chips: For complementary texture and a hint of indulgence in the final decoration.
How to Make Peppermint Ice Cream Cake Recipe
Step 1: Prepare the Crust
Start by greasing a 9-inch springform pan or lining it with parchment paper for easy removal later. Mix your chocolate cookie crumbs with the melted butter until it feels like wet sand when pinched. Press this mixture firmly and evenly into the bottom of your pan—it forms the perfect sturdy base that brings a delicious crunch to every bite. Pop it into the freezer for about 15 minutes to set.
Step 2: Add the Ice Cream Layer
Once your crust is chilled and firm, spread the slightly softened peppermint ice cream evenly over it. This layer is what gives the cake its beautiful, creamy texture and minty freshness. While the ice cream is still soft, generously sprinkle crushed peppermint candies over the top for an extra pop of flavor and crunch that makes this ice cream cake recipe so irresistible.
Step 3: Freeze Until Firm
Cover the pan tightly with plastic wrap to keep all those delicious flavors locked in and place it in the freezer for at least 4 hours—or until it becomes completely firm. This step is essential so your cake holds its shape when you add the whipped topping and slice into it later.
Step 4: Prepare the Whipped Topping
While the ice cream is freezing, whip your heavy cream along with powdered sugar and vanilla extract in a chilled bowl until stiff peaks form. This homemade whipped cream topping is the perfect finish: light, fluffy, and just sweet enough to compliment the peppermint ice cream below.
Step 5: Assemble and Decorate
Take the icy cake out of the freezer and spread the whipped cream evenly over the top. Go ahead and decorate generously with crushed candy canes, chocolate shavings, or mini chocolate chips. These finishing touches enhance both the look and texture, making the cake even more festive and indulgent.
Step 6: Chill and Serve
Return your assembled cake to the freezer for at least one more hour to allow the whipped topping to set properly. When you’re ready to serve, give it about 5 to 10 minutes at room temperature for easier slicing. This small wait helps achieve the perfect, clean slices that everyone will love.
How to Serve Peppermint Ice Cream Cake Recipe
Garnishes
When serving this cake, feel free to add a bit more crushed peppermint candies or delicate chocolate shavings right on each slice for a charming presentation. A sprig of fresh mint can also add a lovely, vibrant touch that echoes the cake’s cool peppermint flavor.
Side Dishes
This peppermint ice cream cake is fantastic on its own but pairs wonderfully with a warm berry compote or a drizzle of rich chocolate sauce. These side touches add a lovely contrast and elevate your dessert experience to something truly special.
Peppermint Ice Cream Cake Recipe – Creative Ways to Present
For a festive twist, try serving individual slices with little peppermint sticks on the side or alongside mini gingerbread cookies. You might even create a layered dessert cup using the cake and whipped cream for smaller portions at parties. The versatility means you can tailor presentation to any event, from casual get-togethers to elegant dinners.
Make Ahead and Storage
Storing Leftovers
This cake stores beautifully in the freezer. Keep it wrapped tightly with plastic wrap or in an airtight container to prevent freezer burn and maintain its fresh flavor. When you’re ready to enjoy leftovers, just let it thaw a few minutes at room temperature before slicing.
Freezing
Because this recipe uses ice cream as a main ingredient, freezing is ideal for preserving both taste and texture. The Peppermint Ice Cream Cake Recipe is perfect to prepare in advance and freeze for special occasions, giving you more time to relax and enjoy your company.
Reheating
This is a no-heat dessert, so reheating isn’t needed. Just let the cake sit at room temperature for about 5-10 minutes before serving to achieve the best texture for slicing and eating.
FAQs
Can I use a different flavor of ice cream?
Absolutely! While peppermint ice cream is classic and gives that refreshing holiday touch, you can substitute with mint chocolate chip or even vanilla for a more subtle twist.
What if I don’t have a springform pan?
No worries! Any cake pan with high sides will work as long as you line it well with parchment paper for easy cake removal.
Can this cake be made dairy-free?
Yes, try using dairy-free alternatives like coconut-based ice cream and non-dairy whipped topping to accommodate dietary needs without sacrificing flavor.
How long does the cake keep in the freezer?
Stored properly, this peppermint ice cream cake will stay delicious for up to one week in the freezer.
Can I add extra layers?
Definitely! You can alternate layers of crushed cookies, ice cream, or even fudge sauce to create your own gourmet version of the Peppermint Ice Cream Cake Recipe.
Final Thoughts
This Peppermint Ice Cream Cake Recipe is one of those magical desserts that brings instant joy to anyone who tastes it. The ease of assembly combined with the festive flavors makes it a go-to for holidays or any time you want a cool, minty indulgence. So go ahead, gather these simple ingredients, and treat yourself and your loved ones to a slice of delicious happiness!
Print
Peppermint Ice Cream Cake Recipe
- Prep Time: 15 minutes
- Cook Time: 0 minutes
- Total Time: 5 hours 15 minutes
- Yield: 8 servings
- Category: Dessert
- Method: No-Cook
- Cuisine: American
Description
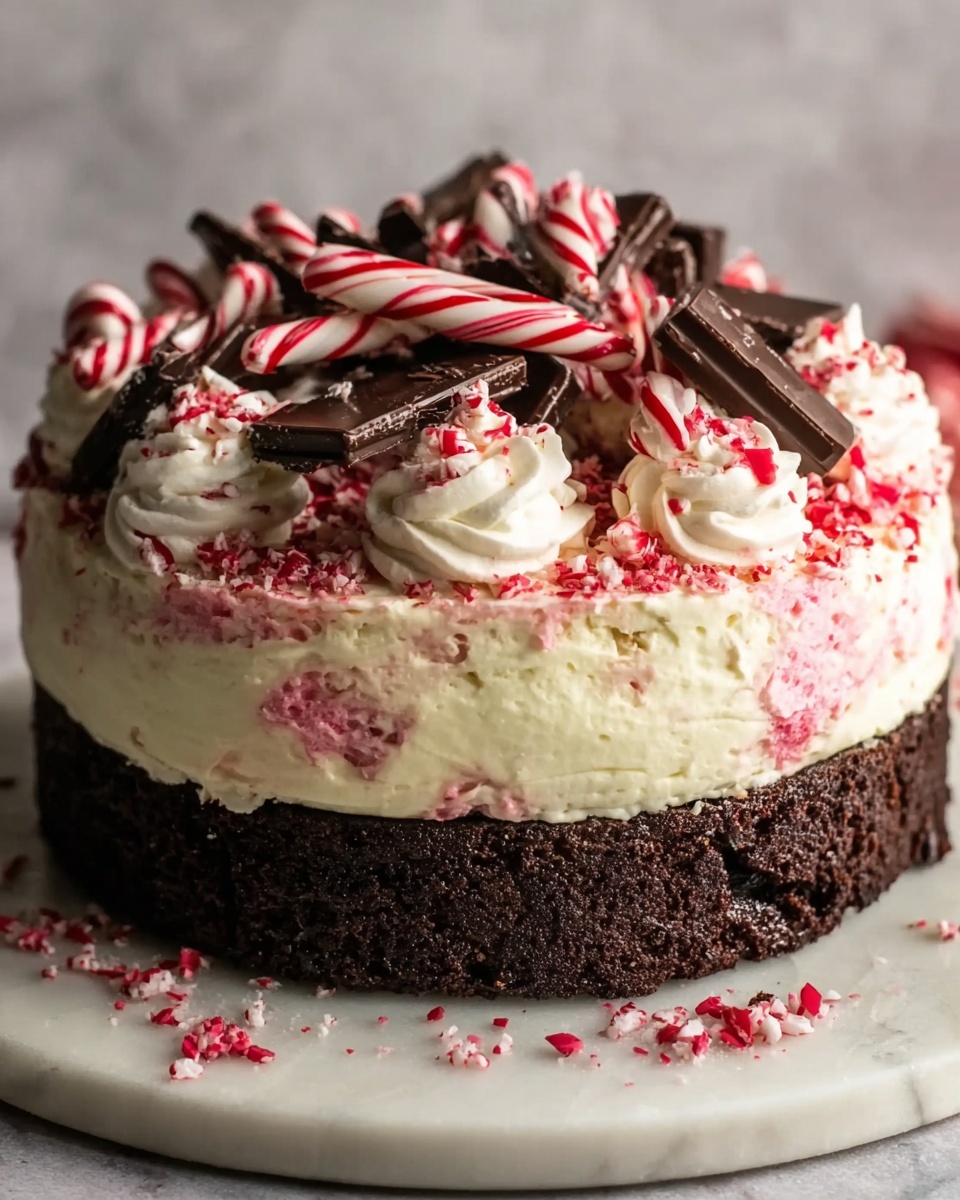
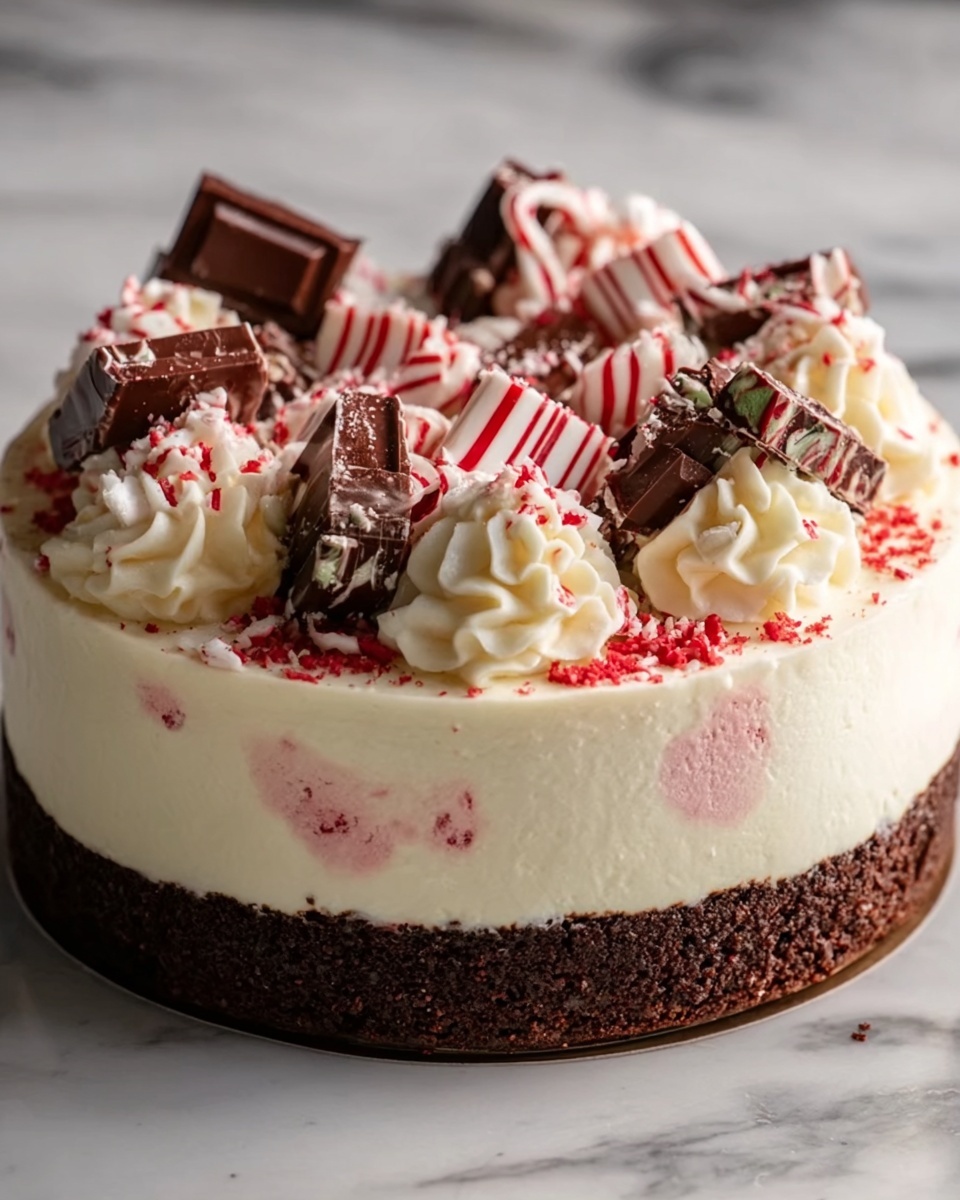
This Peppermint Ice Cream Cake is a festive and refreshing dessert perfect for the holiday season. It features a crunchy chocolate cookie crust, a creamy peppermint ice cream layer, and a light whipped cream topping sprinkled with crushed candy canes and chocolate shavings, creating a delightful blend of textures and flavors.
Ingredients
Crust
- 2 cups (200g) chocolate cookie crumbs (e.g., Oreos, without the filling)
- 6 tbsp (85g) unsalted butter, melted
Ice Cream Layer
- 1 ½ quarts (1.4 liters) peppermint ice cream, slightly softened
- ½ cup (50g) crushed peppermint candies or candy canes
Whipped Topping
- 2 cups (480ml) heavy whipping cream
- 3 tbsp powdered sugar
- ½ tsp vanilla extract
Decoration
- Crushed candy canes or peppermint candies
- Chocolate shavings or mini chocolate chips
Instructions
- Prepare the Crust: Grease a 9-inch springform pan or line it with parchment paper to prevent sticking.
- Mix Crust Ingredients: In a bowl, combine the chocolate cookie crumbs with melted butter until the mixture resembles wet sand, ensuring an even texture.
- Form the Crust: Press the crumb mixture firmly into the bottom of the prepared pan to create an even crust layer. Place it in the freezer for 15 minutes to set.
- Add the Ice Cream Layer: Spread the softened peppermint ice cream evenly over the chilled crust, creating a smooth layer.
- Sprinkle Peppermint Candies: Evenly distribute the crushed peppermint candies over the ice cream for added crunch and flavor.
- Freeze Until Firm: Cover the pan tightly with plastic wrap and freeze for at least 4 hours, or until the ice cream layer is firm.
- Prepare the Whipped Topping: In a chilled mixing bowl, whip the heavy cream with powdered sugar and vanilla extract until stiff peaks form, creating a light and fluffy topping.
- Assemble the Cake: Remove the cake from the freezer and spread the whipped cream topping evenly over the ice cream layer.
- Decorate: Garnish the whipped topping with additional crushed candy canes, chocolate shavings, or mini chocolate chips for festive appeal.
- Chill to Set: Return the assembled cake to the freezer for at least 1 hour to allow the whipped topping to set properly.
- Serve: Before serving, let the cake sit at room temperature for 5-10 minutes to soften slightly for easier slicing and enjoying.
Notes
- Ensure the ice cream is slightly softened to spread easily over the crust for a smooth layer.
- Using a springform pan helps in easy removal of the cake without damaging the layers.
- For best results, whip the cream in a chilled bowl and use cold heavy cream to achieve stiff peaks.
- You can prepare the cake a day ahead to allow ample freezing time for perfect firmness.
- Letting the cake sit at room temperature before slicing prevents cracking and makes serving easier.


