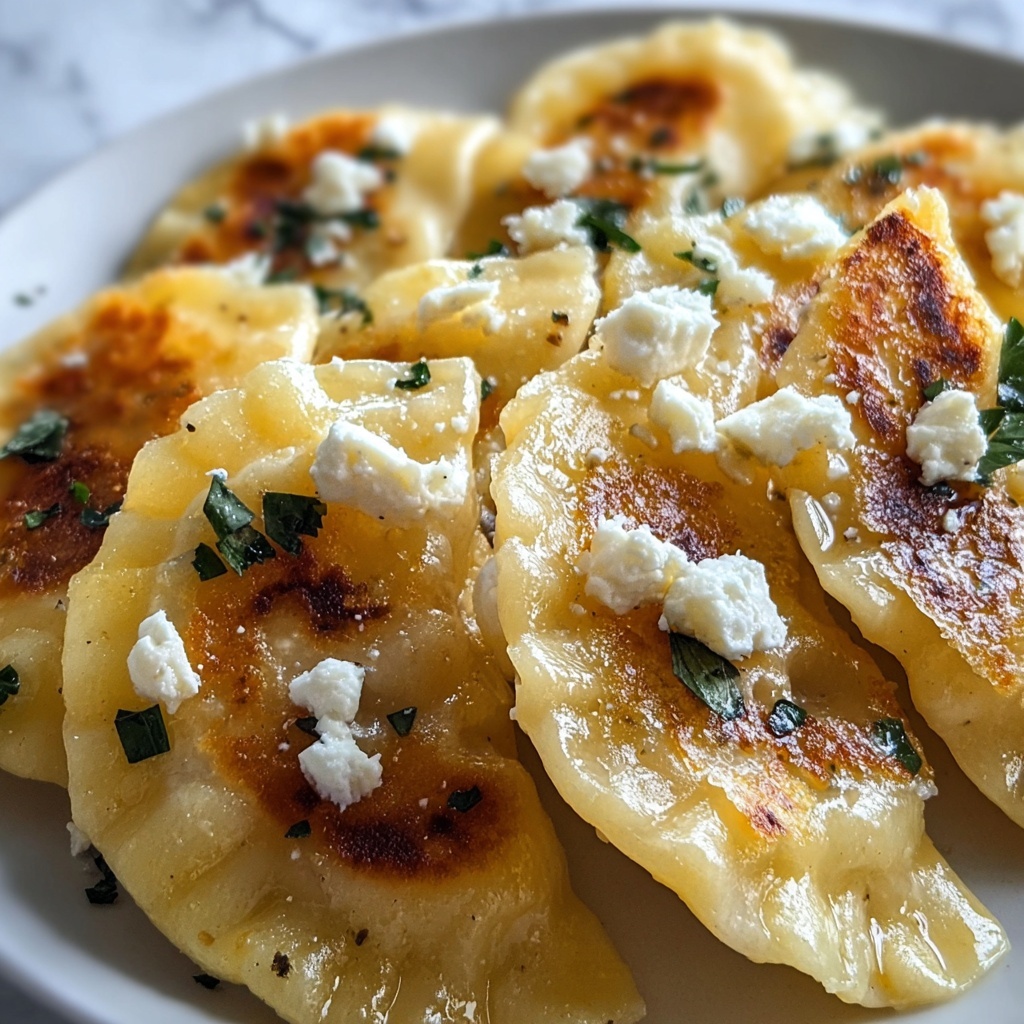
If you are craving a dish that perfectly balances cozy comfort with vibrant flavor, this Roasted Butternut Squash and Feta Pierogi Recipe is going to steal your heart. The roasted butternut squash brings a sweet, tender warmth while the salty tang of feta cheese adds a delightful contrast, all wrapped in tender, pillowy dough. Every bite offers a harmony of textures and tastes that feel both indulgent and wholesome. Whether you’re looking to impress at a dinner party or simply want a satisfying treat for a weeknight meal, this recipe promises a rewarding cooking experience filled with delicious results.

Ingredients You’ll Need
Gathering the right ingredients is the first step to making this dish shine. Each element plays an important role, contributing unique flavors, textures, and colors that transform simple pierogi into a mouthwatering experience.
- Medium butternut squash (about 3 cups chopped): Roasted to sweet tenderness, it’s the star of the filling.
- Vidalia onion, chopped: Adds natural sweetness and a slight bite after sautéing.
- Dried thyme (1/2 teaspoon): Brings warm, earthy herbal notes that enhance the squash.
- Feta cheese (1 cup): Salty and creamy, it creates a perfect contrast to the sweet squash.
- Salt and freshly ground black pepper: Essential for seasoning both the filling and dough.
- Olive oil (2 tablespoons): Used for roasting and sautéing, adding richness and depth.
- All-purpose flour (3 cups): The base of the dough, giving it that tender yet sturdy texture.
- Very warm milk (1/2 cup): Hydrates the dough for softness.
- Very warm water (1/2 to 3/4 cup): Helps fine-tune the dough texture during kneading.
- Unsalted butter, melted (1 tablespoon): Adds moisture and delicate richness to the dough.
- Pinch kosher salt: Balances flavors in the dough.
- Unsalted butter (1 tablespoon): For frying or finishing the pierogi with sage.
- Extra virgin olive oil (1 tablespoon): Used in combination with butter to sauté sage leaves.
- Sage leaves (6): Fragrant and earthy, perfect for a buttery garnish.
How to Make Roasted Butternut Squash and Feta Pierogi Recipe
Step 1: Prepare the Roasted Butternut Squash
Start by cutting the butternut squash in half, scooping out the seeds to create a clean cavity. Brush both sides generously with olive oil and sprinkle with salt and pepper for seasoning. Roast the squash cut-side down for 50 to 60 minutes at about 400°F until the flesh is fork-tender and caramelized. This slow roasting develops the squash’s natural sweetness, creating a rich base for the filling.
Step 2: Sauté the Onion and Incorporate Herbs
While the squash roasts, heat a tablespoon of olive oil in a pan and sauté the chopped Vidalia onion until it softens and browns lightly, about 5 minutes. Stir in the dried thyme and cook for another minute to let the flavors meld. Allow the onion mixture to cool; this step infuses the filling with subtle caramelized sweetness and fragrant herbal depth.
Step 3: Make the Filling
Once your squash is perfectly roasted, scoop the flesh into a food processor and pulse until almost smooth but still slightly textured—this keeps some pleasant bite in the filling. Add the cooled onion mixture, feta cheese, salt, and pepper. Pulse just a few times until everything is combined but not pureed. This creates a creamy yet rustic filling bursting with complementary flavors.
Step 4: Prepare the Pierogi Dough
To make the dough, combine the flour with a pinch of kosher salt in a large bowl, creating a well in the center for the wet ingredients. Pour in the warm milk and melted butter, then gradually add warm water, kneading continuously. It takes about 10 to 15 minutes of kneading to achieve a smooth dough that is pliable but not sticky. Cover the dough with a bowl and let it rest for 20 to 30 minutes, which helps relax the gluten and makes rolling easier.
Step 5: Roll and Cut the Dough
Divide the rested dough into four portions, keeping the unused parts covered to prevent drying out. Roll out one portion at a time into thin sheets, similar to pasta dough. Using a cookie cutter or a large wine glass, cut circles around 3 inches in diameter—these will become your perfectly sized pierogi pockets.
Step 6: Fill and Seal the Pierogi
Place about one teaspoon of the squash and feta filling in the center of each circle. Dip your finger in water and moisten one half of the dough circle before folding it over the filling to create a half-moon shape. Press the edges firmly to seal, making sure there are no gaps. Well-sealed pierogi hold up beautifully during boiling and optional frying.
Step 7: Boil the Pierogi
Bring a large pot of salted water to a gentle boil. Carefully add the pierogi in batches to avoid overcrowding. When the pierogi float to the surface, let them cook for an additional 2 to 3 minutes. This ensures the dough is cooked through and the filling is warmed perfectly.
Step 8: Fry the Pierogi (Optional)
If you love extra texture, drying the boiled pierogi and then pan-frying them in butter creates a crispy, golden crust. Fry each side for about a minute until beautifully browned. Adding some olive oil along with butter helps achieve a balanced crispness without burning.
Step 9: Add Sage Butter and Serve
In the final step, gently sauté sage leaves in a mixture of butter and olive oil until crisp and fragrant. Toss the cooked pierogi in this sage butter or drizzle it on the side for a herbaceous, silky finish that complements the filling perfectly.
How to Serve Roasted Butternut Squash and Feta Pierogi Recipe

Garnishes
Simple garnishes elevate the experience. Crisp fried sage leaves give both visual appeal and a lovely earthy aroma. A dollop of sour cream or a sprinkle of chopped fresh parsley adds freshness and tang that brighten each bite.
Side Dishes
Serve these pierogi alongside a crisp green salad or sautéed kale to balance richness with brightness. A light beet and apple slaw can provide a refreshing contrast that highlights the sweet and savory flavors of the filling.
Creative Ways to Present
For a dinner party, arrange the pierogi in a circular pattern on a platter with sage butter drizzled artistically. Pair with small bowls of flavored sour cream, like chive or garlic, for guests to customize their bites. You can also turn leftovers into a pierogi skillet with caramelized onions and kale for a hearty brunch twist.
Make Ahead and Storage
Storing Leftovers
Store any uneaten pierogi in an airtight container in the refrigerator for up to 3 days. To preserve the best texture, keep boiled or fried pierogi separate from sauces and garnishes until ready to serve again.
Freezing
This Roasted Butternut Squash and Feta Pierogi Recipe freezes wonderfully. Arrange uncooked pierogi in a single layer on a baking sheet and freeze until solid before transferring to a zip-top bag. They’ll keep well for up to 3 months and can be cooked directly from frozen by boiling for a few extra minutes.
Reheating
To reheat, gently sauté leftover pierogi in butter until warmed through and crisp, or steam them and then toss with fresh sage butter. Avoid microwaving as it tends to make dough rubbery; pan reheating preserves that soft yet tender texture.
FAQs
Can I substitute the feta cheese in this recipe?
Yes! While feta offers tangy creaminess that pairs beautifully with the roasted squash, you can substitute with goat cheese or ricotta for a milder flavor. Just be mindful that texture and salt levels may vary slightly.
Is it possible to make this dish vegan?
Absolutely. Replace feta with a plant-based cheese alternative and use olive oil or a vegan butter substitute instead of dairy butter. For the dough, swap milk with a plant-based milk like almond or oat.
How long does it take to make pierogi from scratch?
From prepping the squash to finishing the pierogi, you can expect about 1.5 to 2 hours. Much of this time is hands-off roasting or resting dough, so it’s a lovely recipe to spread out with some music or a good conversation.
Can I use pre-made dough instead of making it myself?
While homemade dough yields the best texture and freshness, you can use store-bought pierogi or dumpling wrappers as a shortcut. Just keep in mind the filling might need slight adjustments since commercial dough varies in thickness and elasticity.
What is the best way to serve leftovers?
Leftover pierogi taste fantastic pan-fried with butter and sage or tossed with caramelized onions. Pair with a crisp salad for a quick, satisfying meal that feels like new again.
Final Thoughts
Making this Roasted Butternut Squash and Feta Pierogi Recipe at home is such a rewarding journey—one filled with inviting aromas, comforting textures, and vibrant flavors. If you’re looking to share something a little special with your friends or treat yourself to a wholesome, home-cooked delight, dive right into this recipe. It’s the perfect balance of rustic charm and elegant taste, and I guarantee it will become a beloved favorite in your kitchen.
Print
Roasted Butternut Squash and Feta Pierogi Recipe
- Prep Time: 25 minutes
- Cook Time: 1 hour 10 minutes
- Total Time: 1 hour 35 minutes
- Yield: 4 servings (about 20-24 pierogi)
- Category: Main Course
- Method: Baking
- Cuisine: Eastern European
- Diet: Vegetarian
Description
These Roasted Butternut Squash Feta Pierogi are a delightful twist on traditional pierogi, featuring a creamy, flavorful filling made from roasted butternut squash, sautéed Vidalia onions, and tangy feta cheese. Encased in a tender homemade dough, these pierogi can be boiled and optionally fried with sage butter for a crispy, aromatic finish. Perfect for a comforting meal or special occasion, they blend sweet and savory flavors with a touch of herbal warmth.
Ingredients
Filling
- 1 medium butternut squash (about 3 cups when cut up)
- 1 Vidalia onion, chopped
- 1/2 teaspoon dried thyme
- 1 cup feta cheese
- 1/2 teaspoon salt, plus more for roasting squash
- Freshly ground black pepper, to taste
- 2 tablespoons olive oil (divided)
Dough
- 3 cups all-purpose flour
- 1/2 cup very warm milk
- 1/2 cup very warm water (up to 3/4 cup depending on flour absorption)
- 1 tablespoon unsalted butter, melted
- Pinch kosher salt
For Frying and Serving
- 1 tablespoon unsalted butter
- 1 tablespoon extra virgin olive oil
- 6 sage leaves
Instructions
- Prepare the Filling: Cut the butternut squash in half and remove seeds. Brush both sides with 1 tablespoon olive oil and season with salt and freshly ground black pepper. Roast the squash in the oven for 50-60 minutes, or until fork-tender.
- Sauté Onions: While the squash is roasting, heat 1 tablespoon olive oil in a pan and sauté the chopped Vidalia onion until slightly browned, about 5 minutes. Add dried thyme and cook for another minute. Remove from heat and let cool.
- Process Filling: Once the squash is cooked, scoop the flesh into a food processor and blend until nearly smooth, approximately 1 minute. Add the sautéed onion mixture, feta cheese, 1/2 teaspoon salt, and freshly ground black pepper to taste. Pulse 2-3 times until combined but retaining some texture. Adjust seasoning as needed.
- Make the Dough: In a large bowl, create a well in the center of the flour. Pour in the very warm milk and melted butter. Gradually add very warm water while mixing. Knead the mixture for about 10-15 minutes until it forms a smooth, pliable dough.
- Rest the Dough: Cover the dough with a bowl or damp cloth and let it rest for 20-30 minutes to relax the gluten, making it easier to roll out.
- Roll and Cut Dough: Divide the dough into four portions, keeping the unused dough covered to prevent drying out. Roll out one portion into a thin sheet, similar to pasta thickness. Use a cookie cutter or large wine glass to cut out circles for the pierogi.
- Fill and Seal Pierogi: Place about 1 teaspoon of the squash-feta filling in the center of each dough circle. Lightly wet the edge of one half of the circle with water, fold the dough over to form a half-moon, and press edges firmly to seal.
- Cook Pierogi – Boiling: Bring a large pot of salted water to a boil. Drop pierogi in batches and cook for 3-5 minutes or until they float to the surface. Remove with a slotted spoon and set aside drained on a towel.
- Optional Frying: For extra flavor and texture, dry the boiled pierogi and fry them in a pan with 1 tablespoon unsalted butter, 1 tablespoon olive oil, and sage leaves until golden brown on each side, about 1 minute per side. Remove the sage leaves before serving.
- Serve: Plate the pierogi warm, optionally topped with the crispy sage butter from the frying step for a delicious, aromatic finish.
Notes
- Make sure butternut squash is fully cooked and soft for easy blending and a creamy filling.
- Adjust water quantity in dough as needed; dough should be pliable but not sticky.
- Sealing the pierogi edges well is important to avoid filling leakage during boiling.
- Boiled pierogi can be frozen before frying for future use; cook from frozen by boiling and then frying as desired.
- Frying pierogi after boiling is optional but adds a delicious crispy texture and enhances flavor when cooked with sage butter.
- You can substitute feta with ricotta or farmer’s cheese for a milder flavor.
- Use fresh sage if possible for best aroma during frying.


