Description
Learn how to create your own natural sourdough starter with this easy 7-day recipe. Using simple ingredients like whole wheat or unbleached all-purpose flour and filtered water, this guide walks you through the fermentation process to cultivate wild yeast, resulting in a bubbly, tangy starter perfect for baking flavorful sourdough bread at home.
Ingredients
Scale
Starter Ingredients
- 1 cup (120g) whole wheat flour or unbleached all-purpose flour
- 1/2 cup (120ml) filtered or non-chlorinated water (room temperature)
Instructions
- Day 1 – Mix Starter: In a clean glass jar or container, combine 1 cup flour and 1/2 cup water. Stir until there are no dry streaks left. Cover loosely with a lid or cloth and let it sit at room temperature (around 70°F) for 24 hours to begin fermentation.
- Day 2 – Discard and Feed: Check for bubbles; they may or may not be visible yet. Discard half the starter (about 1/2 cup), then add 1 cup flour and 1/2 cup water. Stir thoroughly, cover, and let it rest at room temperature for another 24 hours.
- Day 3 – Observe Activity: You should see visible bubbles and possibly detect a slightly sour smell. Repeat the discard and feeding process exactly as done on Day 2 to encourage wild yeast growth.
- Days 4–6 – Continue Feeding: Keep discarding half and feeding the starter daily. If the starter becomes very active—doubling in size within 4 to 6 hours—you can feed it twice daily (every 12 hours) to maintain its strength.
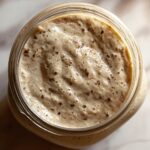
- Day 7 – Starter Ready: By now, the starter will be bubbly, have a pleasant tangy aroma, and reliably double in size after feeding. It is now ready for use in baking. Store it in the refrigerator and feed weekly if not baking regularly to keep it healthy.
Notes
- Use a kitchen scale for precise measurements to ensure starter consistency.
- Filtered or dechlorinated water is essential as chlorine can inhibit natural yeast development.
- Feeding occasional whole wheat or rye flour when using all-purpose flour can boost fermentation and starter vitality.
- Stir gently to incorporate air but avoid overmixing to preserve wild yeast balance.