
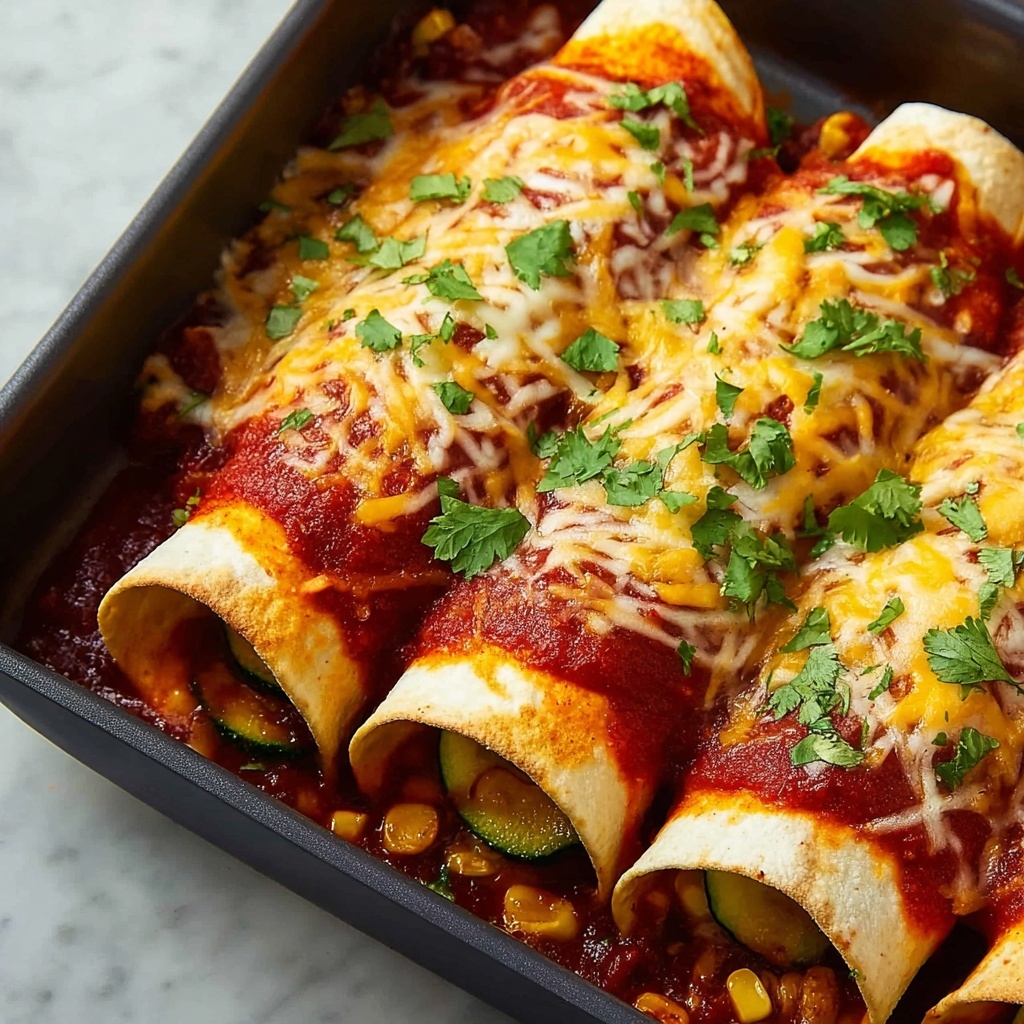
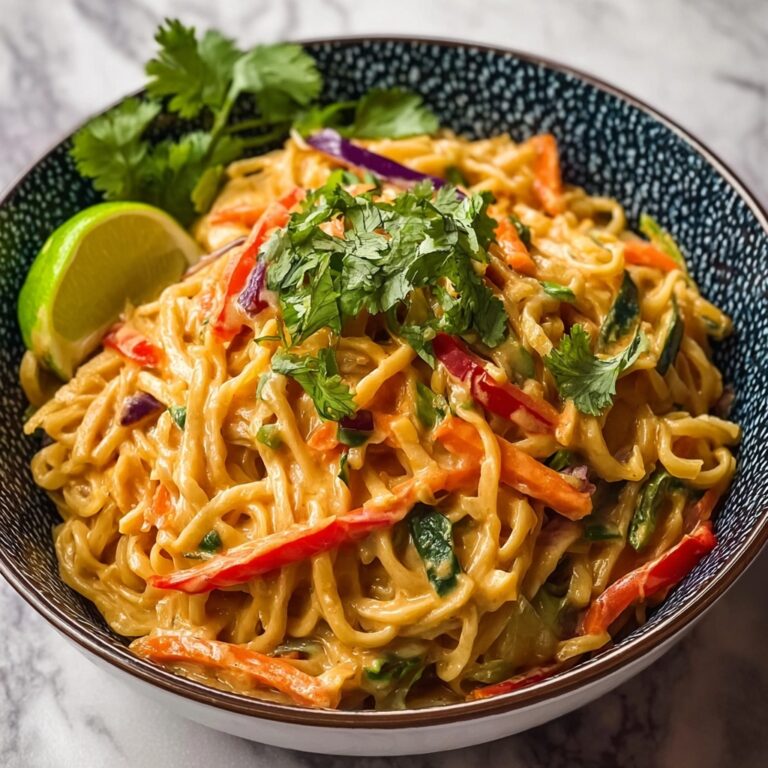
If you’re craving a vibrant, flavorful meal that’s both comforting and a little bit healthy, the Zucchini Enchilada Roll-Ups Recipe is about to become your new favorite. Imagine tender, thin zucchini strips wrapping up a savory ground beef filling bursting with classic Mexican spices, all smothered in rich enchilada sauce and melty cheese. It’s a dish that brings together freshness, spice, and cheesy goodness in a way that’s perfect for weeknight dinners or impressing guests without all the fuss of traditional enchiladas. Each bite is a fresh and fun twist on a beloved classic that’s sure to make your taste buds dance.

Ingredients You’ll Need
The beauty of this recipe lies in its simple but thoughtfully chosen ingredients. Each element plays a crucial role: the zucchini provides a crisp, low-carb wrapper, the spiced meat filling delivers warmth and heartiness, and the enchilada sauce ties it all together with vibrant flavor. Let’s dive into the essentials!
- 1 lb ground beef (or turkey, chicken, or plant-based protein): This is the hearty filling that will make your roll-ups satisfying and flavorful.
- 1/2 onion, diced: Adds a subtle sweetness and a lovely texture contrast to the meat.
- 1 tsp garlic powder: Brings a warm, aromatic base flavor that’s essential for Mexican dishes.
- 1 tsp chili powder: Provides that crucial mild heat and smoky depth.
- 1 tsp cumin: Offers a nutty, earthy component that balances the spices beautifully.
- 1/2 tsp paprika: Adds hints of mild sweetness and a touch of color.
- Salt and pepper, to taste: Enhances all the flavors without overpowering them.
- 1 cup shredded cheese (cheddar, Monterey Jack, or a mix): Melts into the filling for creamy, gooey goodness.
- 1/2 cup chopped fresh cilantro (optional): Gives a fresh, herbaceous pop of flavor that brightens the dish.
- 3–4 medium zucchinis, sliced lengthwise into 1/4-inch thick strips (about 8–10 strips): These are your low-carb tortilla alternatives, tender yet sturdy enough to wrap around the filling.
- Olive oil spray (or a little olive oil for brushing): Helps grill or roast the zucchini strips to perfection without sticking.
- 1 1/2 cups red enchilada sauce (store-bought or homemade): The rich, tangy sauce that gives this dish its classic enchilada charm.
- 1/2 cup shredded cheese (for topping, optional): Optional extra cheese for that irresistible golden crust on top.
How to Make Zucchini Enchilada Roll-Ups Recipe
Step 1: Prepare the Zucchini Strips
Start by slicing your zucchinis lengthwise into 1/4-inch thick strips. This thickness is perfect because it’s thin enough to roll easily but thick enough to hold the filling without breaking. Lightly brush or spray the slices with olive oil, then grill or roast them just until tender—about 2 minutes per side. You want them pliable but still holding their shape so they won’t tear when you roll them.
Step 2: Cook the Filling
Next, heat a skillet and brown your ground beef along with the diced onion. As the meat cooks, sprinkle in the garlic powder, chili powder, cumin, paprika, salt, and pepper. These spices transform simple ground meat into a flavorful filling packed with warmth and depth. Once cooked through, stir in the shredded cheese and fresh cilantro if you’re using it, allowing the cheese to melt slightly and bind the filling together.
Step 3: Assemble the Roll-Ups
Lay your zucchini strips flat and spoon a generous amount of the meat filling along one edge of each strip. Carefully roll the zucchini around the filling to create neat little bundles, placing each seam-side down in a baking dish. This careful assembly keeps your roll-ups from unraveling and ensures every bite is packed with flavor.
Step 4: Add Sauce and Cheese
Once all the roll-ups are snug in the dish, pour the enchilada sauce evenly over the top so each roll-up is generously coated. If you love cheesy crusts, sprinkle that optional 1/2 cup of shredded cheese right over the sauce. This final layer will melt and brown, adding irresistible texture and gooeyness.
Step 5: Bake to Perfection
Preheat your oven to 375°F (190°C) and bake the assembled dish for about 20 minutes or until the cheese topping is bubbly and golden. The heat melds all the flavors and softens the zucchini just right, resulting in satisfying, warm roll-ups that are ready to devour.
How to Serve Zucchini Enchilada Roll-Ups Recipe
Garnishes
Fresh garnishes elevate this dish beautifully. Sprinkle with chopped fresh cilantro or green onions for a fresh note. A dollop of sour cream or a squeeze of lime juice adds creamy tang that balances the richness.
Side Dishes
Keep sides light and complementary. A simple avocado salad or a crisp garden salad with a zesty vinaigrette pairs wonderfully. For heartier options, Mexican rice or black beans round out the meal while keeping it cozy and festive.
Creative Ways to Present
For a crowd, arrange the zucchini enchilada roll-ups recipe in a large baking dish and serve it family-style, allowing guests to help themselves. Alternatively, plate individual portions stacked with a drizzle of crema and a sprinkle of crumbled queso fresco for a restaurant-worthy presentation.
Make Ahead and Storage
Storing Leftovers
Cool leftovers completely before transferring them to an airtight container. They’ll keep well in the fridge for up to 3 days, making this a great recipe for next-day lunches or easy dinners during the week.
Freezing
You can freeze the assembled but unbaked zucchini enchilada roll-ups recipe by covering the baking dish tightly with foil and plastic wrap. Freeze for up to 2 months. When you’re ready, bake them straight from the freezer, adding some extra baking time to ensure they’re heated through.
Reheating
Reheat leftovers covered in the microwave or in a 350°F oven until warmed through. If reheating from frozen, thaw overnight in the fridge for best results before warming up.
FAQs
Can I make this recipe vegetarian or vegan?
Absolutely! Swap the ground meat for plant-based protein crumbles or sautéed mushrooms and beans. Use vegan cheese and choose a dairy-free enchilada sauce to keep it vegan-friendly.
How do I prevent the zucchini from becoming soggy?
Grilling or roasting the zucchini strips just until tender removes excess moisture and helps them hold their shape, preventing sogginess in your roll-ups.
Can I use other vegetables instead of zucchini?
Yes! Thinly sliced eggplant or bell peppers work well as alternatives, each bringing its unique flavor and texture to the dish.
Is it possible to prepare this recipe ahead of time?
Definitely. You can assemble the roll-ups a day in advance, cover them, and keep them in the fridge until ready to bake. This saves time on busy days.
What kind of enchilada sauce should I use?
Store-bought enchilada sauce works great for convenience, but homemade enchilada sauce gives a fresh, robust flavor that really amplifies the dish’s vibrancy.
Final Thoughts
This Zucchini Enchilada Roll-Ups Recipe offers a delightful twist on a classic favorite that’s both fun to make and delicious to eat. It’s packed with flavor, easy to customize, and perfect for anyone wanting a balanced meal with a bit of flair. Give this recipe a try and watch how it becomes a cherished staple in your kitchen—it’s comfort food reinvented with a fresh, veggie-packed spin!
Print
Zucchini Enchilada Roll-Ups Recipe
- Prep Time: 15 minutes
- Cook Time: 30 minutes
- Total Time: 45 minutes
- Yield: 4 servings
- Category: Dinner
- Method: Baking
- Cuisine: Mexican-inspired
- Diet: Low Carb
Description
These Zucchini Enchilada Roll-Ups offer a low-carb, flavorful twist on traditional enchiladas by replacing tortillas with thinly sliced zucchini. Filled with seasoned ground beef and cheese, they are baked in a rich enchilada sauce and topped with melted cheese and fresh cilantro for a satisfying meal perfect for a healthy family dinner or meal prep.
Ingredients
For the Filling
- 1 lb ground beef (or turkey, chicken, or plant-based protein)
- 1/2 onion, diced
- 1 tsp garlic powder
- 1 tsp chili powder
- 1 tsp cumin
- 1/2 tsp paprika
- Salt and pepper, to taste
- 1 cup shredded cheese (cheddar, Monterey Jack, or a mix)
- 1/2 cup chopped fresh cilantro (optional)
For the Roll-Ups
- 3–4 medium zucchinis, sliced lengthwise into 1/4-inch thick strips (about 8–10 strips)
- Olive oil spray (or a little olive oil for brushing)
For Assembly
- 1 1/2 cups red enchilada sauce (store-bought or homemade)
- 1/2 cup shredded cheese (for topping, optional)
Instructions
- Prepare the zucchini strips: Preheat the oven to 375°F (190°C). Slice zucchinis lengthwise into 1/4-inch thick strips, then lightly spray or brush both sides with olive oil. Lay strips on a baking sheet and bake for 8-10 minutes until slightly softened but still pliable. Remove and let cool slightly.
- Cook the filling: In a skillet over medium heat, sauté the diced onion in a little olive oil until translucent. Add ground beef and cook until browned, breaking it up with a spoon. Stir in garlic powder, chili powder, cumin, paprika, salt, and pepper, cooking for another 2-3 minutes to combine flavors. Remove from heat and mix in 1 cup shredded cheese and optionally fresh chopped cilantro. Allow filling to cool slightly.
- Assemble the roll-ups: Spread a spoonful of the cooked meat mixture on one end of each zucchini strip, then roll up tightly. Arrange rolls seam side down in a baking dish.
- Add sauce and cheese: Pour red enchilada sauce evenly over the zucchini roll-ups in the baking dish. Sprinkle the remaining 1/2 cup shredded cheese on top.
- Bake the roll-ups: Bake in the preheated oven for 15-20 minutes until the cheese is melted and bubbly and the sauce is heated through.
- Garnish and serve: Remove from oven and let rest for a few minutes. Garnish with additional fresh cilantro if desired and serve warm as a nutritious low-carb dinner option.
Notes
- Feel free to swap ground beef with ground turkey, chicken, or a plant-based substitute for different protein options.
- You can make this recipe dairy-free by using vegan cheese alternatives.
- If zucchinis are very watery, pat strips dry with paper towels before baking to avoid sogginess.
- Store leftovers in an airtight container in the fridge for up to 3 days, then reheat gently in the oven.
- This recipe works well for meal prepping and can be frozen before baking—just thaw and bake when ready to serve.


